
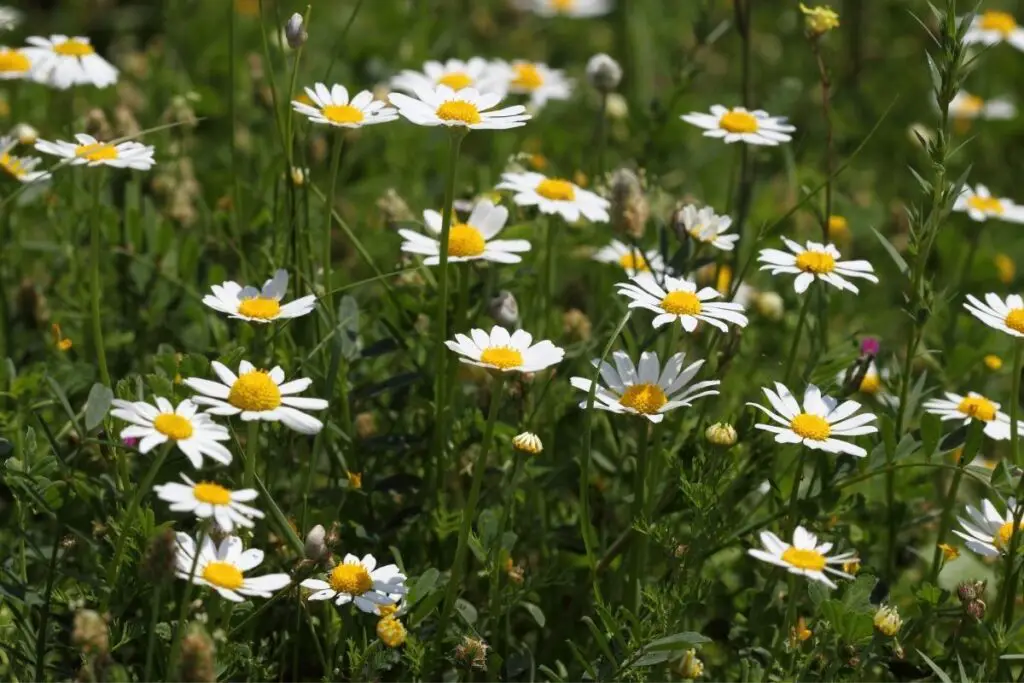
Daisies are flowering plants that belong to the aster family (Asteraceae). Daisy flowers are vibrant and easy to grow, making them a famous garden preference. Daisies are hardy, drought-tolerant plants that offer years of charm.
You can propagate daisies in early fall and spring to have beautiful blooms during the blooming season. Daisies are suitable for propagation, and you can propagate them by following the same propagation method as many other perennial plants.
But don’t forget to test if the plant is healthy before you propagate it. If your plant is not healthy, then propagating it might be a hassle, so it isn’t always suggested to propagate an unhealthy daisy.
The propagation techniques stated underneath can be used: saving and sowing seeds, rooting stem cuttings, or dividing the grownup plant into new divisions. Each of these techniques is simple and effective. Now, let’s look into the propagation process of daisies in detail.
Best time to propagate the daisies
The best time to propagate daisies is early fall and spring. It is best to do it in early fall so that the daisies will be ready to bloom by spring.
Early morning is considered to be the ideal time to take cuttings for propagation. You should ensure that the cuttings are moist and cool.
In early fall, the soil remains warm, providing favorable conditions for the roots to grow deep. The plant is ready to have glorious blooms by the blooming season.
Bright sunshine accelerates the growth and quality of the flowers; however, in summer, these flowers need diffused sunlight. It will not bloom in locations with insufficient lighting.
The optimum day and night temperature is 27C and 14C respectively. For flower initiation, the optimum temperature is 23C, and for leaf unfolding, it is 25 – 27C.
Daisy propagation process (Stem cutting)
Supplies required:
- 4 gallons sphagnum peat moss.
- 2 quarts agricultural mineral.
- 2 quarts agricultural vermiculite.
- Plastic container.
- 6-inch pots.
- Garden shears.
- Razorblade.
- Lint-free cloth.
- A Pencil.
- Synthetic auxin contained rooting hormone powder.
- Heating mat (optional).
- Isopropyl alcohol.
Steps to follow:
Step 1: Prepare the medium
Mix 4 gallons of sphagnum peat moss with cool water and leave it for one hour. Take the water out of the peat moss by squeezing it. Now, mix:
- 2 quarts of perlite
- 2 quarts of vermiculite
- Peat moss
Mix these in a plastic container and leave them aside. If you have a 5-6 inches pot, this will be enough and will work as a perfect propagating medium.
Step 2: Fill the pot and water it
Put the medium into the pot and leave some space on top. Water it thoroughly till the water starts coming out of the drainage holes of the pot.
Step 3: Clean the equipment
Clean the pruners or scissors with disinfectants. Wipe them with a cotton ball soaked in alcohol, and allow let it dry.
Step 4: Make a cutting
Cut a portion of a shoot containing few healthy leaves and at least one node with the help of pruners. Cut at an angle of 45-degree just below the leaf node. Always select healthy stems as unhealthy ones will not lead to successful propagation. Morning is the best time for propagation so propagate healthy young daisies in the morning.
Step 5: Cut the leaves
Leave two healthy leaves on the stem and prune or pinch the remaining leaves so that the plant can focus its energy to grow new roots and leaves. Make a slight cut through the leaf node to encourage root growth.
Step 5: Prepare the pot
Poke a small hole of about 1-2 inches in the soil with a chopstick. This hole will hold the stem and keep it upright.
Step 6: Apply rooting hormone
Rooting hormones will promote root growth. So, apply some rooting hormone powder at the end of the stem cutting and then place it into the hole you made in the soil.
Step 7: Place the pot in a bright spot
A good amount of indirect sunlight will help the cutting grow into a new plant. Therefore, find a spot where the cutting gets enough indirect light but make sure it is not exposed to direct sunlight as that will do no good. You can use a heating mat if the temperatures are low. But no heating mat will be required if the temperatures are high already.
Propagation by seeds
You should collect the seeds from the parent plant and plant them within two months. The seeds will grow in any suitable soil mix if kept moist and given enough indirect sunlight.
Make sure to plant the seeds with their pointed ends downwards without covering the seed. Germination is very rapid, certainly within three weeks.
Suppose the season for planting outdoors has passed. In that case, the seedlings can be grown indoors in containers and successfully transplanted when the new season starts. The seedlings can even be allowed to seed themselves.
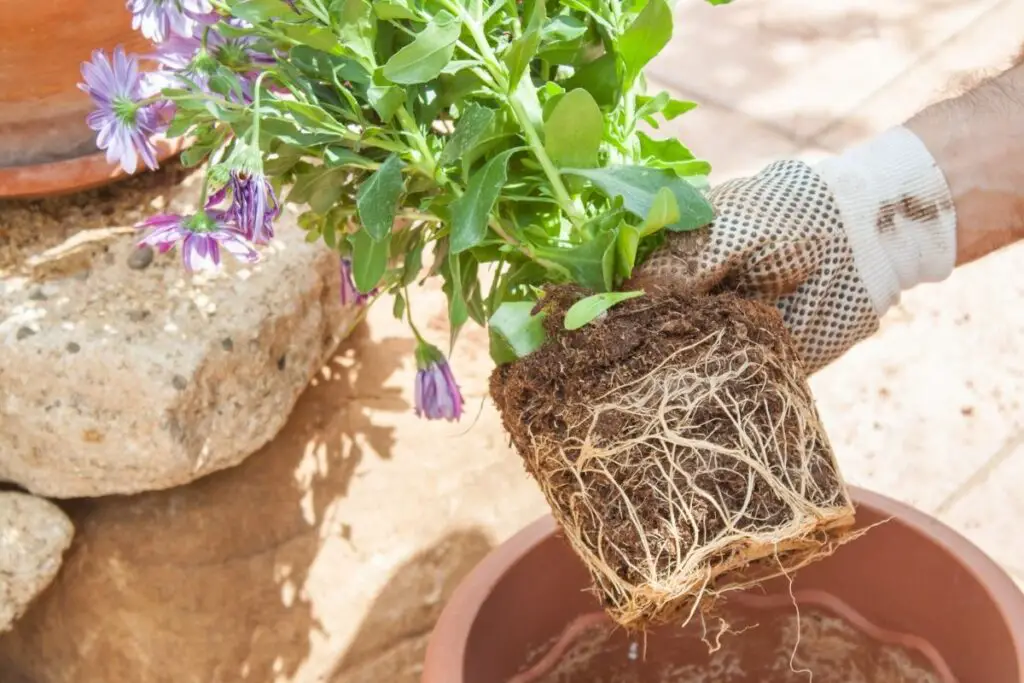
Planting rooted plants
Dig a hole that is twice the diameter of the pot it came in. Place the plant in the hole in a way that the top of the root ball is flushed with the soil’s surface. Fill the rest of the hole loosely.
Potting and Repotting:
Use any standard potting soil and get a container that has drainage holes. During summer, abandon the plants after their blooming and repot fresh plants in the same season for new blooms.
Also read: Can Daisy Flower Be Grown In Pots? (Tips To Grow In Pots)
Light requirement:
Common daisies do well with four to six hours of sunlight per day. In hotter areas, a break is required during the afternoon, which will help the plants bloom longer.
Also read: How Much Light Do Daisies Need? (Daisy Light Requirements)
Soil requirement:
The common daisy plants require the same rich, loamy soil with good drainage, just as roses and vegetables. Common daisies tolerate a wide pH range, from acidic to alkaline.
Also read: What Kind Of Soil Do Daisies Need? (Daisy Soil Requirements)
Water requirement:
Common daisies are not drought-tolerant and need regular watering to stay in bloom. Cool and moist soil keeps the plants lively, as long as the plants don’t have wet feet from soggy conditions.
Temperature and Humidity:
Cool temperatures are necessary for thriving daisy plants. In the areas that experience cool summers, the plants will bloom throughout the season and spread into prolific colonies. Damp and high humidity conditions are suitable for the plant.
Also read: Do Daisies Grow In Winter? (+Daisy Winter Care)
Fertilizer requirement:
Applying an all-purpose slow-release flower fertilizer to common daisies would help if the soil is rocky and poor. The plant does feed itself by extracting what they need from rich soils.
How to grow daisies for beginners (easy guide and tips)
While buying, ensure that the bulbs are firm, unblemished with no tears to the outer coating.
For good growth of the daisy plant, it needs a 3-8 hardiness zone, length and width of 4 inches x 3 inches, average watering, full sun exposure, and summer season for a good bloom.
Plant daisy bulbs in the fall when the soil has cooled off and the temperature is between 40-50°F.
Locate the area of the flower garden or yard where you will plant the daisies. Daisies grow the best in areas that receive partial to full afternoon sun. The soil must be well-draining with a pH level of 6.0 pH-7.0 pH level. Try to protect the flower garden from wind and heavy rain.
Then finally, plant your daisy bulbs. To have the most success planting the bulbs, a hole of 8 inches should be dug, and plant ten daisy bulbs next to each other.
You should do this at the beginning of winter or during the spring season.
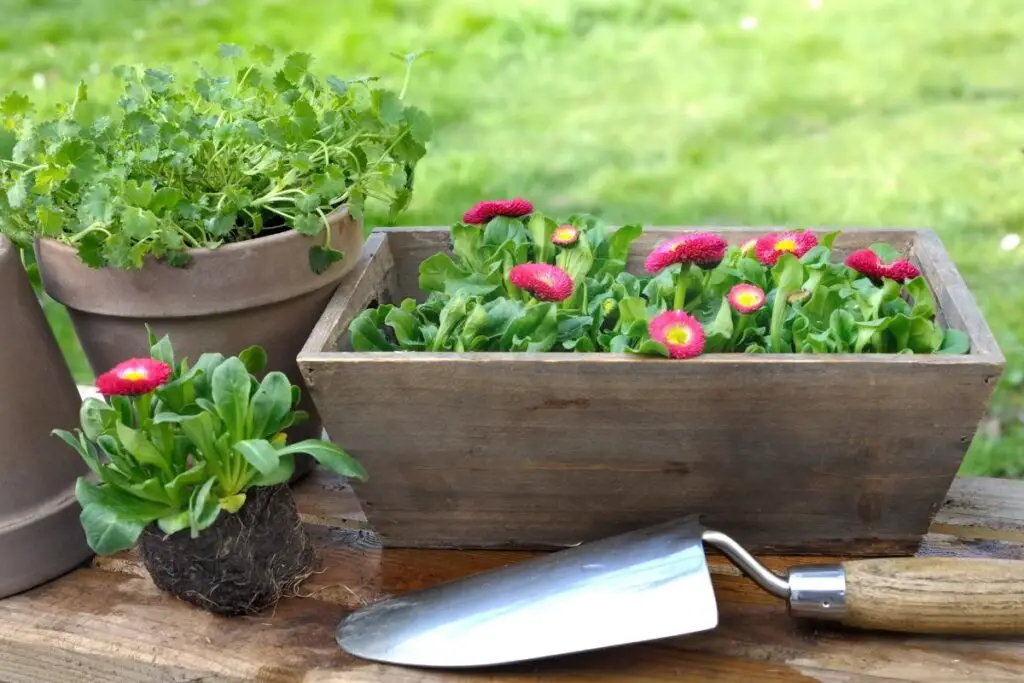
How to grow daisies in pots?
To successfully plant the daisy bulbs in pots, you must use the following steps:
- Bury the bulbs in a container with 8 inches of flower garden soil over them.
- The pointy end of the bulb should face upwards.
- Immediately water the daisy bulbs for 15 seconds at a stretch.
- Before the first frost of the year, shift the container to an area where the temperature is cool and dry. Leave it there throughout the winter season.
- Once the daisy petals fall off, the flower needs to be deadheaded.
- Let the green growth of the plant remain for six weeks. Then cut it and stem where it meets the soil.
How to water daisies?
There are three different ways through which daisies can be watered.
- Immediately after planting the daisy bulbs, soak the soil for 15 seconds.
- Continue watering daisy bulbs once a week for the first month, and then don’t water until the spring.
- Begin watering the daisies once a week once green growth returns in the spring.
Also read: How Much Water Do Daisies Need? (Daisy Water Requirements)
How to maintain and care for the daisy plant?
Water properly and fertilize when needed – Your daisies will require more water during the dry seasons as they produce flower buds and blooms during this time. Not watering can make the stems dry and droopy and it will be hard for them to recover.
Whenever you water the daisies, make sure to water at the base of the plants so that the water doesn’t touch the leaves or blooms. This can promote mold growth or sunburn.
Fertilize the daisies with an all-purpose fertilizer during the start of the growing season to promote foliage and flower growth.
Pruning and caring for your daisies – Keeping the spent flowers on the daisy plants will not allow new blooms and might promote mold growth. So, prune the daisy blooms whenever you notice they are dying. This is called deadheading that encourages new blooms by getting rid of the old ones.
Pruning the roots will prevent overcrowding and overgrowth. The roots of the daisies tend to get overcrowded so you can take the plants out of the soil and prune the roots before planting them back.
Use a shovel to divide the root balls and prune the thick center of the clump. Plant the daisies back into the soil but make sure to keep spaces between them to avoid overcrowding.
Put mulch around each daisy plant during the winter season. This will help to keep the roots moist and the daisies healthy.
Ref: Wikipedia, Britannica, University Of Florida, Ucanr.edu