
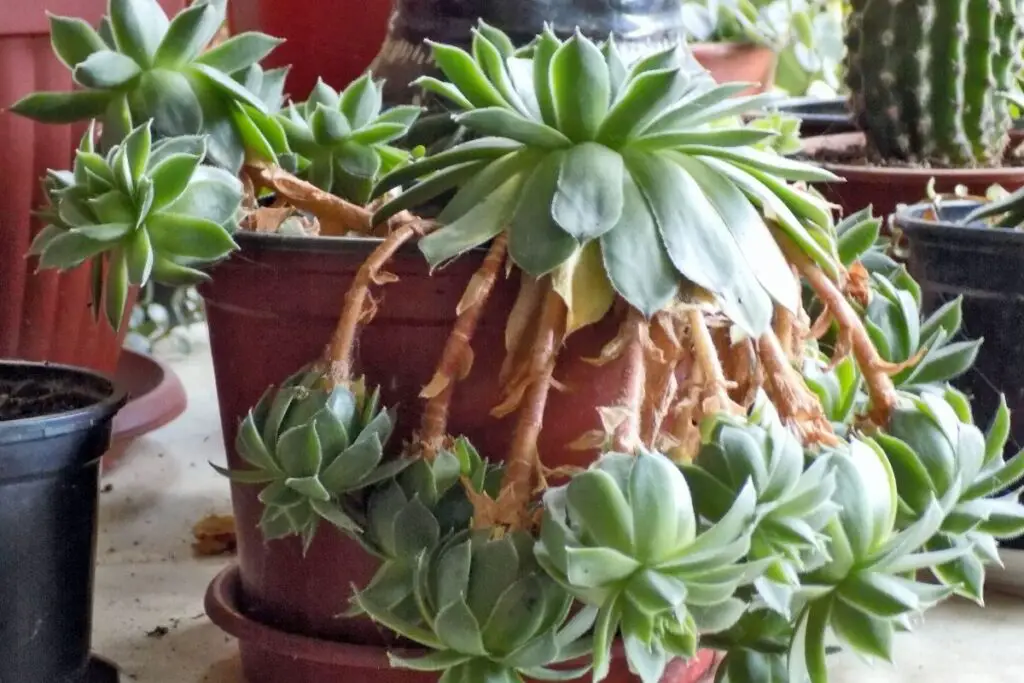
One of the most famous and hardy outdoor succulents is Hens and Chicks. These lovely succulents reproduce lots of babies that can be divided and propagated. But how can we propagate Hens and Chicks? Let’s figure it out.
For propagating hens and chicks, divide the baby plants from the mother plant, trim off some stems and plant them to the soil bed. Within 30-40 days, they will develop roots. Hens and Chicks can also propagate in water by keeping the baby plant roots submerged and moving them it grows.
This article will provide you with in-depth knowledge about the different ways to propagate Hens and Chicks and some tricks to witness flourishing growth. Let’s begin without delay.
In how many ways can you propagate Hens and Chicks?
There are two different ways to propagate Hens and Chicks:
The vegetative method is where the baby plants are divided from the mother plant and then planted for rooting.
The generative method is where you will get the seeds after blooming.
After they bloom, they will produce seeds to sow and get more plants.
Both the ways are easy, yet people choose propagation by division over seeds.
The reason is time and simplicity.
Seeds can take a whole year to sprout out.
But the offsets will take a few months to develop roots and turn out to be a matured plant that will further reproduce more offsets.
You can propagate hens and Chicks in two mediums:
- In soil. Applicable for both division and seed propagation.
- In water. Only applicable for division.
When is the best time to propagate Hens and Chicks?
In general, the best time is spring. It is the growing season of Hens and Chicks.
Dividing them helps both the mother and babies to recover from division shock.
If you have large and medium varieties of Hens and Chicks, you can propagate them in the spring, summer, and autumn.
But for the dwarf varieties, it is only spring and autumn.
The sun doesn’t shine much, and its intensity is also very low compared to summers.
They will not survive the high temperatures like the larger varieties.
Winter is not the right time for propagation because these plants stay dormant in the cold months.
Dividing can give them a shock, and they won’t recover quickly. Moreover, how will they grow or develop roots while resting?
How to propagate Hens and Chicks by offsets?
Propagating Hens and Chicks is effortless and doesn’t require much effort.
You just need to divide the offsets and plant them in the soil or water.
We will give you a step-by-step guide so that you can get a glimpse of successful Hens and Chicks propagation.
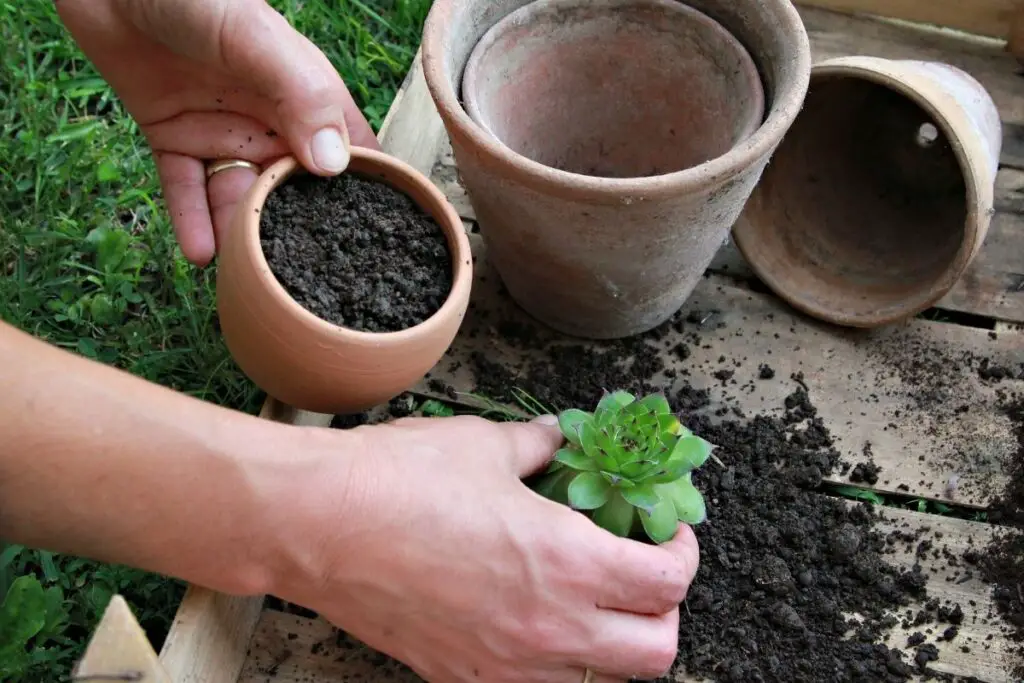
Propagation in soil
Supplies needed:
- Sharp scissor or pruner
- A healthy plant
- Appropriate soil mix
- Pot (if you want to start propagation in a container)
- Shading grid
Step-by-step guide
Select a healthy rosette.
For productive propagation, you will need a healthy and mature plant.
A healthy plant means the plant is holding broad and juicy leaves.
A tiny plant will take more time to develop roots.
Go for the young larger varieties that are one-year-old having roots.
It will encourage quicker development of the roots in the babies.
Always choose those baby plants that turned 1-2 inches in diameter.
Smaller plants than this size will face difficulty in growing roots.
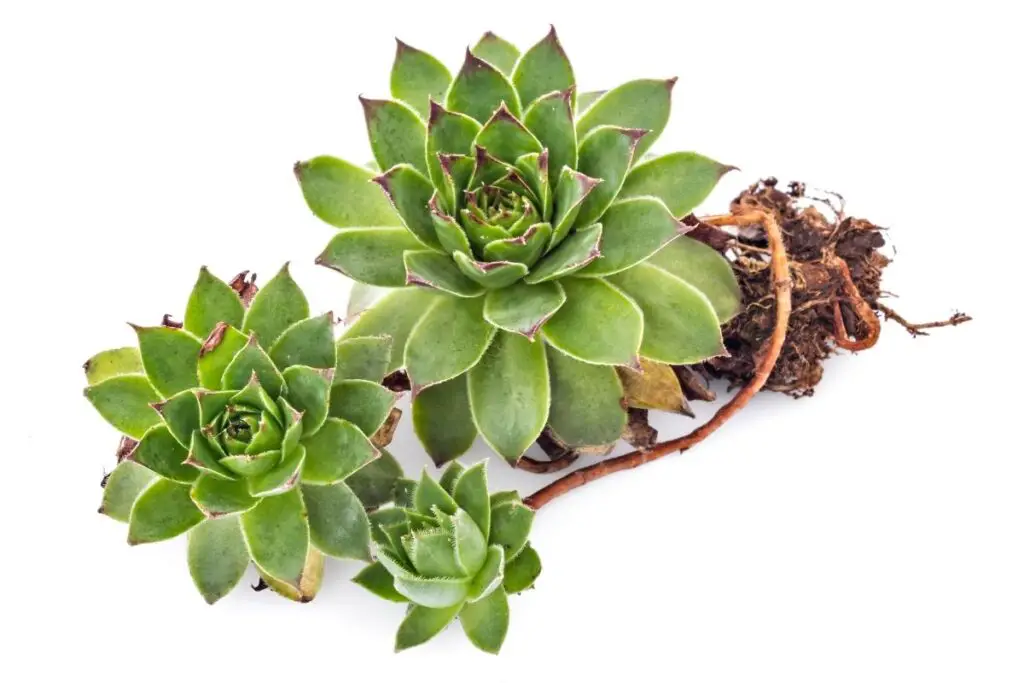
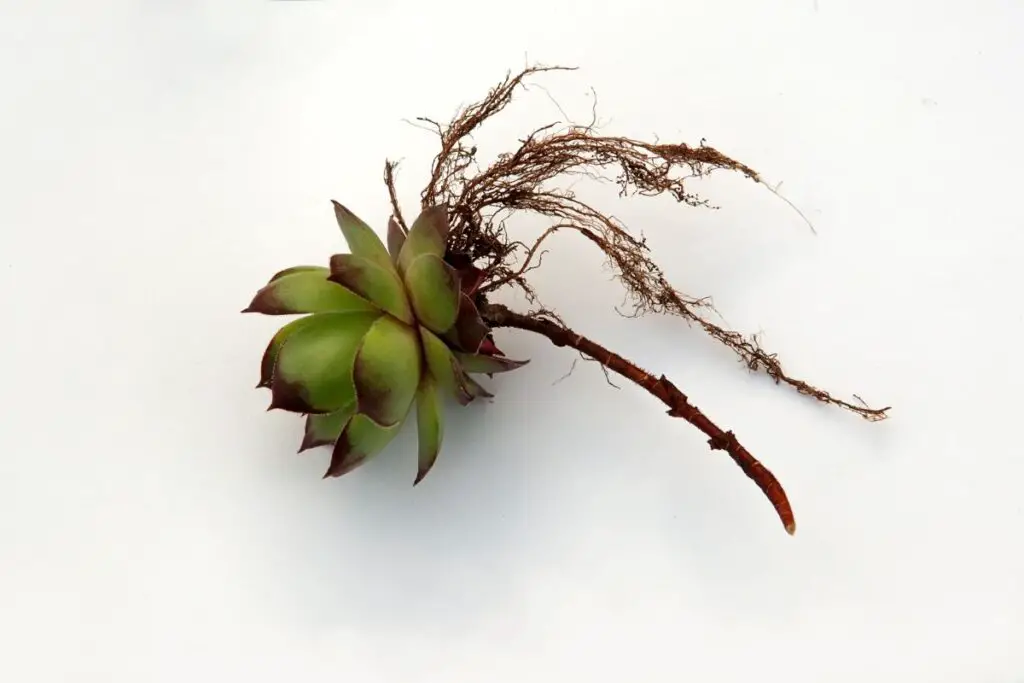
Divide the offsets from the mother plant.
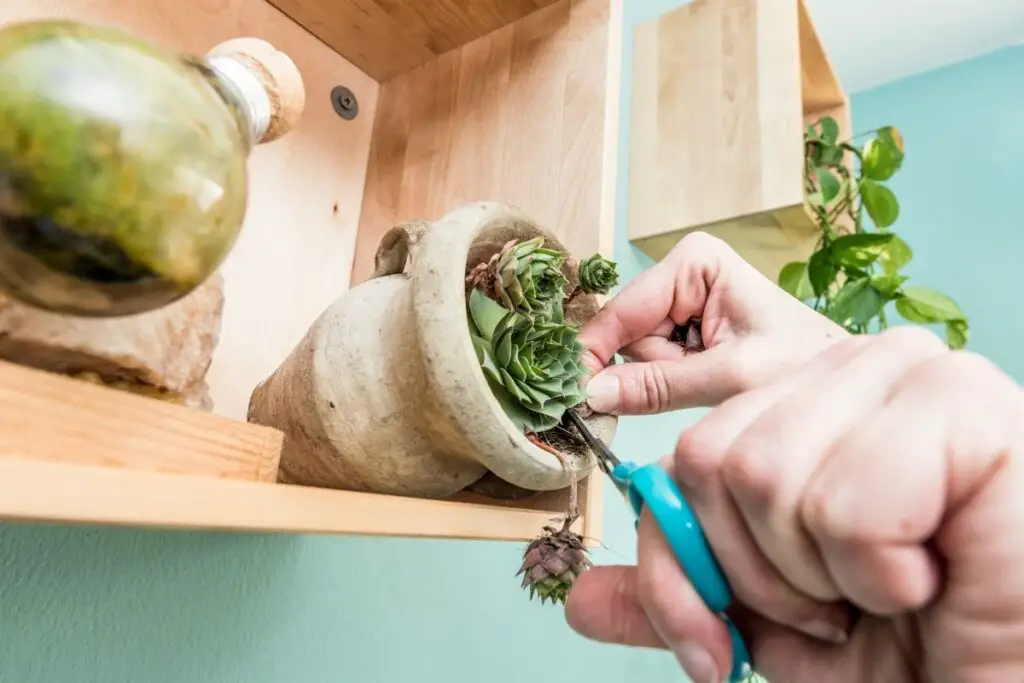
Now slowly separate the baby plants from the mother plant using a disinfected pruner.
First, try to pull it off by breaking the stem that connects the mother and baby.
If they don’t separate, make a cut close to the rosette. Be careful and try not to hurt the roots.
Don’t wash the roots to remove the dirt.
Use your hand to get rid of the maximum dirt.
If a small amount of soil is there, you don’t have to remove it. Clear the withered stuff from the bottom of the plant.
Wait for them to form callus.
It includes allowing the divided plant to dry and heal for some days, significantly when the stem is trimmed.
It will ensure the prevention of any infection in the plant.
Prepare location and soil to plant them.
When these baby Hens and Chicks develop, they will require at least 6-8 hours of sunlight.
Making raised beds would be great. It ensures good drainage.
When it comes to soil, drainage is more important than nutrition.
Plant the offsets in the ground and fill up the roots and surrounding of the plant with your preferred soil mix.
Some good soil recommendation recipes would be:
Recipe 1
- 50% Garden soil/Potting soil
- 50% Sand
- A handful of Compost
Recipe 2
- 25% Potting soil
- 50% Sand
- 15% Perlite/Vermiculite
- 10% Compost/Worm casting
You need to maintain a distance of at least 2 inches between each plant.
If they produce large rosettes, the space should be at least 4 inches minimum.
For containers, use commercial succulent soil.
It contains perlite and pumice, which support satisfactory drainage.
Use a small container, depending on the size of the offsets.
For instance, the baby plants of a cobweb houseleek are pretty small.
A 2-inch pot will be enough for them.
Protect the offsets.

Since the babies are too young and did not develop roots yet, they will be unable to tolerate the shining sun at their top.
For that, you need to protect them by shading them.
Stick 2-4 sticks around the prepared raised beds.
Fix the shading net so that the harsh sun cannot reach them, especially in the front part.
You can also keep pots having large trees to filter the sunlight.
You need to put the shade on for at least 1-2 weeks.
Once the center of the plant gets green, remove the shading net.
It is a signal that they have started developing roots.
Sometimes, you have to put the shade on for a month or more.
It is applicable when you propagate Hens and Chicks in summer.
They need protection from the punishing sun of the season.
If there is no sun or chance of rain until root growth, you can skip shading.
Also read: How Much Sun Do Hen And Chicks Need? (Light Requirement)
Water the plants.
Don’t start watering immediately after planting.
Begin watering after 3-4 days of planting.
However, if there is little rain, you don’t have to water them.
Water the plants when the rain stops and the soil gets dry.
At first, begin with small amounts. Just keep the soil evenly moist.
Instead of directly pouring from a watering can, you can spray water.
Once the plant has grown roots, gradually start to increase watering.
Don’t water too much or too often.
Young plants are sensitive to wet conditions and may result in rotting.
Also read: How Much Water Do Hens And Chicks Need? (Underwatering+Overwatering)
Fertilize them a little.
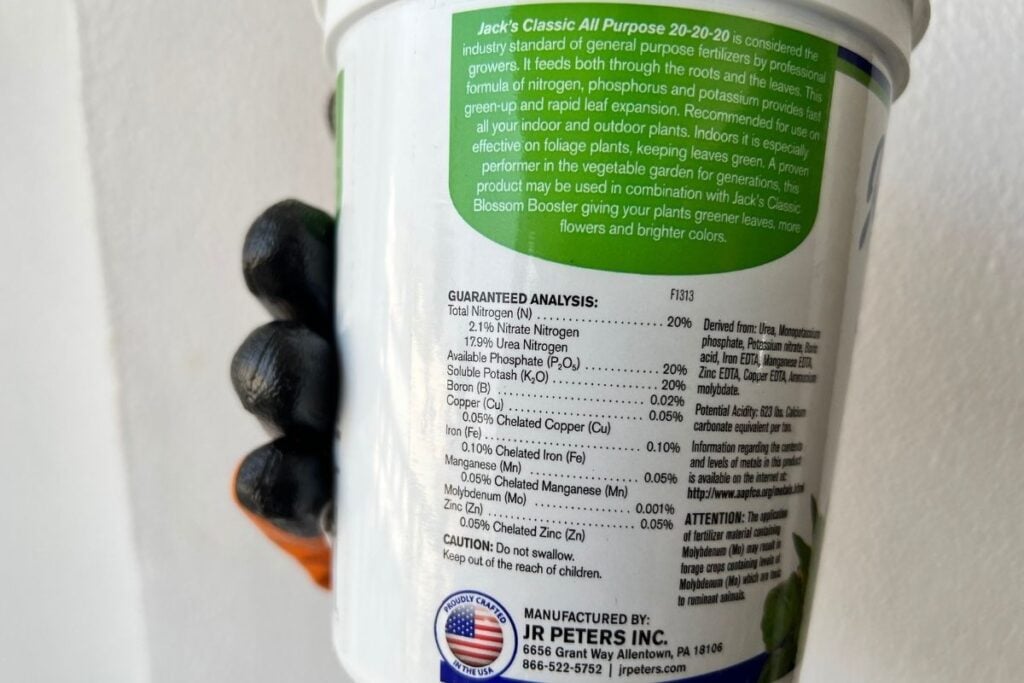
Generally, fertilizing is unnecessary for Hens and Chicks.
But it is not useless.
However, fertilizing helps pretty much.
If it is spring or summer and your offsets are rooting, fertilizing can encourage good development and fast growth.
Slow-release, long-acting fertilizers are best.
You must make sure not to over-fertilize them.
Remember the part where I said fertilizing is unnecessary? They produce lots of vitamins, like auxins, which facilitate their growth.
Use only 1-2 pellets under each plant.
Also read: Do Hens And Chicks Need Fertilizer? (+Best Fertilizer For Hens And Chicks)
Propagation in water
The steps are the same as the soil.
The only difference is instead of putting them in soil, place them in water.
- Divide the baby chicks from the mother plant.
- Cut off the stem that is too long. At least some inches of the stem must be there.
- Take a glass jar or container and fill it with water.
- Place the plant in it.
- Only the bottom of the stem should sit in water.
- Let it stay under filtered sunlight.
- You can either transplant them to the soil or let them stay in the water after root growth.
- Change the water every 2-3 days.
Here you can use one trick to let the plant sit in the water with proper balance if your plant is small and the jar mouth is broad.
Cover the jar at the top with plastic and seal it.
Make a hole at the center of a size that the stem quickly gets into the hole. Now place the plant on the jar. That’s all.
After 2-6 weeks, you will see new root growth in them.
Also read: Can Hens And Chicks Grow In Water? (How To, Care & More)
How to propagate Hens and Chicks from seeds?
After division, another propagation method having high chances of success is by seeds.
It is simple but time-consuming. Propagating by seeds increases the chances of hybridization.
You will get colorful plants having distinctive features.
From the development of the rooster to the production of seeds, it will take 2 months.
For seed propagation:
First, it is better to start seeds indoors.
It helps the seeds to be safe from outside predators.
You can also sow them outdoors.
But there must be ways of protecting them from animals or strong winds.
Collect the seeds from the plant after the flower dies.
Prepare soil for sowing.
Create a raised bed having an equal mixture of garden soil and gravel or sand mix.
The raised bed helps in good drainage.
Spread the soil and cover them lightly.
Keep the soil evenly moist.
For containers, you can also use germination soil mix.
Please keep them in a warm room, having temperatures around 70-75°F.
When they germinate, add some gravel on the top as mulch to hold moisture.
Let them have direct sunlight when they have developed roots.
Transplant them where they have become 2.5 cm in diameter.
Start with regular care after transplanting.
Can I propagate Hens and Chicks by leaf cuttings?
Many gardeners get positive results about propagating Hens and Chicks by leaves.
But there is low hope of success from leaf cuttings.
In most cases, the leaves will dry off and, there will be no root growth.
If you don’t get good results, don’t be sad.
You already have a lot of young offsets to propagate them.
We will still be sharing the information about leaf propagation if you want to try it.
- Choose the already rooted plants having healthy leaves, as instructed before.
- Twist and snip off some leaves close to the plant base. Don’t tear them off the plant. Tug off one whole leaf.
- Using pruners will make sure you don’t tear them.
- Once you pull them off, let them form callus. It ensures keeping infections away.
- Now, plant the healed leaves in the soil.
- The base of the leaves must be in touch with the soil. Keep at least 1-2 inches distance between each leaf.
- They must receive indirect sunlight until rosette and root development.
- Keep the soil moist consistently.
- After one month, you will find new plant and root growth.
- Let the plant have direct sunlight for hours, as per need.
Though it is an outdoor ground-cover plant, you should start in containers indoors. It is because these small leaves get easily chewed up by pests.
Once they develop rosette and roots, you can shift them outside.
But if you think you can protect them from pests, try it once in the ground.
You must create a fence around the garden bed and use shading nets to protect them from direct sunlight.
Still, I would recommend starting it in the container.
Suggestion: Don’t get upset if you find negative results.
There is a low chance of success in this method.
You can try once for your own experience.
If you get positive results, well and good.
Moreover, if there is already a simple way to get more Hens and Chicks, why worry about leaf propagation failure?
Some tricks to increase chances of better propagation
When a baby plant has developed, remove the shoot connecting the mother and baby.
Instead of transplanting, let it remain over there.
Remove when they develop roots.
In this way, it will increase and confirm the chances of healthy rooting in a new bed.
To get more young plants, water them regularly, avoid overwatering and fertilize little near the mother plant.
It increases babies by 10-15%.
Starting propagation in pots can save the plant from many things.
You don’t have to create any shade or protection.
You can keep them indoors or shift them as per their requirement.
For example, for some weeks, you can keep the offsets indoors.
Once they develop roots, you can plant them outdoors permanently.
During rains, you can keep the potted plants under a transparent cover.
After 1-2 months, you can permanently plant them outdoors, promoting prolonged existence.
Final thoughts of Hens and Chicks propagation
Now that you are accustomed to many ways of propagating Hens and Chicks, you can help yourself enjoy propagation.
If you want positive results, I recommend doing the easy way by dividing offsets. It is easy, simple, and effective.
Seed propagation is also sound, but it can be time-consuming.
If they don’t germinate within 30-45 days, store them for 1-2 weeks, sealed tightly in a refrigerator.
Again place the container at a warm temperature.
Germination can occur in either 30-45 days or after one year.
Instead of facing so many complications and insecurities during seed and leaf propagation, choose the division method straightaway to enjoy more and more Hens and Chicks and witness them covering your garden bed most of the time.
FAQs
Is Cobweb Hens and Chicks propagated differently?
Cobweb houseleeks have small offsets that rarely cross 2 inches.
Additionally, they cannot endure the full sun.
The webs are meant to protect the center of the rosette from sunburn.
For propagating them, you have to separate and plant them in clusters.
In one 2-inch pot, you have to place 2-4 offsets.
Also, make sure they have the maximum amount of roots.
What about sempervivum oddity propagation?
Their propagation process is as same as discussed in the article.
The only difference is keeping these varieties less moist than others because they have juicer leaves than others.
The soil you use should have more drainage capacity than the soil mix used for other varieties.
Just remember they will live more being less moist.
Reference: Wikipedia, Iowa State University of Science and Technology, The University of Arkansas Division of Agriculture, NSDU, The Ohio State University, Missouri Botanical Garden.