
It is always fun to propagate plants and get more of them. Propagation is the best and an economical way to get more Haworthias. But how can we propagate a haworthia plant? Let’s find out.
Haworthia can be propagated through a leaf, offset, and seed. For offset propagation, separate the offshoots from the mature plant and place them in soil or water. For leaf propagation, cut the healthy leaves, and place them in soil or water. And seed propagation can be done after the plant blooms.
Propagation can be the last step of saving your dying plant. However, you can even do it for more Haworthias if you love them.
This article will share a complete guide about the procedures for different propagation methods to help you avoid silly mistakes while doing it.
What are the different ways of propagating Haworthia?
Haworthias can be propagated with three different methods:
- Offset propagation
- Seed propagation
- Propagation from leaf cuttings
All of them are quite easy.
The only difference is the time each process takes to develop roots.
Most people choose offset and leaf cuttings because, in seed propagation, you have to wait for the plant to flower.
You can buy them online if you can’t wait long but desperately want to try seed propagation.
Haworthias can be propagated both in soil and water, but seeds are not propagated in water.
When is the best time to propagate Haworthia?
The best time to propagate Haworthia is either at the end of their dormant period or the beginning of their growing season.
The plant will come out of dormancy and grow actively at both times.
When you propagate them at the end of dormancy, the plant will get its growing period after a few weeks and start growing.
As they are slow growers, doing it early will be good.
Similarly, while propagating at the beginning of their actively growing period, the plant will grow well.
Their growing months have just started and will stay for some months.
So, they can grow busily to sprout if everything is perfectly done.
Winter and summer is not the right time to do it.
During the summer, they rest and, in the winters, they slow down their growth process.
As a result, Haworthias won’t be responding much to propagation.
They might not sprout or grow well or struggle too much for new growth.
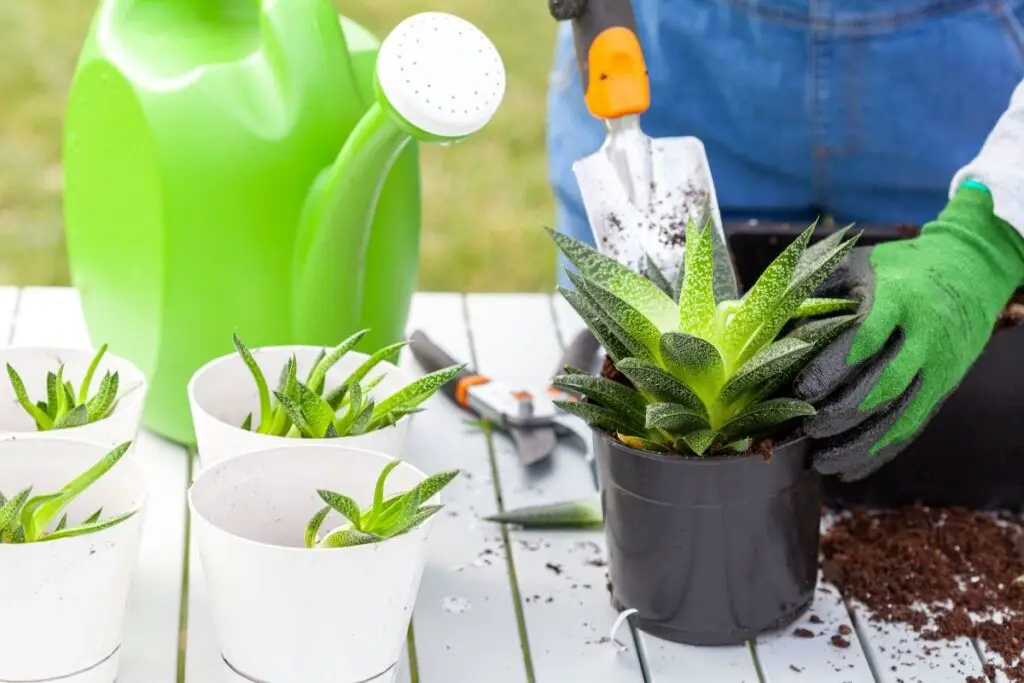
Supplies needed for propagation
Propagation may seem difficult, but once you get acquainted with the procedures, you will find it easy and a fun part of gardening.
First, let’s see what we are going to need for propagation.
- Disinfected knife: This is needed to separate the leaves or offsets from the plant. It is better to use a knife so that the cut is made clean. A blunt or random tear may cause trouble in propagation.
- Container with drainage holes: You can directly put the offsets or leaves in the ground soil, but it is better to use a container first. Moreover, you will need it when you propagate Haworthia from seeds.
- A healthy mature plant: Of course, without a healthy plant, propagation is not possible. If the plant has suffered or just came out of any stress, don’t choose it for propagation. Wait for some more days until the plant is back to normal.
- Water: This is required for watering the soil and for water propagation.
- A clean glass jar: This is necessary during water propagation.
- Ideal soil mix: The soil is of utmost importance during soil propagation. Use fast-draining soil for good results.
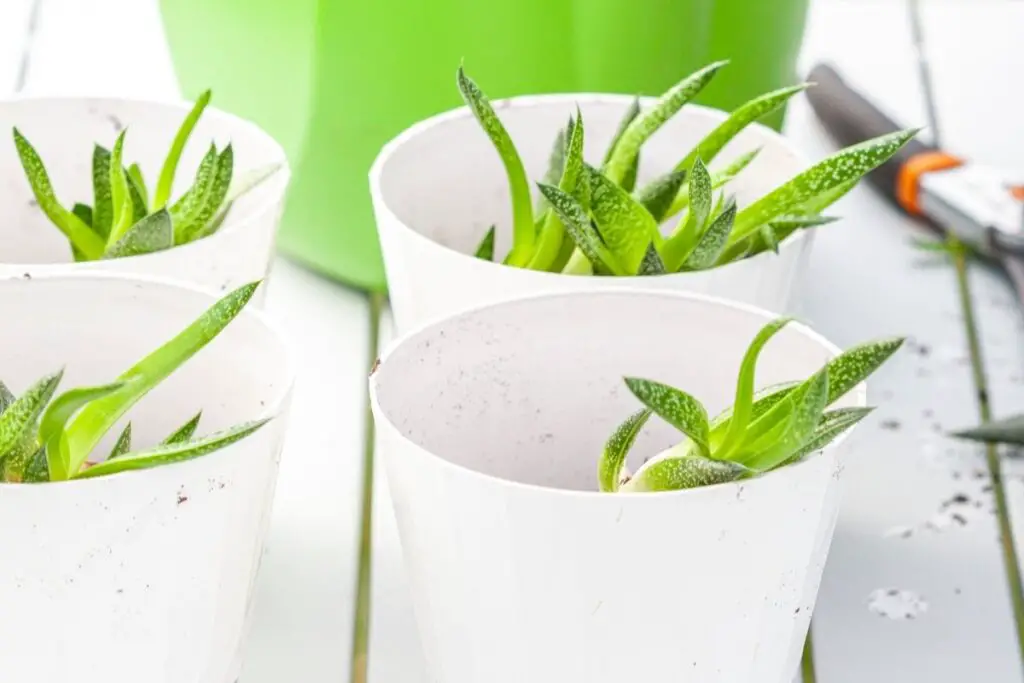
Propagation from offsets
Haworthias produce offsets once they are mature.
Being slow growers, they take 2-3 years to get mature.
Propagating from offsets is an easier process than the other two.
They are relatively clear-cut and have higher success rates.
The best time to divide the offsets is during the spring and autumn.
Steps for propagation:
For removing the offsets, wait until they have some leaves, at least four leaves.
These will have roots, and they can survive the division.
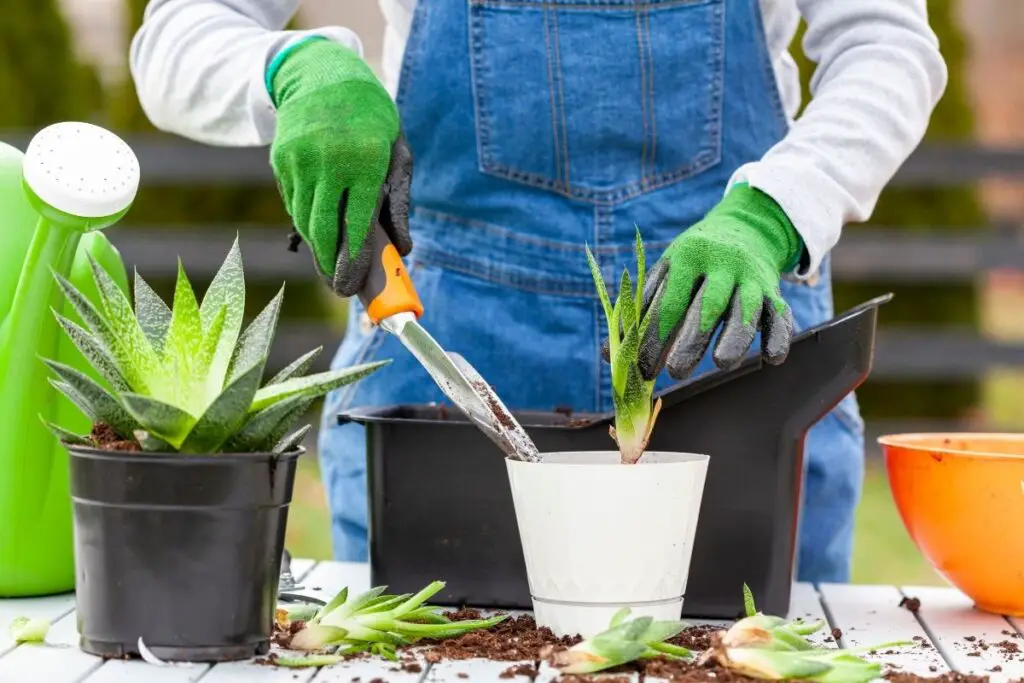
- First, loosen the soil with water so that the plant comes out easily. It will be smooth to remove the offsets safely.
- Now, carefully remove the maximum amount of dirt from the root portion using a brush. Be gentle.
- Let the wound that occurred during division get healed before planting. Let the plant dry.
- Plant your mature plant back to its place and the babies in a well-drained soil mix.
- For potted plants, you can use cactus potting soil.
- Water lightly to keep them moist for the next few weeks.
- Allow them to dry out before the next watering.
- Don’t expose them to direct sunlight as that can stress them.
- There is no need to fertilize the offsets right after you plant them. As they are in new soil, the soil will give them their required nutrients.
Propagation from leaf cuttings
This is also another easy method of propagation.
For a successful propagation of Haworthia, you need to select a healthy and mature plant.
For the selection of the leaves, choose the healthy and young ones.
Don’t use old leaves as they won’t root well.
For an easy selection, first, remove the old dead leaves.
Step-by-step guide:
- Select a young and healthy leaf.
- If the plant has recently suffered any stress, wait for weeks until it recovered fully.
- The leaves are attached with a double-sided thin, rigid membrane.
- Make a little cut and twist and tear the leaf. Be gentle and gradual. Tearing the leaf slowly will keep the white stem tissue intact. The roots will grow from this wound.
- After removing the leaves, lay them over a tray and apply some rooting hormones.
- Then let the leaves form callous.
- After one week, take the leaves and plant them in well-drained soil with a light sand topping. The lower portion of the leaf must be under the soil.
- Mist the soil slightly instead of pouring water through a watering can. It will ensure that the soil is not overly wet or dry.
- Within 2-4 weeks, the roots will start to develop. After 2-3 months, small offspring will form.
- Separate them and plant them in well-drained soil.
Note: If you don’t let the plant form callous and put it directly in soil or water after cutting, it will rot the leaf.
They must be spread with some rooting hormone and allowed to heal for some days.
Don’t be in a hurry to get results.
The whole concept of gardening is about patience.
Following the correct process patiently will give you the best results.
Water propagation
For water propagation, the separation of the offsets and leaves and callous forming is the same as explained in the above two methods.
After the separation:
- Take a transparent glass jar. Though you can use any container, a transparent one helps detect the root and water condition.
- Fill it with water fully. Use distilled or rainwater. Tap water contains many hard minerals that can harm the plant.
- Now, place the offset or the leaf-cutting in it.
- Only the bottom must remain in the water.
- For proper balance, seal the top of the bottle and make a hole for the root to pass through.
- Keep the jar at a location that receives bright, indirect sunlight, average temperature between 65-75°F, no high humidity, and out of pets’ and children’s reach.
- Change the water every 2-3 days. Fertilize a little with a few drops of mild liquid fertilizer.
You don’t need to shift the plant to the soil after rooting if they are good in the water.
Shifting can be stressful because the root process in both mediums is different.
But if you must do it, use an ideal soil mix and container with drainage holes (if you use pots).
Pros and cons of asexual reproduction
The above two methods fall into asexual reproduction.
They are simple and easy.
If done properly, there are high chances of victory.
Though they are easy and advantageous, there are some demerits too behind these two processes, which we have highlighted in this point for you.
| Pros | Cons |
|---|---|
| As the offsets grow from the mother plant, they will have the same feature as their mother plant. You can give them the same requirements you used to give to the mother plant. | Though they are clones of their mother, the Haworthia offsets lose their genetic variations. Moreover, they won’t be able to handle any change. It makes them less competitive. |
| You can get multiple plants from leaf propagation. One leaf can grow at least 4-5 plants. | As they cannot handle changes, they get prone to diseases. You have to give them more attention to ensure they don’t suffer any diseases. |
| The offset propagation can guarantee good quality by cutting or layering. Sometimes, when a plant is a mutant naturally, it can resist pests and diseases. You can preserve this for other Haworthias through asexual reproduction. | You can directly buy seeds and start propagation. But for offsets or leaves, a healthy and mature plant is needed. So, starting propagation needs time. |
| Seed propagation takes a long time to grow seedlings. But asexual reproduction takes 4-6 weeks to grow roots and mature, thus helping you with quick gardening. | Right knowledge is essential. Otherwise, propagation may fail. |
How to propagate Haworthia from seeds?
Seed propagation is an ancient propagation method.
You can buy the seeds if you desperately want to without waiting for the plant to produce seeds.
Or, if you are lucky enough to see your Haworthia grow flowers, you can collect the seeds after flowering.
Steps of seed propagation:
The seeds must not be older than six months. The new seeds have a higher success rate.
Mostly, 1 month older seeds have high rates of progress.
Make sure the seeds are clean. Remove all the debris and shells.
Otherwise, it can develop fungus.
- Soak the seeds in lukewarm water for 30 minutes before sowing to soften them. The water shouldn’t be too hot or cold.
- Use a pot that is neither too deep nor too shallow. Since Haworthia is a slow grower, developing deep roots will take 1-2 years. Make sure it has a drainage hole.
- Prepare a perfect soil for them, for example, cactus mix. Add a thin layer to the planter.
- Now spread the seeds evenly and cover them with a light layer of sand.
- Moisten the soil at regular intervals. Instead of pouring water directly, mist the soil. This will prevent overwatering.
- Seal the pot with plastic and keep it under filtered sunlight. The environment of seed propagation should be averagely warm and humid.
- Daily, open the plastic once at one particular time for some time to let air pass through. It will prevent fungus or algae development.
- Once you see them sprouting, get rid of the plastic.
Being slow-growers, the plant will take 6 weeks to 1 year to become fit for transplantation.
Pros and cons of sexual reproduction
Propagation from seeds is called sexual reproduction. Let’s look at the pros and cons of this method.
| Pros | Cons |
|---|---|
| It is natural and successful if done correctly. | Though there are low chances of disease development or transfer, they are not immune to diseases or pests. When the soil gets too much moisture during germination, it can suffer from algae. |
| From seed propagation, there are high chances of genetic variation. The plant will look different, but it can handle changes to some extent. | The right storage place is quite confusing. They must get a temperature of 15-25°C during storage. Moreover, storing them at any random place can attack them by bugs and mites. |
| Seeds are cheaper than plants and can be preserved for 5-6 months. | The features of the plant from seed might not be like their own type. Some traits match with the mother plant during offset or leaf propagation which get missed in the plant by seeds. |
| There are low chances of disease transfer. | They take quite a long time to sprout and mature. |
Note: Though there are chances of success, there are still some drawbacks.
Sometimes the soil gets too dry.
You have to check the soil daily and moisten it when they feel dry.
Sometimes fungus can develop due to too humid and moist conditions.
That is why you need to open the seal daily for airflow.
You can add a little fungicide before sowing to avoid fungus formation.
Tips for successful propagation
- Select the seeds carefully. Some may have fungus and viruses that get transferred after the seedlings sprout and destroy the propagation.
- The seed taken from the plant having adequate nutrients can increase the plant’s fertility after maturity.
- The temperature for germination is important. The plant grows well when the temperature stays within 20-25°C.
- The days must be short, and nights must be longer during the time of seed germination.
- The seeds must receive adequate oxygen for successful germination. Otherwise, they won’t sprout well.
- The light must be bright and indirect sunlight. Direct exposure to sunlight can burn the plant and stop its healthy growth.
- The soil must be evenly moist throughout the germination process. Both dry and wet conditions can hinder their growth and lead to propagation failure.
- Don’t put the wounded leaf or offset directly in wet soil. Let it heal first. Additionally, loosen the seal to let the soil dry out.
Final words
Being an attractive succulent, Haworthia can change the look of your garden and your home as well.
The plant might be quite expensive. So, if your plant is dying or you have fallen for them, propagate them to get more of them instead of repeated purchase. It’s an easy and economical way of increasing Haworthias. Their seeds are quite cheaper than the plant. You can start seed propagation.
With patience, love, care, maintenance, and proper procedures, the propagation will be a great success, and soon, you will have lots of Haworthias in your garden or house.
Reference: The Haworthia Society, Botanical Studies, University of Wisconsin-Madison, Sciencedirect, Researchgate, Haworthia Study.