
Chrysanthemums, or mums, can really brighten up a porch or garden bed. If you’ve got a favorite, there’s a way to multiply them without buying more—just take cuttings.
I like cuttings because they’re straightforward, budget-friendly, and the new plants end up looking just like the parent. You can propagate chrysanthemums by snipping a healthy stem, sticking it in moist soil or water, and letting it root.
Once you figure out how to propagate chrysanthemums the right way, you’ll notice stronger plants and fuller fall blooms. Here’s how I do it—what tools I reach for, when I take cuttings, and how I keep those baby mums healthy while they root.
Quick Tip: Take cuttings in spring or early summer when stems feel soft and green, not hard or woody, for the best rooting results.
Essential Tools and Materials
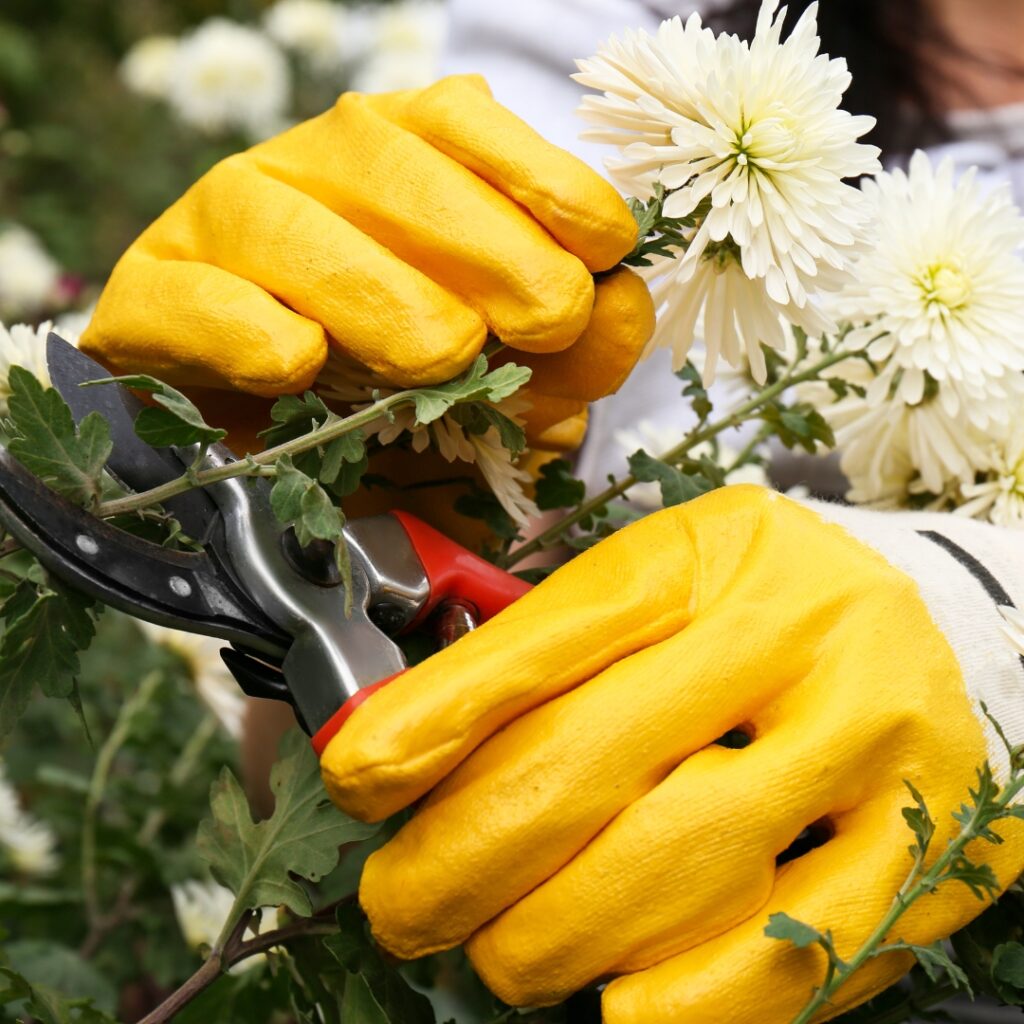
You don’t need much to get chrysanthemum cuttings off to a good start. Clean cuts, the right rooting hormone, and a light seed-starting mix make all the difference.
Pruning Shears and Clean Cutting Techniques for Strong, Healthy Starts
I stick with sharp pruning shears. Dull ones just smash stems, and those rot quickly. Sharp blades give you a smooth cut that heals well.
Before cutting, I swipe the blades with rubbing alcohol. It’s quick and keeps disease at bay.
I always cut just below a leaf node, since roots pop out from there. I pull off the lower leaves so they don’t sit in the soil and rot. A 3 to 4-inch cutting usually works best.
Quick Tip: If a stem looks ragged or split after cutting, snip again for a cleaner edge.
When I’m working outside, I avoid the blazing afternoon sun. Early morning is better—stems are firmer and hold more moisture.
Choosing Rooting Hormone and Its Benefits for Faster Root Growth
I dip the cut end in rooting hormone to speed things up. It helps cuttings root before they dry out or rot. The powder form is easy to find and less messy.
Pouring a bit into a separate cup keeps the main container clean. I tap off the extra so there’s just a light dusting on the stem.
I don’t overdo it with hormone. Too much slows rooting or causes rot.
Quick Tip: For soft, green stems, go light on the hormone. Heavy coatings don’t help.
Sometimes, in warm and humid weather, I skip the hormone altogether and still get roots. In cooler conditions, I rely on it more.
Selecting Seed-Starting Mix and Soil Types for Proper Drainage
I use a loose seed-starting mix instead of garden soil. Garden soil is heavy and holds too much water, which mums don’t like.
The best mix feels light and crumbly. It drains fast but doesn’t dry out instantly. If you squeeze it and water drips, it’s too wet.
I fill small pots or trays and press the mix gently—never too tight. Roots need air as much as they need water.
Quick Tip: If the top inch is soggy the next day, your mix isn’t draining well enough.
In humid weather, I check moisture often. In dry spots, I mist the surface lightly to keep cuttings from wilting.
Optimal Timing and Types of Cuttings
Picking the right type of cutting at the right time makes a huge difference. Soft, fresh growth roots faster than old, woody stems, and hardy mums definitely follow a seasonal rhythm.
Identifying Softwood Cuttings for Faster Rooting and Healthier Plants
I always go for softwood cuttings from new spring growth. These stems feel flexible and snap cleanly—not bendy and mushy, not stiff and woody.
Stems about 3 to 4 inches long with two or three leaf nodes work well. Roots will grow from those nodes.
I avoid any stems with flower buds. Buds drain energy away from rooting.
Softwood cuttings are usually ready in late spring to early summer. In cooler areas, that might be late May. Warmer regions? Sometimes earlier.
Quick Tip: If the stem bends but doesn’t break and feels soft but not mushy, you’re good to go.
I always take cuttings in the morning when plants are hydrated. Wilted stems just don’t root well.
Understanding Hardy Chrysanthemums and How Their Growth Cycle Affects Cuttings
Hardy mums survive winter in the ground in many zones (Zones 5–9). They send up new shoots in spring, which are perfect for cuttings.
I wait until those shoots are 4 to 6 inches tall. That’s usually the sweet spot for propagation.
Older, woody stems from last year don’t root well, so I skip those.
Hardy mums tend to form tight clumps. Early spring is when you’ll spot lots of new shoots around the base—ideal for taking cuttings.
Quick Tip: Look for green, tender stems near the base. That’s what you want.
In hot climates, spring can move fast. I check early so I don’t miss the soft growth stage. Timing trumps the calendar every time.
Seasonal Factors for Success When Taking Chrysanthemum Cuttings
Spring is the best time for chrysanthemum cuttings. Mild temps and longer days help roots form quickly.
I avoid taking cuttings during heat waves. High temps dry them out before roots can even start.
In cooler places, I wait until frost risk is gone. Cold nights slow everything down and can damage new cuttings.
Humidity matters, too. Softwood cuttings root better when the air’s a bit moist, not dry and windy.
Quick Tip: If soil dries out within a few hours, it’s probably too hot or windy for new cuttings.
I aim for steady conditions—daytime temps around 60–75°F are about perfect. Getting the timing and type of cutting right leads to stronger roots and tougher plants.
Preparing and Taking Chrysanthemum Cuttings
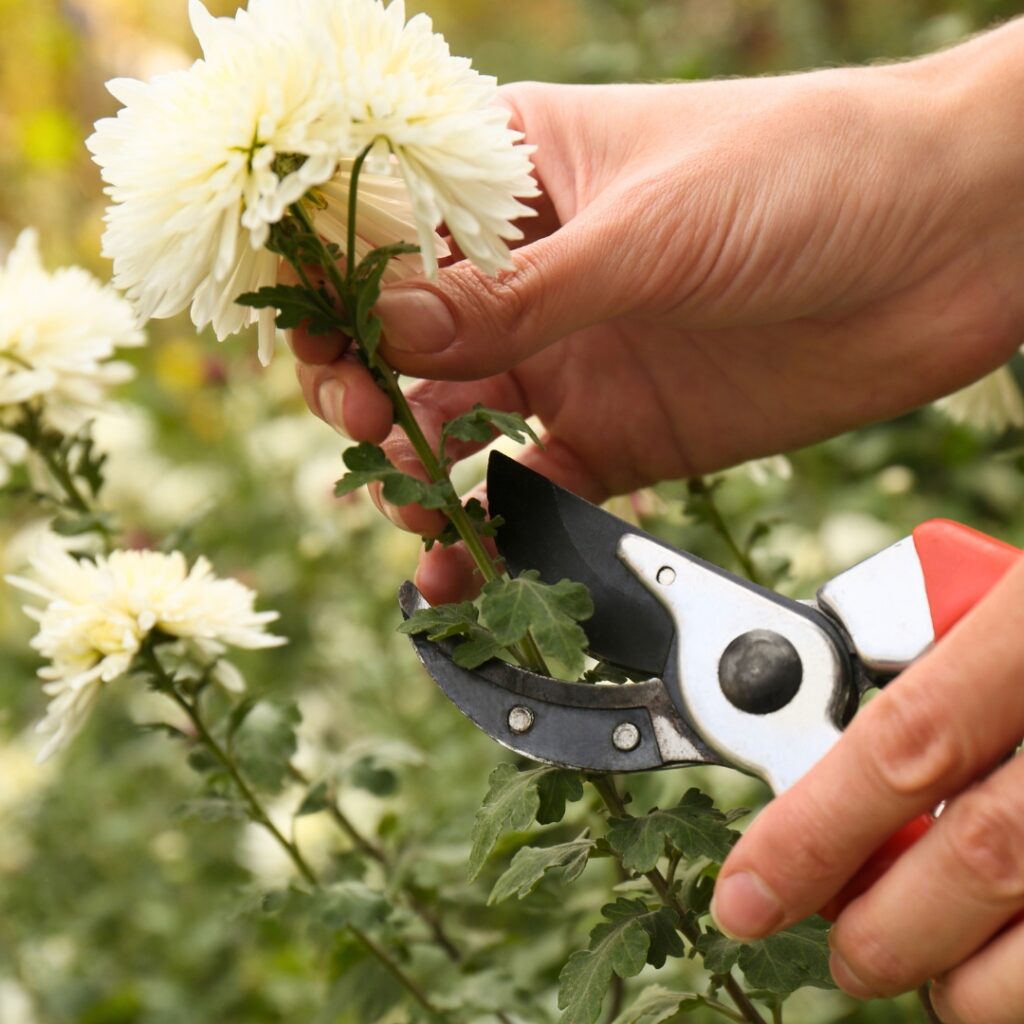
Healthy parent plants, clear leaf nodes, and clean cuts are my focus. These details really shape how well new roots form.
Selecting Healthy Parent Plants for Stronger Chrysanthemum Cuttings
I always start with a plant that looks healthy and pest-free. If leaves are yellow, spotted, or wilted, I pass. Weak plants just lead to weak cuttings.
No blooms, either—flowers pull energy away from rooting. I want all the energy going into new roots.
I look for firm stems with bright green leaves. The stem should snap, not bend and feel mushy.
In hot zones (8–10), early morning is best for cuttings. In cooler places, I can take them later as long as the plant isn’t stressed.
Quick Tip: Water the parent plant the day before you cut. Hydrated stems root better.
Locating and Using Leaf Nodes to Trigger Root Growth
A leaf node is just the little bump where a leaf grows. That’s where roots will sprout.
I look for stems with at least 2–3 sets of leaves. That gives me one node for rooting and a couple above the soil.
I remove the lower leaves but keep the top ones. The bare node sits in soil or water, while the top leaves keep the cutting alive.
If the leaves are big, I snip them in half to cut down on water loss while the cutting is rootless.
Quick Tip: Always cut about ¼ inch below a leaf node using sharp, clean scissors or pruners.
Best Practices for Preparing Cuttings So They Root Faster
Cuttings about 3–5 inches long seem to work best. Short ones dry out fast; long ones flop and don’t stand up well.
After cutting, I wrap stems in a damp paper towel if I’m not planting them right away. Leaving them dry on the table is a recipe for failure.
For rooting in soil, I use a small pot with moist, well-draining mix. I poke a hole first, then slide the cutting in so I don’t scrape the node.
I press the soil gently around the stem. The cutting should stand up straight but not feel squeezed.
In dry climates, I loosely cover the pot with a clear plastic bag to keep humidity up. I take it off daily for fresh air and to avoid mold.
Quick Tip: Keep soil just barely moist—if the top half inch feels dry, add a little water (don’t soak it).
Planting and Root Development Steps
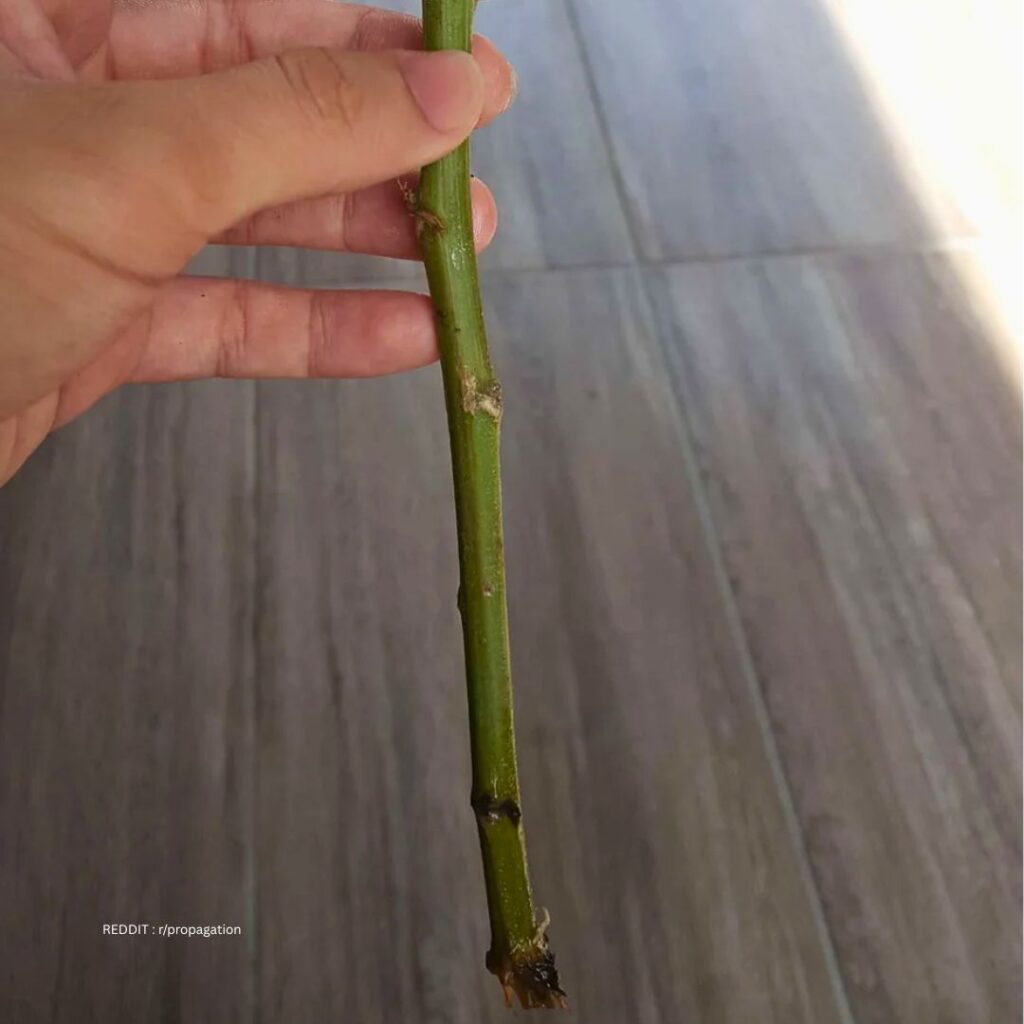
At this point, I focus on how I plant the cuttings, manage air and temperature, and support root growth. Small things here can really affect success.
Planting Cuttings in Containers for Strong Early Root Growth
I start with clean pots that have drainage holes. Small 3–4 inch containers are just right—they hold enough moisture but don’t get soggy.
Then I fill them with a light seed-starting mix. It should feel soft and airy, not dense like garden soil. I water the mix first so it’s damp but not dripping.
I dip the cut end of each stem in rooting hormone and tap off the excess. Then I use a pencil to make a hole and set the cutting in about 1–2 inches deep.
I gently press the mix around the stem so it stands upright. If the cutting wobbles, I firm up the mix a bit more.
Quick Tip: Check that the stem is steady. If it wobbles, firm the mix a little more.
Creating the Right Humidity and Temperature for Faster Rooting
Chrysanthemum cuttings root best at 65–75°F. I keep mine in bright, indirect light—an east-facing window works well.
I avoid direct sun because it dries leaves too quickly. Warm, steady air helps roots grow beneath the surface while the leaves stay healthy up top.
To boost humidity, I use a clear plastic dome or a loose plastic bag over the pot, making sure it doesn’t touch the leaves.
I open the cover daily for some fresh air. Too much trapped moisture can cause rot.
Quick Tip: If you see heavy water droplets inside the cover, lift it for an hour to let out excess moisture.
During heat waves, I move pots to a cooler spot indoors to keep them in that 65–75°F range.
Encouraging Robust Root Development Without Overwatering
I check the moisture every day. The surface should feel just a bit damp, not soggy.
If it’s dry, I water lightly—just enough so a little drains out the bottom. I empty the tray so the roots don’t sit in water.
Too much water cuts off oxygen, and roots need air as much as water.
After about 2–3 weeks, I give the stem a gentle tug. If there’s resistance, roots are forming.
Quick Tip: Hold off on fertilizer until you see new leaves. Feeding too early stresses young roots.
Once roots fill the small pot, I move the plant to a bigger container and let it keep growing.
Monitoring and Transplanting Rooted Cuttings

I keep a close eye on my cuttings as soon as I spot any signs of life. Noticing small changes in color, growth, or firmness tells me when to step in.
Strong roots and gentle transplanting usually mean healthier plants later on. I’ve learned that patience and observation pay off.
Signs of Rooting Progress and How I Know My Cuttings Are Ready
New leaf growth at the tip is a good sign. Those fresh, light green leaves usually mean roots are forming below.
I’ll give the stem a gentle tug. If there’s resistance, roots are anchoring the cutting; if it slides right out, it’s not ready yet.
- Leaves stay firm, not floppy
- The stem stays green and upright
- Tiny white roots peek out at the drainage holes
Warm soil helps speed things up. In a chilly room, rooting might drag out for another week or two.
Hot weather dries things out quickly, so I check moisture a lot more often.
Quick Tip: I wait until roots are at least an inch or two long before moving the cutting. It just handles the move better that way.
If leaves turn yellow or stems go soft, I suspect overwatering. Soggy soil with poor airflow can slow everything down and even cause rot.
Transplanting Mums to Garden Beds Without Causing Shock
I always transplant on a cloudy day or late in the afternoon. Full sun right after transplanting stresses those fresh roots.
First, I prep the garden bed by loosening soil about 8–10 inches deep. Mixing in compost helps with drainage and gives the plants a nutrient boost.
Mums really do best with at least six hours of sun. I space them 18–24 inches apart for good airflow and to keep diseases at bay.
When I take the cutting out of its pot, I leave the root ball alone. I plant it at the same depth as the container—too deep, and the stem might rot.
Quick Tip: I water the hole before and after setting the plant in. Moist soil helps roots settle in faster.
In hot climates, I toss on a bit of light mulch to keep the soil cool. If I’m in a cooler area, I wait until frost isn’t a threat before planting outside.
Aftercare and Acclimatization So Young Plants Adjust Smoothly
Rooted cuttings need time to get used to the outdoors. I harden them off over about a week or so.
Each day, I leave them outside a little longer, starting with morning sun. Afternoon heat is rough, so I avoid it at first.
Wind dries them out fast, so I shelter them early on. If the top inch of soil is dry, I water deeply—shallow watering just leads to weak roots.
I keep an eye out for wilting during the first week. A mild droop in the heat is normal, but if they don’t perk up by evening, I check the soil right away.
Once I see steady new growth, I know the plant has settled in and I can switch to regular care. It’s a satisfying moment.
Common Challenges and Disease Prevention
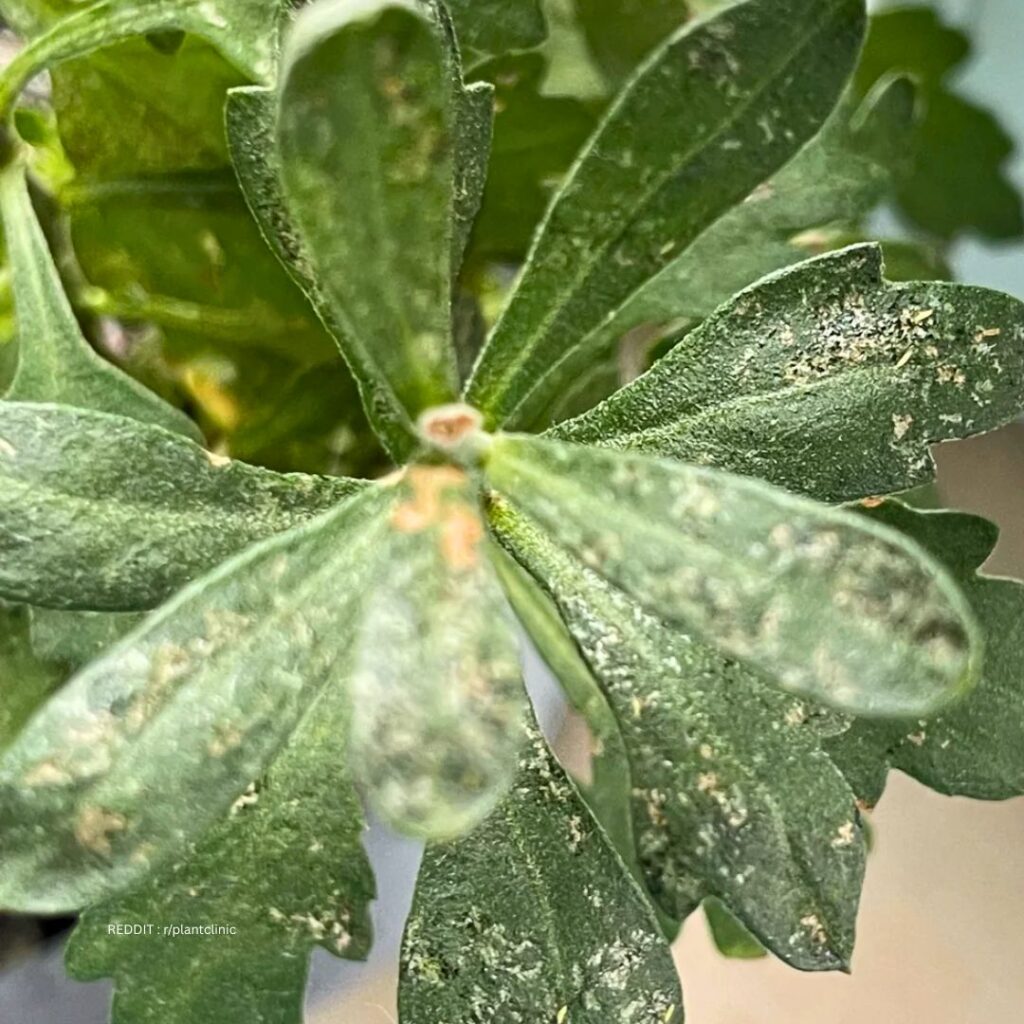
Chrysanthemum cuttings can root quickly, but they can also go downhill just as fast. Clean tools, well-draining soil, and steady—not soggy—moisture make a big difference.
Preventing Fungal Diseases Before They Take Over Your Cuttings
Fungal diseases thrive in warm, damp spots. I always use clean scissors and fresh pots, or wash reused ones with hot soapy water and let them dry completely.
I try not to splash water on the leaves. Wet leaves plus still air almost guarantee gray mold or stem rot.
If I spot fuzzy growth or dark, mushy stems, I remove those cuttings right away. Airflow is underrated—I keep cuttings in a bright spot with indirect light, never in a stuffy room.
In humid weather or rainy spells, I space pots a few inches apart so air can move. If the soil smells sour or musty, it’s too wet—so I let the top layer dry before watering again.
Even in cooler areas, overwatering can still cause problems. I stay on my toes regardless of the climate.
Maintaining Well-Draining Conditions to Stop Root Rot Early
Chrysanthemum cuttings hate soggy soil. I use a light mix for cuttings or add perlite to regular potting soil to keep it loose.
Pots with drainage holes are a must—no exceptions. When I water, I stop as soon as I see a bit of runoff at the bottom.
I check moisture with my finger. If the top inch feels dry, I water lightly. If it’s damp, I wait another day or two.
Quick Tip: Lifting the pot gives me a clue—if it’s heavy, there’s still water in there.
During hot spells, soil dries out faster, so I check more often. On cool or cloudy days, I hold back on watering to match the plant’s needs.
Tips for Healthy Root Growth So Cuttings Establish Faster
Healthy stems make strong roots. I take cuttings from green, firm growth—woody or flimsy stems just don’t root well.
Each cutting should have at least two leaf nodes. I remove the lower leaves so they’re not buried in damp soil, which can cause rot.
Light is key. I set cuttings near a bright window with indirect sun. Direct midday sun can dry them out before roots even form.
Quick Tip: If leaves wilt a bit, I mist the air around the plant instead of soaking the soil.
I resist the urge to tug on the cuttings too soon. After two or three weeks, I check gently—if there’s resistance, roots are forming.
Frequently Asked Questions
I get plenty of questions about rooting chrysanthemums—everything from water rooting to timing, soil mixes, and dealing with wilting or rot.
Can I root chrysanthemum cuttings in water, and does it actually work well at home?
Yep, you can root chrysanthemum cuttings in water, and it works surprisingly well. I put the cut end in a glass with an inch or two of water, keeping the leaves above the water.
Roots usually show up in about a week or two if it’s warm. I change the water every few days to keep things fresh.
Water roots are fragile, though. When I move the cutting to soil, I’m extra gentle and keep the soil just lightly moist at first.
Quick Tip: If the water gets cloudy or starts to smell, I dump it, rinse the glass, and refill right away.
Can I take cuttings from store-bought or gifted chrysanthemum cut flowers and expect them to grow?
I usually skip bouquet cut flowers. Florists often treat them with stuff that slows rooting, and the stems are often too old.
If I’m feeling lucky, I look for a firm, green stem that still feels fresh—not mushy or slimy. I cut off the flower head and trim the stem to about 4–6 inches.
Honestly, results are mixed. Potted mums from a garden center root way more reliably than bouquet stems.
Quick Tip: If the stem looks woody or brown inside when I cut it, I toss it and look for a green, softer piece.
What time of year works best for taking chrysanthemum cuttings for strong roots?
Spring or early summer is my go-to. New growth is soft, green, and bursting with energy then.
In warm zones (like 8–10), I can start a bit earlier. In colder spots, I wait until frost is past and fresh shoots are popping up.
Fall cuttings are a gamble since the plant is focused on blooming, not rooting.
Quick Tip: I look for 3–4 inches of flexible, soft growth at the tip. If it bends without snapping, it’s good to go.
How long do chrysanthemum cuttings usually take to form healthy roots?
Most of mine root in 10 to 21 days. Warm air, bright light, and steady moisture move things along.
After two weeks, I give the stem a gentle tug—if there’s a bit of resistance, roots are starting.
If my room drops below 65°F, rooting slows down. I’ve learned to be patient if it’s chilly.
Quick Tip: I keep cuttings in bright, indirect light. North or east windows seem to work best.
What’s the best potting mix or medium to use for rooting chrysanthemum cuttings without rot?
I stick with a light, well-draining mix—half potting soil, half perlite is my usual blend.
The mix should feel loose and airy. When I squeeze a handful, it holds shape but crumbles easily.
Garden soil is too heavy for cuttings and just holds too much water.
Quick Tip: I water the mix before planting so it feels like a wrung-out sponge. Not dripping, just damp.
Why are my chrysanthemum cuttings wilting or rotting before they can grow roots?
Wilting usually means the cutting’s losing water faster than it can take it in. I like to keep humidity high by covering the pot with a clear plastic bag, but I try not to let it touch the leaves—otherwise, things get soggy fast.
Rot tends to show up when there’s too much water or not enough air moving around. If the base of the stem goes brown or mushy, that’s pretty much game over for that cutting.
I always snip off the lower leaves so they don’t end up pressed into wet soil. Overwatering is a common trap, so I make a point to dump out any water that collects in the saucer under the pot.
Quick Tip: If the top inch of the mix feels wet and heavy, I hold off on watering. Cuttings need steady moisture—not a swamp.