
I’ll show you how to dig, dry, store, and replant dahlia tubers so your dahlias can return with healthy spring growth. These tender perennials can survive cold winters indoors when you handle their tubers with care.
I’ll help you decide whether to lift your dahlias or protect them in the ground, based on your winter weather. You’ll also learn when frost signals that it’s time to start cleanup.
Quick Tip: Keep stored tubers cool, dark, and dry, but not frozen or bone-dry. I’ll cover how to check them through winter and wake them up for spring planting.
Decide Whether to Lift or Protect Dahlias
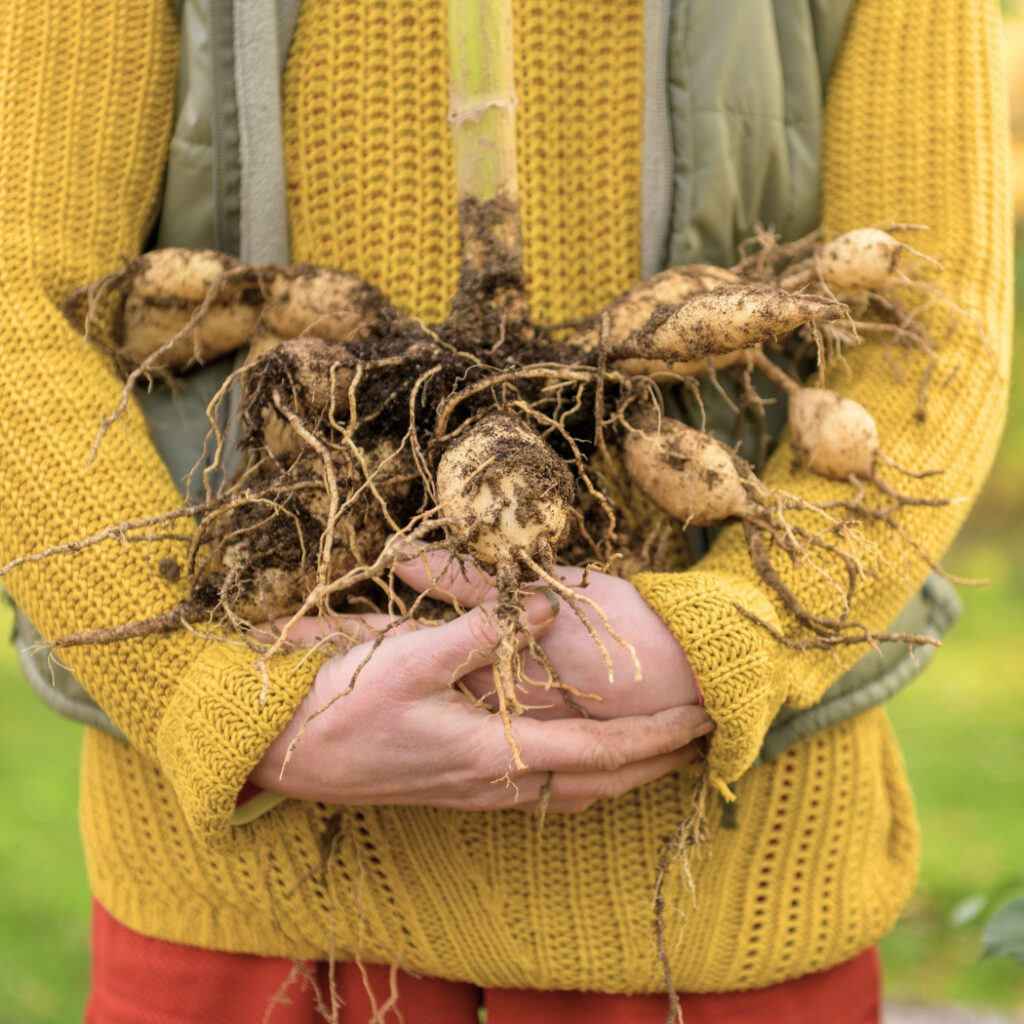
I decide based on winter cold, soil drainage, and how often the ground stays wet. A hard freeze can kill dahlia roots, but soggy soil can rot them just as quickly.
Use USDA Hardiness Zones and Local Conditions
I use USDA hardiness zones as a starting point, not a guarantee. Dahlias usually survive outdoors in USDA Zone 8 and warmer if winter soil drains well and the ground doesn’t freeze deeply.
In USDA Zones 7 and colder, I lift tubers after frost kills the tops. A long ground freeze or repeated hard freezes can damage tubers below the soil line.
I also watch my own yard. A sheltered bed beside a warm wall may stay milder than an open, windy spot. Low areas collect cold air and water, so I lift dahlias there even in a mild zone.
Quick Tip: I check local winter low temperatures, not just my zone number, before deciding.
When Leaving Dahlias in the Ground Can Work
I consider leaving dahlias in the ground when winters stay mild and the bed drains quickly. This can work well in USDA Zone 8, Zone 9, and warmer areas where soil rarely freezes solid.
I wait until frost blackens the stems, then cut them back to about 4 to 6 inches. I leave the tubers in place only if the soil feels loose and doesn’t stay muddy for days after rain.
Sand or sandy loam drains better than heavy clay soil. Clay holds water around dahlia roots, which can cause soft, brown rot during winter. If my bed has heavy clay, I usually dig the tubers. It saves a sad surprise in spring.
Quick Tip: I leave dahlias in the ground only when water drains away quickly after rain.
Protect In-Ground Tubers From Cold and Wet
I cover in-ground tubers after cutting back the stems and before steady winter cold arrives. I spread 6 to 12 inches of dry mulch over the planting area, using wood chips, straw, shredded leaves, or a mix of these materials.
I keep mulch loose so it traps air instead of forming a wet, packed layer. In rainy areas, I place burlap over the mulch and secure it with stones, but I remove or loosen it during long wet spells. Trapped moisture causes trouble.
I mark each clump with a sturdy label. In spring, I pull mulch back gradually after the risk of hard freeze passes and the soil begins to warm.
Quick Tip: I keep the mulch dry and airy; warm, wet mulch can rot tubers.
Time the Fall Cleanup and Digging
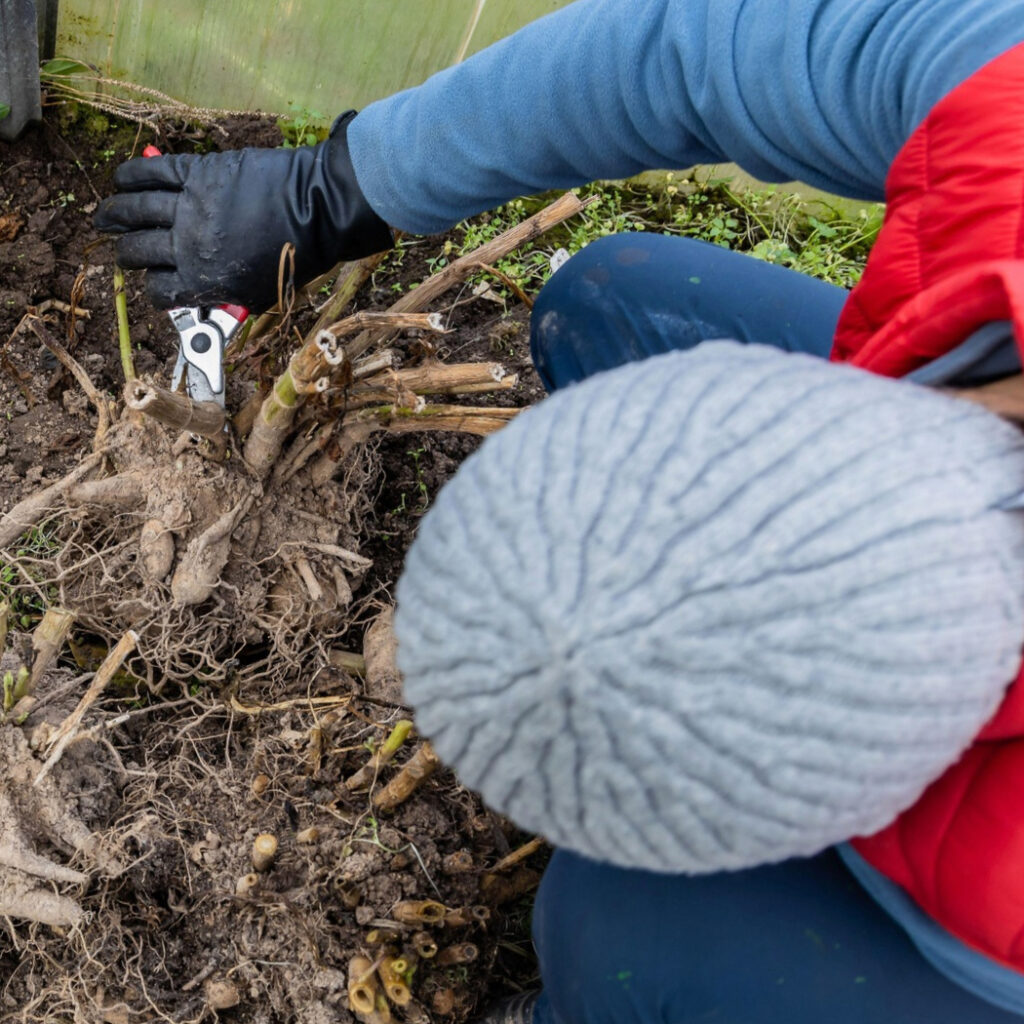
I wait for frost to signal the end of the growing season, then cut, label, and lift each clump with care. A little patience now helps me avoid snapped necks and damaged tubers later.
Watch for the First Frost and Killing Frost
I watch the forecast as fall nights turn cold. The first frost may blacken the top leaves but leave some stems green. A killing frost or hard frost turns most of the dahlia plant dark, limp, and watery.
After a killing frost, I leave the tubers in the ground for about 7 to 14 days if the soil isn’t freezing or waterlogged. This gives the eyes near the base of the dahlia stems time to mature.
Quick Tip: I dig before the ground freezes solid or heavy rain soaks the bed.
In mild winter zones, I may not need to dig dahlia tubers at all. I check my local hardiness zone and protect in-ground plants with deep mulch only if winter soil stays well drained.
Cut Back and Label Dahlia Stems
I cut dahlia stems to about 4 to 6 inches tall after frost has damaged the plants. I use clean pruners and remove loose leaves, flowers, and tangled stems from the bed.
I label every clump before I lift it. Dahlia varieties can look nearly identical once the flowers and leaves are gone, so guessing in spring gets old fast.
Quick Tip: I tie a weatherproof label to the short stem, not to a loose branch that may end up in the compost pile.
I include the variety name and flower color on each label. If I don’t know the name, I write a simple note such as “tall red dinnerplate” or “small yellow pompon.”
Lift Clumps Without Breaking Tubers
I dig on a dry day when the soil is crumbly, not sticky. I place a garden fork about 10 to 12 inches away from the dahlia stems, then push it straight down.
I lift gently from several sides instead of pulling hard on the stem. Tubers often spread wider than expected, and a fork placed too close can slice through them.
Quick Tip: I hold the clump low and support its weight with both hands; I never use the stem as a handle.
I brush off loose soil and inspect the clump. I set aside damaged tubers with deep cuts, soft spots, or rot, since they can spoil during storage. I leave healthy clumps intact until they dry and I’m ready to divide them.
Clean, Cure, and Inspect the Tubers
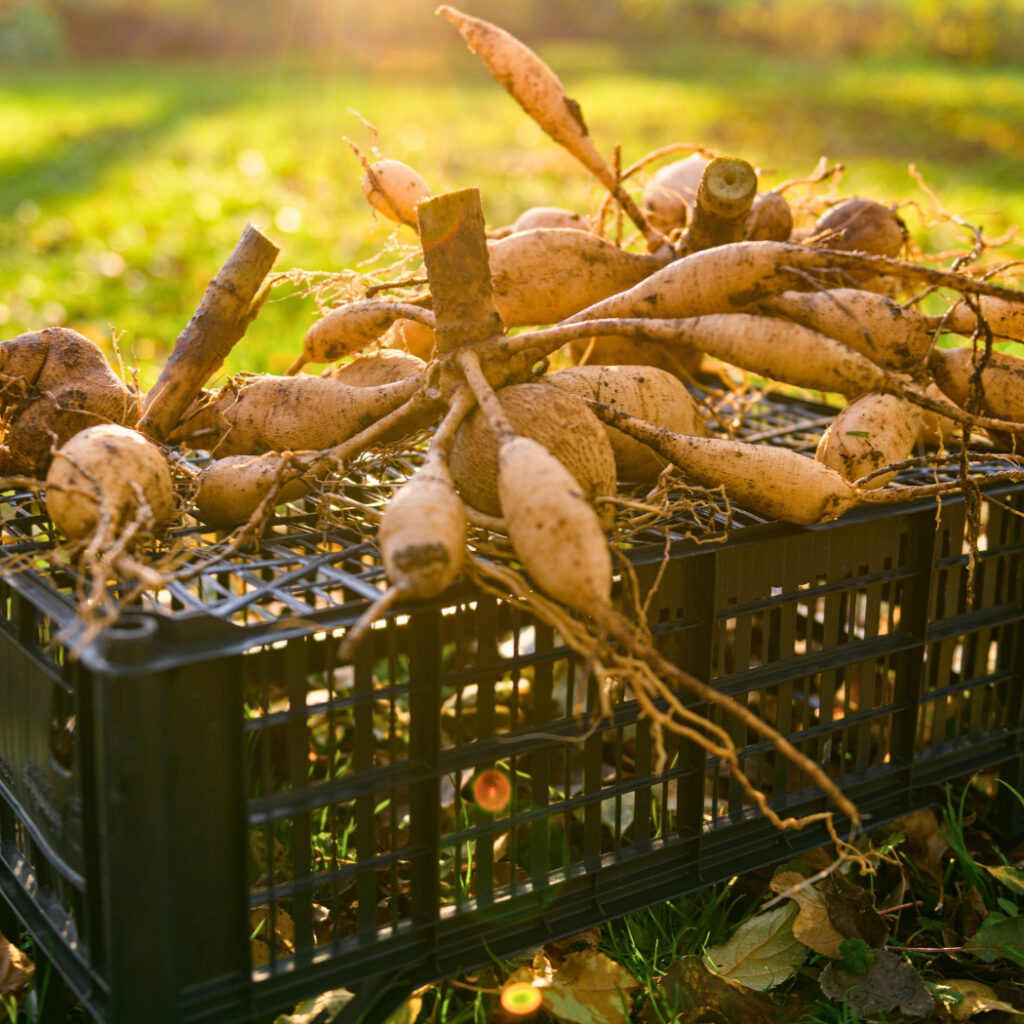
I clean dahlia tubers gently, let their skins dry, and remove anything soft or sick before storage. This limits rot and helps me save firm, healthy dahlia roots for spring.
Remove Soil and Trim Damaged Growth
I shake off loose soil with my hands or a soft brush. I don’t scrub dahlia tubers hard or wash them unless heavy clay soil hides cracks, rot, or pests.
I cut away the old stem, leaving about 1 to 2 inches above the crown. I also remove thin feeder roots and any snapped, shriveled, or soft dahlia roots. The cut surface should look firm and pale inside, not brown, black, or mushy.
Quick Tip: I throw damaged tubers and diseased plant parts in the trash, not the compost pile.
I watch for fuzzy mold, dark wet spots, and a sour smell. Those signs can point to fungal disease. I disinfect my pruners between clumps with rubbing alcohol or a disinfectant wipe so I don’t spread trouble from one dahlia clump to another.
Dry Tubers Before Packing to Prevent Rot
I place clean dahlia tubers in a single layer in a dry, frost-free spot with moving air. A garage, shed, or covered porch works if temperatures stay above freezing and rain can’t reach them.
I keep the tubers out of direct sun. Strong sun can shrivel them fast, while a damp, cold space invites rot. I let them cure for several days, usually until the cut stems feel dry and the outer skin is no longer wet or shiny.
Quick Tip: I turn the clumps once a day so damp spots don’t hide underneath.
Drying dahlia tubers takes longer during cool, wet fall weather. In rainy areas or cold zones, I use a fan nearby on a low setting, but I don’t blow hot air directly on the tubers. I avoid packing them while they still feel cool and damp.
Divide Clumps or Wait Until Spring for Easier Cuts
I can divide dahlia tubers in fall after they cure, or I can wait until spring. I divide in fall when the eyes are easy to find and I want smaller storage bundles.
Each division needs one tuber, one neck, and one visible eye on the crown. A large tuber without an eye won’t grow a new plant. I use a clean, sharp knife and discard pieces with broken necks or rot.
Quick Tip: I dust fresh cuts with fungicide only if disease has been a problem; otherwise, I let the cuts dry naturally.
I wait until spring if the eyes are hard to see or the clump feels tricky to cut. By late winter, small pink or pale bumps often show where new stems will grow. That makes dividing dahlia tubers less of a guessing game.
Pack and Store Tubers for Winter
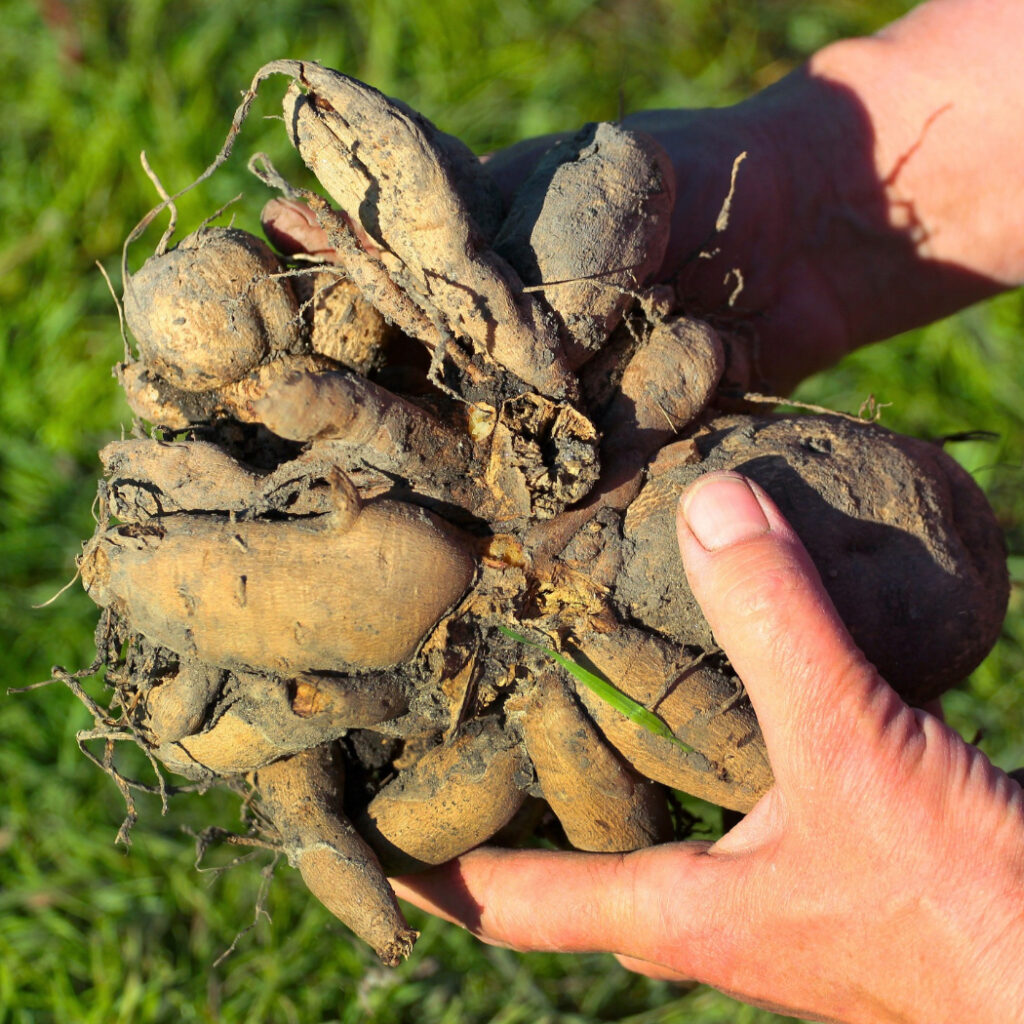
I keep dahlia tubers cool, slightly humid, and protected from hard frost. The goal is simple: prevent shriveling, rot, and early sprouts until spring.
Create the Right Temperature and Humidity Balance
For overwintering dahlia tubers, I aim for 40–50°F. At this range, tubers stay dormant without freezing. Temperatures below 32°F can kill them, while warmth above 55°F may trigger soft sprouts.
I want the packing material to feel barely damp, not wet. A tuber that looks wrinkled or feels light needs a little more moisture. A tuber with soft, dark, or smelly spots has too much moisture and may rot.
Quick Tip: I check stored tubers about once a month. I remove any rotting tubers right away, then lightly mist dry packing material if several tubers are shriveling.
Air circulation matters. Stale, damp air encourages mold, so I don’t seal tubers in airtight containers.
Choose Containers and Packing Materials That Prevent Rot
I use cardboard boxes, paper bags, or plastic bins with loose-fitting lids for dahlia storage. Cardboard boxes breathe well, while plastic bins help hold moisture but need ventilation holes or a lid left slightly open.
I place tubers in a single layer when possible. If I stack layers, I separate them with packing material so they don’t touch. Good choices include:
- Coarse vermiculite
- Dry peat moss
- Perlite
- Clean, dry sawdust or wood shavings
- Shredded newspaper
I avoid damp potting soil because it often holds too much water. I also label each clump with its variety name before packing. By March, many dahlia tubers look alike. That’s when labels earn their keep.
Quick Tip: I use coarse vermiculite for tubers that tend to shrivel and dry wood shavings for tubers that tend to rot.
Find a Cool, Frost-Free Storage Space Before Cold Hits
I store tubers in a dark place that stays near 40–50°F. A root cellar works well, but an unheated basement can also work if it doesn’t freeze or become too warm.
An attached garage may be suitable in mild winter areas, but I watch its temperature closely. In colder zones, garages can drop below freezing during sharp cold spells. I move the boxes indoors or add insulation if a hard freeze is expected.
I keep containers off cold concrete by placing them on a shelf, board, or pallet. I also keep them away from furnaces, water heaters, and sunny windows, since heat dries tubers fast.
Quick Tip: I place a simple thermometer beside the boxes. It tells me more than guessing whether the storage spot feels cool.
Monitor Stored Tubers Through Winter
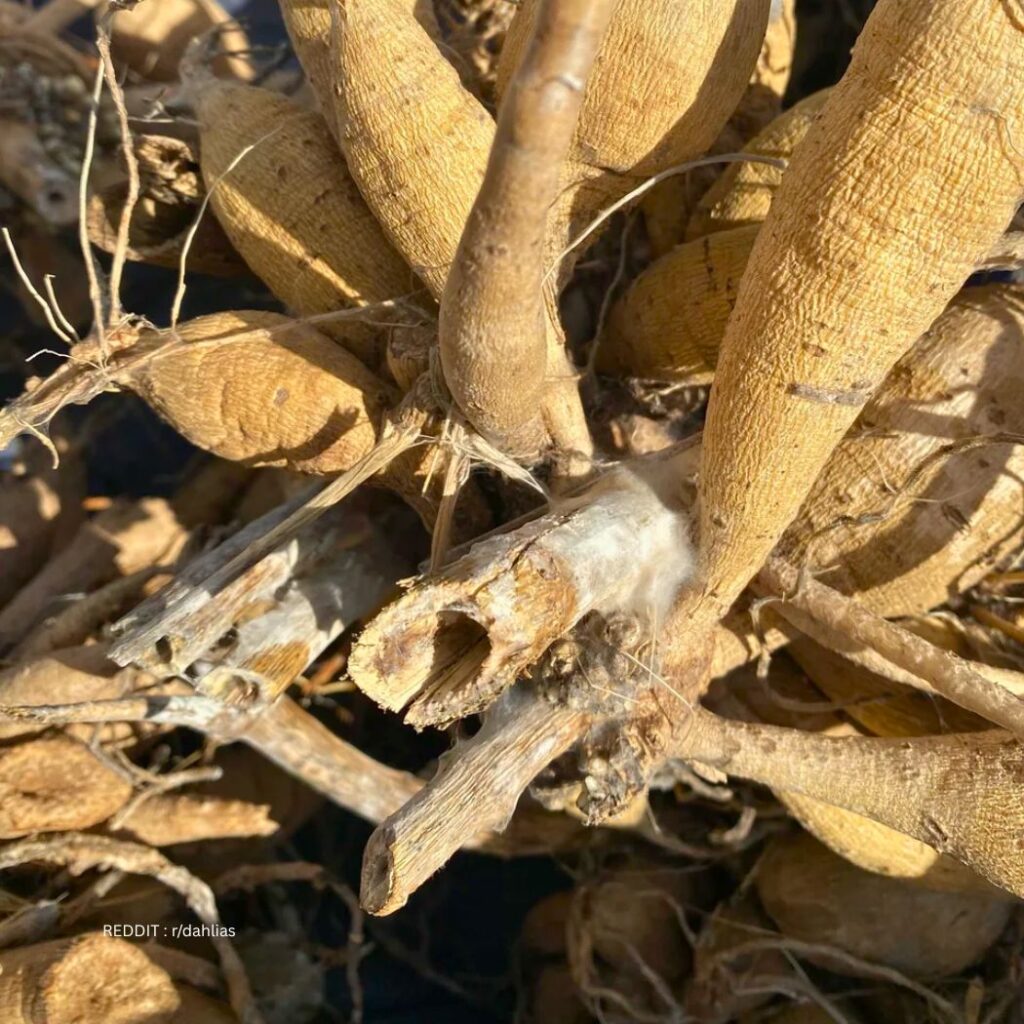
I check my dahlia tubers once a month during winter storage. I look for soft spots, mold, and drying before small problems spread.
Check Monthly for Rot, Mold, and Shriveling
I open each box or crate about once a month, preferably on a dry day. I gently move aside the peat moss, vermiculite, or sawdust and inspect each tuber.
Healthy tubers feel firm and look plump. A little wrinkling is usually fine, but a tuber that feels light, hollow, or very shriveled needs more moisture.
I watch for these warning signs:
- Rot: soft, wet, brown, or black areas
- Mold: fuzzy white, gray, green, or black growth
- Fungal disease: spreading dark spots, bad smells, or mushy tissue
- Shriveling: deep wrinkles and dry, papery skin
Quick Tip: I check the neck where the tuber joins the stem. Rot often starts there and can hide under dry soil or packing material.
I also make sure plastic bins don’t trap stale, damp air. A loose lid or a few small ventilation holes help air circulate and reduce mold.
Adjust Moisture Without Encouraging Decay
If my tubers look deeply wrinkled, I lightly mist the packing material, not the tubers themselves. I use only a little water because wet storage material can cause decay quickly.
Peat moss, vermiculite, and sawdust should feel barely damp, like a sponge squeezed hard. If the material clumps, feels cold and wet, or leaves moisture on my fingers, I spread it out to dry before putting the tubers back.
Quick Tip: I add moisture a little at a time. A dry tuber can recover better than one sitting in soggy peat moss.
Winter storage conditions can shift with the weather. In mild zones or during warm spells, storage areas may heat up, so I check more often and improve airflow if needed.
Discard Diseased Tubers Promptly Before Problems Spread
I remove damaged tubers as soon as I find soft rot, heavy mold, or a sour smell. I don’t leave them in the box “just in case.” One badly rotted tuber can spread fungal disease to nearby tubers.
For a small, firm spot, I cut away the damaged area with a clean knife until I reach clean, pale tissue. I let the cut dry for a day, then store the tuber separately for later checks.
Quick Tip: I clean my knife with rubbing alcohol between tubers so I don’t carry disease from one tuber to another.
If rot has reached the crown or most of the tuber feels soft, I discard it. I also replace wet packing material and wash plastic bins before using them again. I use a labeled fungicide only if its label allows use on stored dahlia tubers.
Wake Up and Replant Dahlias in Spring
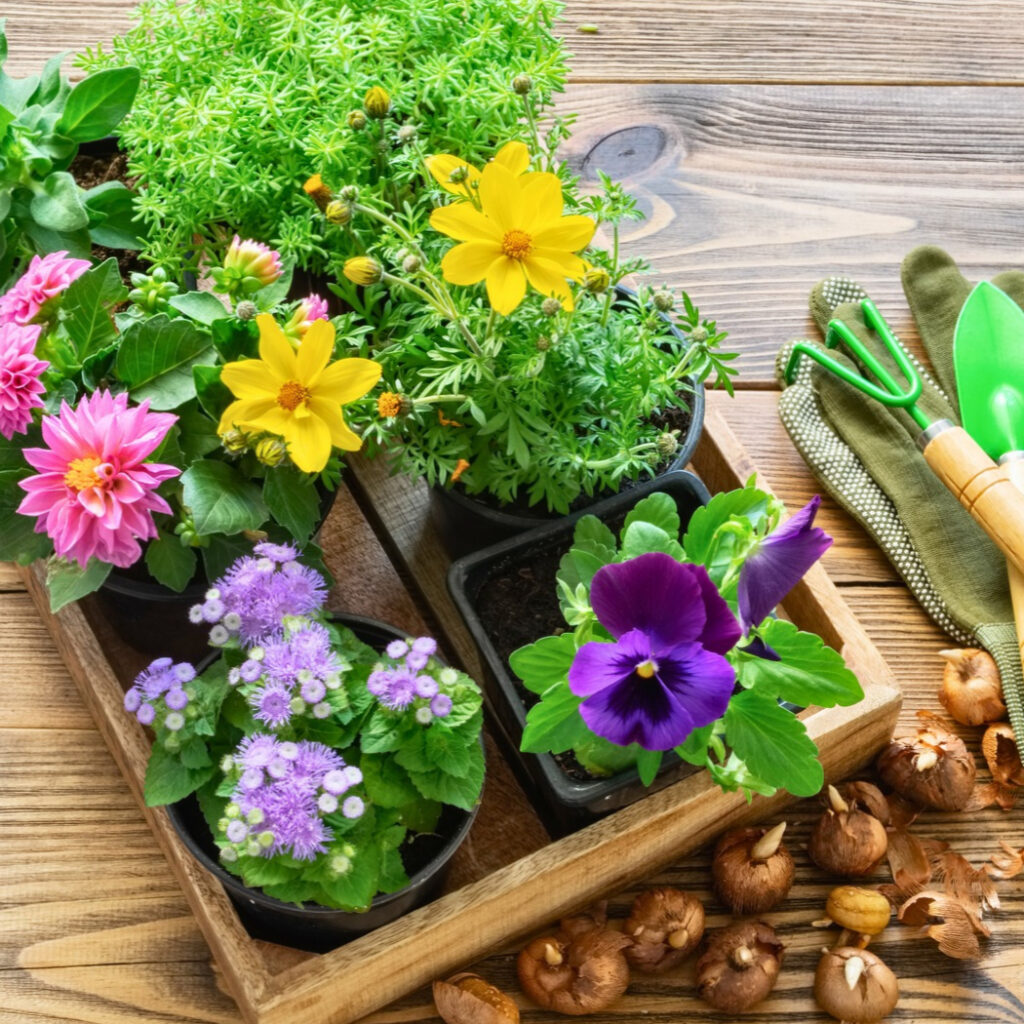
I check stored dahlia tubers for health, divide them only when needed, and plant after cold weather passes. I also start potted dahlias carefully so tender spring growth doesn’t get damaged.
Inspect and Divide Tubers Before Planting
I unwrap my dahlia tubers about 4–6 weeks before my usual planting time. Firm dahlia roots with a visible eye or small growth bud are ready to use; I discard tubers that feel mushy, smell rotten, or have deep mold damage.
I cut away small dry spots with a clean knife. If a tuber has several healthy eyes, I divide it so each piece has one eye and a solid part of the crown. A tuber without an eye won’t grow, no matter how plump it looks.
Quick Tip: I let fresh cuts dry for a day in a cool, dry place before planting.
Some dahlia varieties wake earlier than others. Longfield Gardens recommends checking stored dahlia bulbs regularly in late winter, especially if warm indoor storage has started new sprouts.
Plant After Frost Risk Has Passed
I plant dahlia tubers outdoors only after my area passes its last expected frost date. The soil should feel warm, usually at least 60°F, and not wet or sticky. In cold zones, that may mean late May or early June.
I choose a sunny bed with loose, well-drained soil. I plant each tuber 4–6 inches deep, with the eye facing up, then space plants 12–24 inches apart based on the mature size of the dahlia variety.
Quick Tip: I place a stake in the hole before covering the tuber, so I don’t stab the dahlia roots later.
I water lightly after planting, then wait until shoots appear before watering deeply. Cold, soaked soil can rot tubers. If a late frost threatens new spring growth, I cover the plants overnight with frost cloth.
Restart Potted Dahlias Safely
I start potted dahlias indoors about 4–6 weeks before outdoor planting time. I use a pot with drainage holes and fresh potting soil, not heavy garden soil. A 1- to 2-gallon pot gives one tuber enough room to begin growing.
I set the tuber on its side or with the eye facing up, then cover it with 2–3 inches of soil. I keep the pot in bright light near a sunny window and water only when the top inch of soil feels dry.
Quick Tip: I don’t move potted dahlias outside all at once; spring wind and cold nights can be rude.
After shoots reach several inches tall, I harden them off for 7–10 days. I place them outside in the shade for a few hours at first, then slowly add sun and time outdoors before planting them in the garden.
Frequently Asked Questions
I dig tubers after frost, store them cool and dry, and replant them after spring frost risk passes. I check them during winter because shriveling, mold, and freezing can ruin a healthy clump.
When should I dig up dahlia tubers for the winter?
I wait until the first light frost blackens the leaves and stems. Then I give the tubers about 7 to 14 days in the ground to finish forming their protective skin.
I dig before a hard freeze reaches the soil. In Zones 8 and warmer, I may leave dahlias in the ground if the soil drains well and I add a thick layer of mulch.
Quick Tip: I cut stems to 4 to 6 inches tall before digging so I can handle each clump without snapping the necks.
How do I properly dig and prepare dahlia tubers for storage?
I use a garden fork and start 10 to 12 inches away from the stem. I lift gently from several sides because dahlia tubers break more easily than they look.
I brush off loose soil, rinse only if needed, and let the clumps dry in an airy, frost-free spot for a few days. I remove damaged, soft, or rotten tubers before storage.
Quick Tip: I label each clump before storing it. Once the flowers are gone, many varieties look exactly alike.
What is the best material to use when storing dahlia tubers?
I pack tubers in slightly damp peat moss, vermiculite, pine shavings, or coarse sand. The material should feel barely moist, not wet or muddy.
I place them in cardboard boxes, paper bags, or plastic bins with air holes. I keep tubers from touching when possible, since rot can spread.
Quick Tip: I squeeze the packing material in my hand. If water drips out, it’s far too wet.
Can I store dahlia tubers in a garage, basement, or refrigerator?
I store tubers in a dark place between 40°F and 50°F. A cool basement often works well if it stays dry and doesn’t freeze.
I use a garage only if temperatures stay above freezing. I avoid most refrigerators because they can be too cold, too dry, or crowded with fruit that releases ethylene gas.
Quick Tip: I place a thermometer near the tubers, not across the room. Small temperature changes matter.
How long will dahlia tubers last in winter storage?
I expect healthy dahlia tubers to last from fall digging time until spring planting, usually five to seven months. They need a quick check about once a month.
I mist packing material lightly if tubers look wrinkled and dry. I cut away soft, black, or moldy spots with a clean knife, then let the cut dry before repacking.
Quick Tip: I don’t water tubers on a schedule. I add moisture only when they start to shrivel.
When and how should I replant dahlia tubers in spring?
I plant tubers after the last frost date, once the soil reaches about 60°F. In colder areas, I wait until late spring instead of putting them in cold, wet soil.
I plant each tuber 4 to 6 inches deep, with the eye facing up. Most plants need 12 to 24 inches of space, depending on the variety, and I add a stake when I plant them.
Quick Tip: I wait to water regularly until green shoots appear, unless the soil gets very dry.