
Asters show up just as other flowers start to fade, and honestly, their timing feels perfect. Their daisy-like blooms pull in pollinators and make the garden pop in late summer and fall.
If you want those steady blooms and healthy plants, you need to pick the right variety, give them plenty of sun, and make sure their roots never sit in soggy soil. I’ve learned the hard way that drainage really matters.
You can grow asters successfully by picking types that fit your climate, planting them in full sun and loose soil, and watering them steadily—but never so much that the roots drown. I’ll share how I choose strong plants from the aster family and match their bloom times to what my garden actually needs.
Spacing, seasonal care, and pest management—these are the things that make a difference. With a few tweaks, you’ll get a garden full of color and a steady stream of bees.
Choosing the Right Aster Varieties
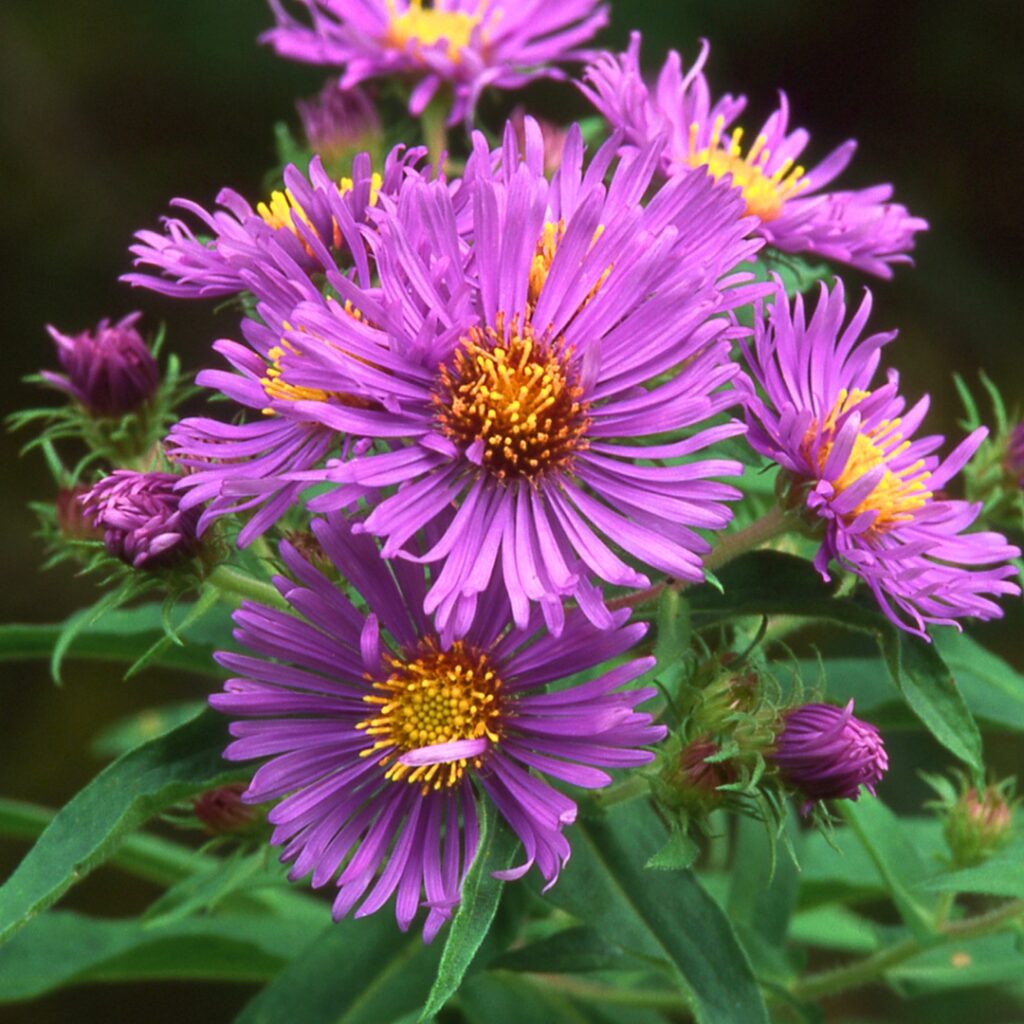
When I’m picking asters, I always think about height, bloom time, and the space I actually have. Some shoot up tall and wild, others stay low and spread gently.
Popular Perennial Options That Return Year After Year
I go for perennial asters if I want a repeat show each fall. They’re often called Symphyotrichum now, but most garden centers just say aster or Michaelmas daisy. The blooms? Classic daisy shapes in purple, pink, blue, and white.
New England aster (Symphyotrichum novae-angliae) can get tall—think 3 to 6 feet. The stems are hairy, and the flowers are big and bold. I’ve had ‘Alma Potschke’ draw in butterflies almost overnight with its bright pink blooms.
New York aster (Symphyotrichum novi-belgii) stays a bit shorter and looks tidier. It comes in so many colors and fits well along borders.
For something softer, I like heath aster and calico aster. They have airy stems covered in tiny flowers.
Quick Tip: Check your USDA zone before you buy. Most perennial asters handle Zones 3–8, but if you garden where summers are steamy, watch out for mildew.
Annual and Potted Types for Flexible Color and Small Spaces
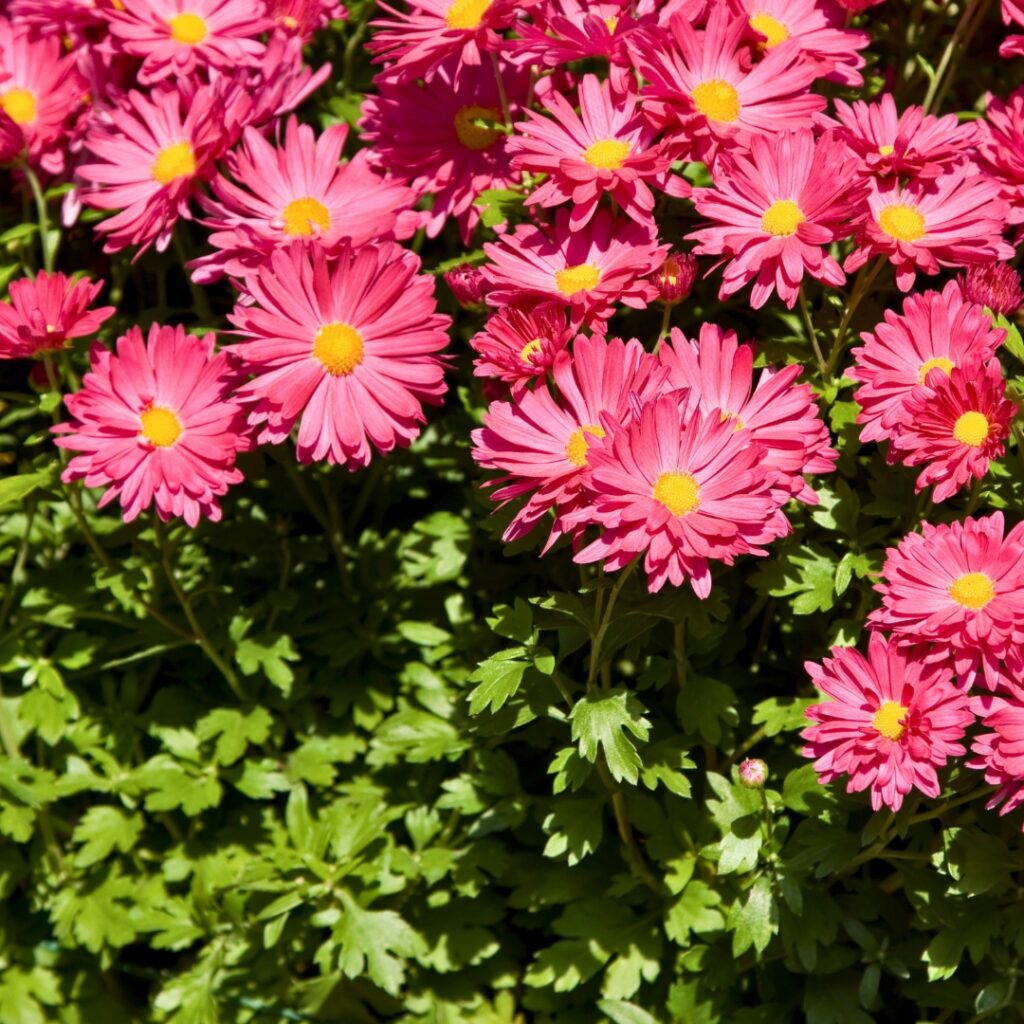
If I want fast color just for one season, I use annual asters. China aster (Callistephus chinensis) is the go-to. It blooms in summer, not fall, and comes in punchy shades—red, purple, white, you name it.
China asters are compact, usually 1–3 feet tall, so they’re great for containers or tight beds. Their flowers look fluffier or more layered than the classic daisy look.
I’ve filled patio pots with asters, too. Shorter types or young “fall asters” from the garden center work best for this. Sometimes they’re sold as “frost flower.”
Quick Tip: In pots, drainage is everything. If the top inch dries out, I water deeply. Wet soil is a recipe for root rot, especially once fall chills set in.
Selecting by Bloom Time and Color for a Long-Lasting Display
I mix up aster varieties to keep the show going from late summer into mid-fall. Some start as early as August, others wait until September or even October to peak.
For early color, I go with Aster amellus—Italian aster. It blooms ahead of most North American types and stays a tidy 1–2 feet tall.
When I want late-season punch, I always plant New England and New York asters. They’ll keep blooming until frost finally wins.
Purple and blue shades seem to pull in bees and butterflies best. If I’m planting in shade, I’ll use white wood aster (Eurybia divaricata) to brighten things up.
Quick Tip: Plant tags usually list bloom months. Mixing early, mid, and late bloomers is the only way I avoid a bare-looking garden in fall.
New England vs. New York Asters: Key Differences That Affect Your Garden
I always compare New England aster and New York aster before planting. They’re similar, but the way they grow can really change the look of a bed.
New England asters grow tall, with thick, hairy stems and bigger flowers—usually deep purple or pink. They shrug off cold and bloom late.
New York asters are shorter, bushier, and their stems are smoother with narrower leaves. Most hybrids you see in stores come from this group.
If you garden where summers are humid, New York asters can get powdery mildew. I’ve found that giving them more space helps.
Quick Tip: Want height for the back of a border? Go New England. Need something neater for the middle? New York asters are better.
Site Selection and Light Requirements
Light and airflow—these are the first things I look at for asters. The right spot means more blooms, sturdier plants, and way fewer problems with disease.
Full Sun vs. Partial Shade: How Much Light Your Aster Plant Really Needs
I plant most asters in full sun—at least 6 hours of direct sunlight. Morning sun is best; it dries off dew and keeps mildew off the leaves.
In cooler climates, I give them as much sun as I can. More light means more flowers and stems that don’t flop over.
If you’re in a hot southern zone, a little afternoon shade helps. Too much late-day sun can stress plants and fade blooms. If leaves look pale or wilt even when the soil’s moist, the sun might be too harsh.
Quick Tip: Tall, floppy asters with few blooms? They’re probably craving more sun.
I watch how shadows move in my yard before planting. The sun shifts through the seasons, so I check again in late summer, right when asters are about to bloom.
For potted asters, I move containers around to catch the best light and give them a break during heat waves. A bright patio or south-facing spot usually does the trick.
Placement for Optimal Growth: Choosing the Best Spot in Your Yard or Patio
I pick spots with good airflow and soil that drains quickly. Asters hate soggy roots. If water puddles after rain, I look for a new site or use raised beds.
Spacing matters. I leave enough room between plants so air can move. Crowded asters trap moisture and get mildew fast. Most types need 1 to 3 feet, depending on their size.
Quick Tip: After watering, I poke the soil. If the top inch is dry but the plant looks firm, drainage is probably fine.
I avoid planting them near big shrubs or trees—roots compete for water, and shade creeps in as those other plants grow.
For potted asters, I always use containers with drainage holes and keep them out of spots where rain can flood them. On balconies, I watch out for wind that can snap tall stems.
When I get the spot right, asters stay upright, bloom like crazy, and don’t need much from me.
Soil Preparation and Drainage
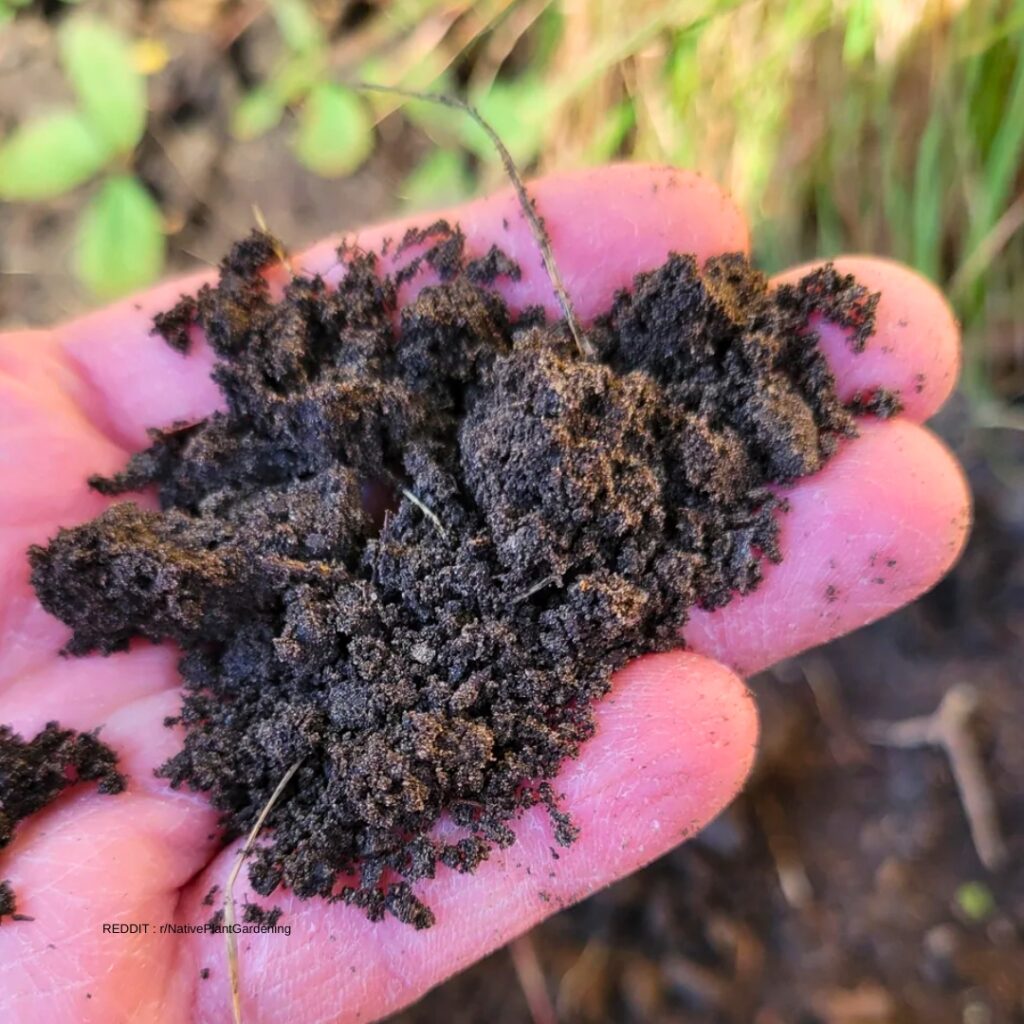
Loose, well-drained soil and steady moisture are the secret to better blooms. Asters will sulk if their roots sit in water, so I always prep the ground before planting.
Ideal Soil Types for Asters That Support Strong Roots and Steady Growth
I go for well-drained soil that holds a bit of moisture but never stays soggy. Loamy soil is best—it feels crumbly and dries out within a few hours after rain.
I mix in compost about 8–12 inches deep before planting. That helps roots spread and keeps the soil moist without getting swampy.
For containers, I use a good potting soil—never garden soil, which compacts and blocks drainage. Sometimes I add a bit of vermiculite for more even moisture.
Hot southern gardens dry out faster, so I check the soil more often. In cooler or rainy spots, I make sure water doesn’t pool around roots.
Quick Tip: After watering, check the soil the next day. If it’s still soggy, fix drainage before you plant.
Improving Clay and Poor Soil for Better Drainage and Root Health
Heavy clay is a nightmare for asters. It’s sticky and dense, and I never plant without fixing it first. Clay holds too much water, and the roots rot.
I mix in compost and shredded leaves—about 2–3 inches on top, then dig it in deep. This breaks up clumps and lets air reach the roots.
Poor or sandy soil? I add compost to boost nutrients and help it hold consistent moisture. Sandy soil drains too fast otherwise.
Raised beds work well if drainage is terrible. They lift roots above the wet ground, so overwatering isn’t as risky during rainy spells.
Quick Tip: If soil clumps into a hard lump in your hand, add organic matter before you plant.
pH and Fertility Considerations for Long-Lasting Blooms
I shoot for a soil pH between 6.0 and 7.0—slightly acidic to neutral. I use a basic soil test kit to check before planting.
If the soil’s too acidic, I add lime. If it’s too alkaline, I mix in compost or sometimes sulfur based on the test. Guessing doesn’t work here; even small changes matter.
I feed asters lightly. Too much nitrogen means lots of leaves but not many flowers. A balanced fertilizer or just compost in spring usually does the job.
Overwatering can wash nutrients away, especially in sandy soil. I water deeply but only when the top inch feels dry.
Quick Tip: Test your soil before adding fertilizer. More food doesn’t always mean more flowers.
Planting and Spacing Tips
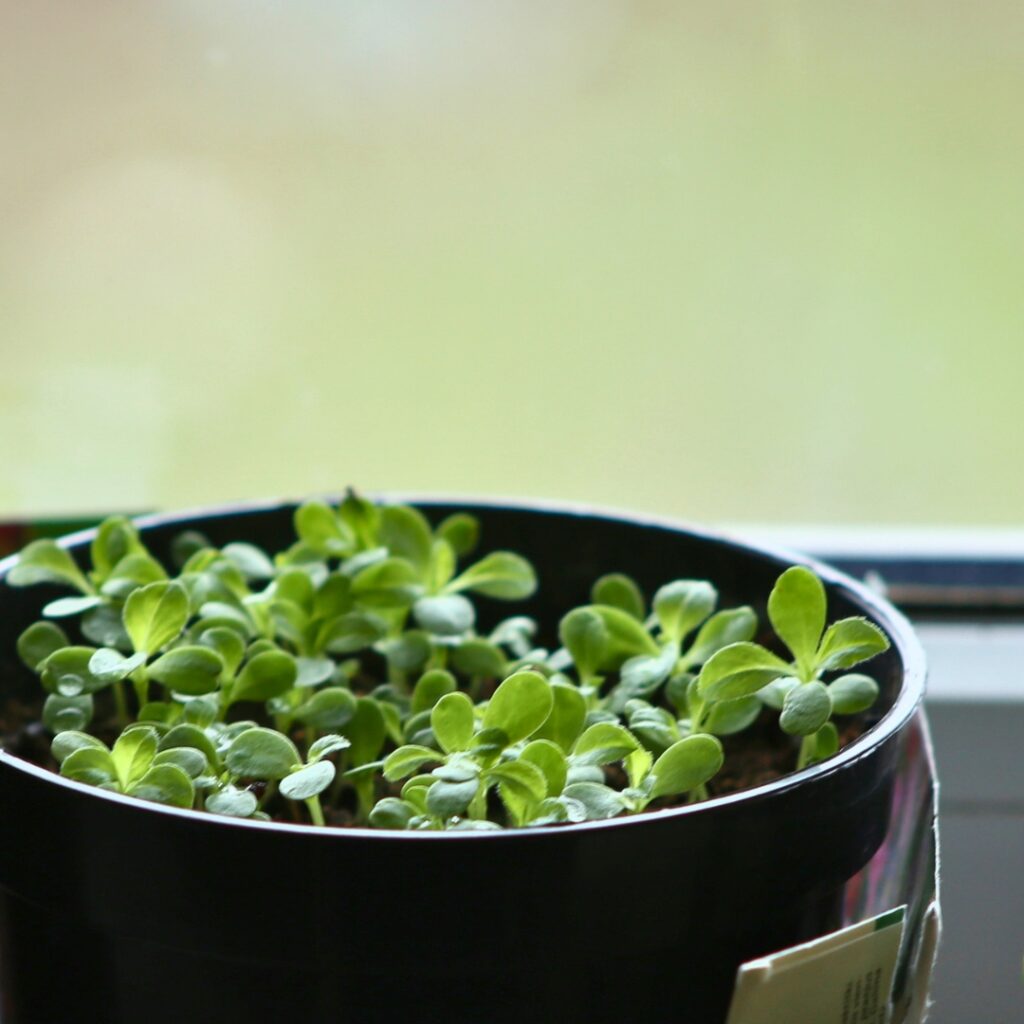
I plant asters at the right time, give them space, and lock in moisture early. These basics make everything easier—stronger stems, fuller blooms.
Spring Planting and Sowing Seeds for Strong Early Growth
I plant asters in early spring, after the last frost. In colder places, I wait until the soil feels workable and isn’t soggy. Warmer zones let me start a bit earlier, but I always dodge heavy rain spells.
When sowing aster seeds, I press them lightly into the soil, covering with just 1/8 inch of fine soil. They need light to germinate, so I don’t bury them deep. Watering is gentle so I don’t wash them away.
If I start seeds indoors, I use trays in a bright window. Once seedlings hit 2–3 inches and have a couple of true leaves, I harden them off for a week before planting outside.
Quick Tip: If the top inch of soil dries out, water lightly. Keep it moist but never soggy while seeds sprout.
Spacing Guidelines by Variety for Healthier Plants and Better Airflow
I always check plant tags for spacing—compact asters need about 8–12 inches between plants, while taller types need 18–24 inches.
Good spacing means better airflow, which helps prevent mildew. Crowded plants also fight for water and nutrients, making stems weak.
I measure before planting. It might look too far apart at first, but asters fill in fast by midsummer. If I plant too close, I thin them early instead of waiting for problems.
Quick Tip: Not sure? Give them a few extra inches. More space now saves headaches later.
Using Mulch for Moisture Retention and Steady Root Growth
After planting, I toss down a 2-inch layer of mulch around the base—usually shredded bark or clean straw. I leave a gap of about an inch around the stems to keep rot away.
Mulch keeps the soil cool and holds moisture, which is a relief during those scorching summer weeks when asters start forming buds. Fewer weeds pop up, too, so water goes where it should.
If I’m gardening somewhere rainy, I go easy on the mulch so things don’t get soggy. In drier spots, I poke under the mulch with my finger—if it feels dry, I give the plants a deep drink.
Quick Tip: Mulch right after spring planting to trap in moisture before the real heat hits.
Caring for Established Asters

Once asters settle in, I pay attention to watering, light feeding, pruning, and support. These habits keep them healthy and blooming longer, plus they make for better cut flowers.
Watering and Moisture Management for Strong Roots and Longer Bloom Time
For established asters, I stick to consistent moisture, especially during bud set and bloom. If the top inch of soil dries out, I water deeply at the base so roots grow down, not out.
I avoid splashing the leaves because damp foliage is a magnet for mildew, especially on humid days or cool fall nights. Spacing plants well and thinning crowded stems helps with airflow.
Hotter zones mean I check soil more often. If rain is steady in cooler regions, I hold back on watering.
Quick Tip: Water early in the morning so leaves dry quickly and roots soak up moisture before the sun gets intense.
Fertilizing for Abundant Blooms Without Weak Growth
Asters don’t need much food, but they perk up with a light feed. I use a balanced flower fertilizer once in spring when new growth hits about 6 inches.
Too much nitrogen makes them floppy and reduces flowers, so I skip high-nitrogen lawn fertilizers. If the soil’s poor, a second light feeding in early summer helps extend bloom time.
If leaves look pale or growth seems slow, I spread a thin layer of compost and water it in. That usually does the trick.
Quick Tip: Feed lightly and keep an eye on the leaves. Deep green and steady buds mean things are going well.
Pruning and Pinching for Shape, Fullness, and Better Air Flow
I pinch young asters in late spring when they reach 6 to 8 inches tall, just taking off the top inch with my fingers. This makes the plants bushier with more blooms.
Taller types might get pinched once or twice before mid-summer, but after that, I let buds form. Deadheading keeps things tidy and sometimes stretches the bloom season.
Crowded stems get trimmed for better air flow, which cuts down on powdery mildew. Those healthy cuttings root well if you want more plants.
Quick Tip: Stop pinching by mid-summer or you’ll risk delaying fall blooms.
Supporting Tall Varieties So Stems Stay Upright and Flowers Look Their Best
Some asters shoot up 3 to 5 feet, and wind or rain can flatten them fast. I slide in stakes or grow-through supports early, before stems get too tall.
If needed, I tie stems with soft twine—never too tight. Good support keeps flowers upright and makes it way easier to cut for bouquets.
Windy spots or open yards make support even more important. Shorter border types usually hold up on their own, but I check them after storms just in case.
Quick Tip: Get supports in by early summer. It’s a headache trying to prop up a fallen plant later.
Propagation and Division Techniques
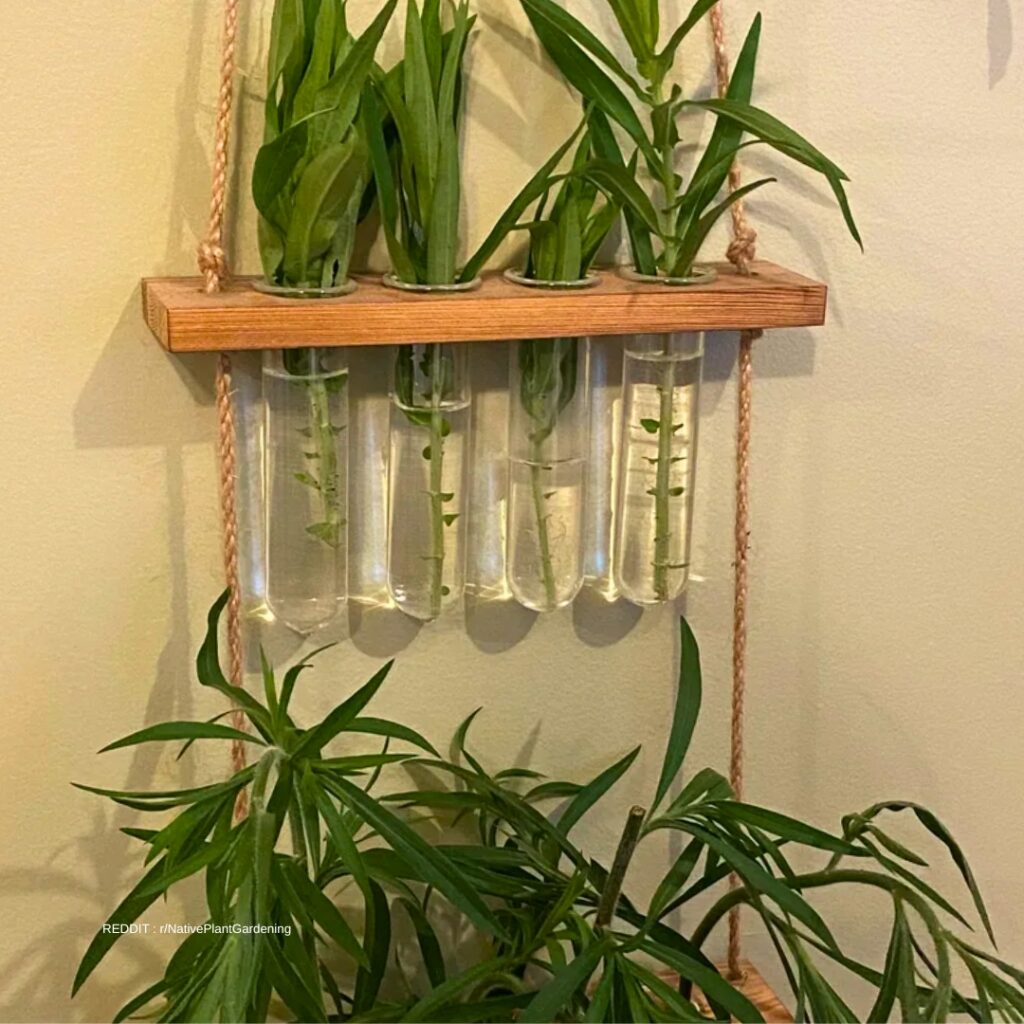
I multiply asters by starting seeds, taking cuttings, or dividing old plants. Each method works if you get the timing right and handle roots with care.
Propagating by Seed, Division, and Stem Cuttings
I start aster seeds indoors about 6–8 weeks before the last frost. I press seeds lightly into moist mix—no need to bury them, since they need light to sprout.
Seedlings usually pop up in 10–14 days. I keep the soil just moist, watering gently if the top inch dries out.
For cuttings, I snip a 4–6 inch soft stem in late spring, remove the lower leaves, and tuck it into moist potting mix. I keep it in bright, indirect light.
Roots show up in about 3–4 weeks. I give a gentle tug to check for resistance.
Quick Tip: I always label trays with dates and varieties—otherwise, things get mixed up fast.
Dividing Mature Clumps
I divide older asters every 2–3 years to keep them fresh. Early spring is best when new growth is just a few inches tall, though early fall works in warmer areas.
I dig up the whole clump, then pull or cut it into smaller pieces. Each piece needs strong roots and a few shoots.
The woody old centers usually get tossed. I keep only the healthy outer sections.
Divisions go back in at the same depth, spaced 18–24 inches apart for good airflow.
Quick Tip: Water the clump the day before dividing. Damp soil makes digging easier and roots less likely to break.
Tips for Healthy Transplants
Cool, cloudy days make transplanting easier—hot sun stresses new roots fast. I dig a hole twice as wide as the root ball and set the plant so the crown is level with the soil.
Planting too deep can cause rot, so I watch the depth. After planting, I water slowly and deeply so moisture reaches several inches down.
I add a thin layer of mulch to lock in moisture but keep it away from the stems. For the first two weeks, I check soil every few days and water if the top inch dries out.
Quick Tip: I pinch back tall new growth after transplanting to help the plant branch out and stay compact.
Common Pests, Diseases, and Solutions
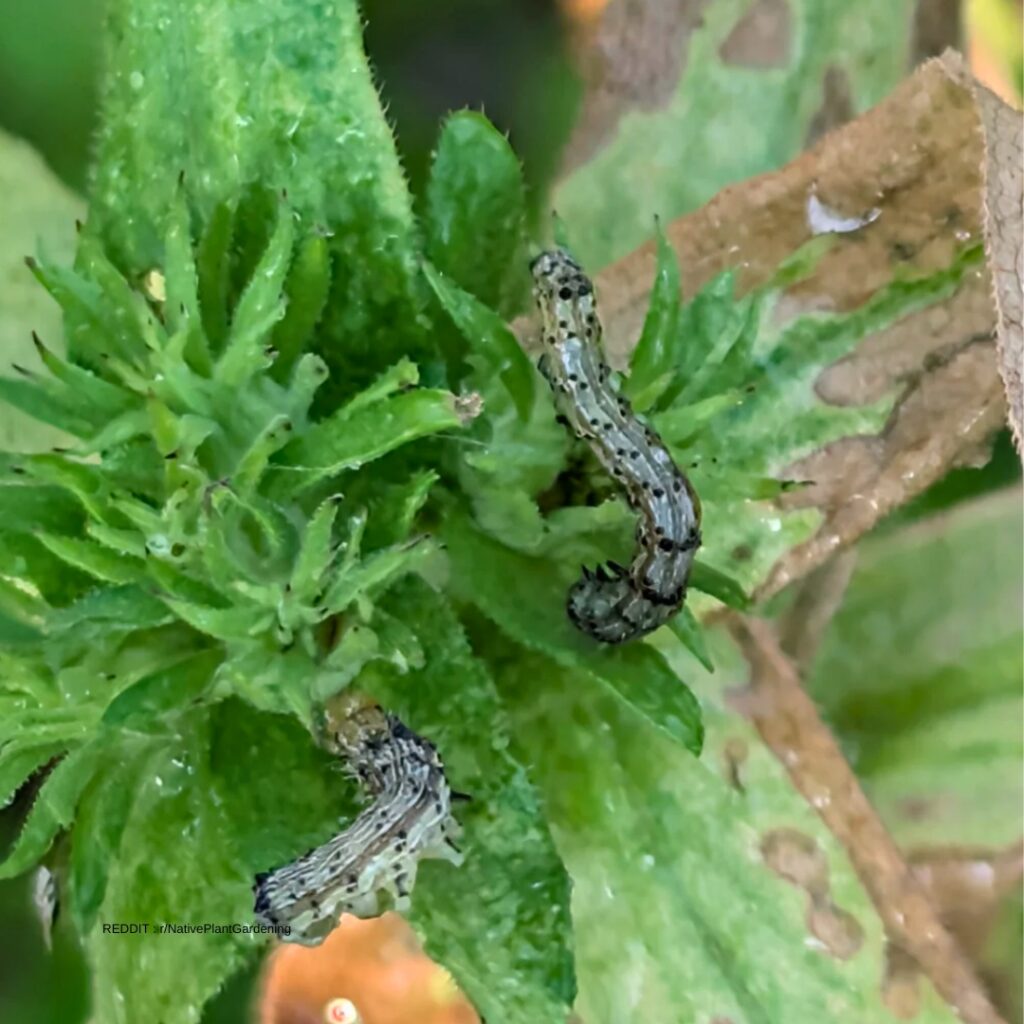
Asters usually stay healthy if I keep leaves dry, space plants well, and check them regularly. Most issues come from powdery mildew, lace bugs, poor airflow, or overwatering, so I tackle those first.
Managing Powdery Mildew Before It Spreads Across Leaves
Powdery mildew looks like white or gray powder on leaves and stems. I spot it most in late summer when days are warm and nights are cool and damp.
I snip off infected leaves right away and toss them in the trash—not the compost. That slows things down quickly.
I water at the base and avoid wetting the leaves. Crowded stems and wet foliage make mildew worse, especially in humid climates.
If mildew keeps coming back, I use a fungicide labeled for powdery mildew on flowers, spraying in the morning so leaves dry fast.
Quick Tip: If leaves look dusty but feel dry, act fast. Mildew can take over before you know it.
Aster Pests: Lace Bugs and More That Chew and Suck Sap
Lace bugs are tiny but cause obvious damage—pale spots on leaf tops, dark specks underneath, and sometimes yellowing or dry leaves.
I flip leaves to check for bugs or eggs. If I spot them, I blast the undersides with a strong stream of water every few days to knock them off.
Heavy infestations get insecticidal soap, focusing on the undersides where lace bugs hide. I repeat as needed until things clear up.
Aphids and spider mites show up too, especially in hot, dry spells. Overwatering stresses plants and draws in more pests.
Quick Tip: Check leaves weekly. Catching pests early saves the plant and means less spraying.
Enhancing Air Circulation to Prevent Issues Like Mildew and Rot
Good air movement prevents a lot of headaches. I space asters so air can move even when they’re full size.
If things get crowded, I thin out a few stems and stake tall types so they don’t flop onto each other.
I only water when the top inch of soil feels dry—soggy soil causes root rot and weak plants. After rainy spells, I watch for leaves that stay damp all day.
Shady spots need extra attention, since mildew shows up faster where air doesn’t move much.
Quick Tip: Give each plant space to breathe. Better airflow means fewer diseases and stronger blooms.
Enhancing Your Garden with Asters
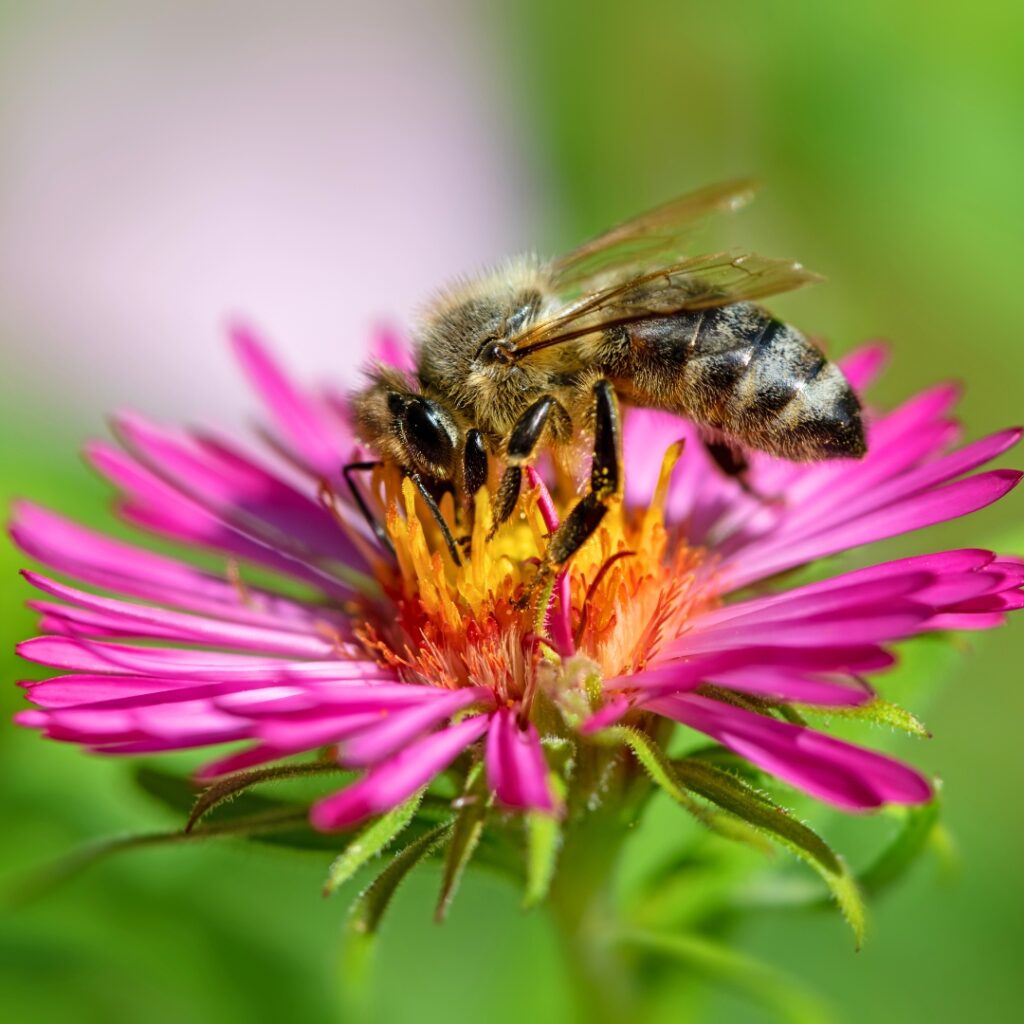
I grow asters because they bring a late burst of color and life to the garden. Bees and butterflies love them, they pair nicely with sedum, and they make sturdy cut flowers for the house.
Attracting Bees and Butterflies with Late-Season Aster Blooms
I plant asters in full sun for the most blooms, which means more pollinators show up. Bees and butterflies flock to flowers that are open and easy to reach.
Single-flowered types work best since the open centers make nectar and pollen easy for bees. When other flowers fade in early fall, asters become a reliable food source.
I avoid spraying anything near blooming plants. Even mild pesticides cut down pollinator visits. If pests need attention, I treat early in the morning before flowers open wide.
Quick Tip: Plant at least three asters together for a bigger landing zone—bees find them faster that way.
In hot climates, I give them a bit of afternoon shade so blooms last longer. In cooler areas, I let them soak up all the sun they can get.
Companion Planting with Sedum for Stronger Fall Color and Support
Sedum and asters bloom together, so I often plant them side by side. Sedum’s thick leaves and flat flowers contrast nicely with aster petals, making the combo look balanced.
Both like well-drained soil, so I avoid soggy spots—if soil stays wet on top for days, I fix drainage first. Sedum’s sturdy stems also help support taller asters that might lean.
Bees love bouncing between both plants. The pairing really boosts late-season pollinator activity.
Quick Tip: Space plants 12–18 inches apart for better air movement and less mildew.
After the ground freezes in colder zones, I mulch for winter protection. In warm areas, I keep mulch light to avoid trapping too much moisture.
Tips for Long-Lasting Cut Flowers from Your Aster Patch
I cut asters early in the morning when stems are full of water. Flowers that are fully open but still fresh last best indoors—half-open buds usually don’t hold up.
I strip leaves from the lower half of the stem since leaves in water breed bacteria and shorten vase life. Stems go straight into clean, cool water.
Every two days, I change the water and trim a half inch off the stems. With this care, cut asters last about a week, sometimes more.
Quick Tip: Keep the vase out of direct sun and away from heat vents to slow wilting.
If it’s especially hot outside, I harvest more often since blooms fade faster on the plant.
Frequently Asked Questions
Asters thrive with good light, steady moisture, and a bit of attention. I keep an eye on sunlight, soil, spacing, and timing to make sure they stay full and covered in blooms.
Can I grow asters indoors, and what light do they need to bloom well inside?
You can absolutely grow asters indoors, but they really crave bright light. A south- or west-facing window is your best bet—aim for at least six hours of direct sun if you want them to bloom.
If you stick them in a north-facing window, you’ll probably notice the stems stretch and get a bit leggy. Leaves can pale, and blooms might stay small or take forever to open.
Keep the soil just barely moist, and make sure the pot drains well so the roots don’t sit soggy. Indoor air gets dry fast, so I usually poke a finger into the top inch of soil to check if it’s thirsty.
Quick Tip: If stems start leaning toward the window, just rotate the pot every few days—keeps things growing straight.
How do I grow asters in pots so they stay compact, healthy, and full of flowers?
I always grab a pot that’s at least 10 to 12 inches wide for a single plant. Drainage holes are a must, otherwise the roots get waterlogged and unhappy.
Regular potting mix works way better than garden soil. Garden soil gets heavy and holds too much water in a pot, which is just asking for trouble.
Potted asters dry out faster than those in the ground, especially during summer heat waves. Sometimes I water every day if the top feels dry—no shame in checking often.
Full sun is non-negotiable if you want a bunch of flowers. Less sun, fewer blooms—simple as that.
Quick Tip: I pinch back young stems in late spring to keep the plant bushy. Otherwise, they get tall and floppy, which isn’t a great look.
What’s the best way to start asters from seed, and when should I sow them for strong plants?
I usually start seeds indoors about six to eight weeks before my last spring frost. For me in zone 5, that’s often sometime in March or early April.
Press seeds gently into moist seed-starting mix and cover with a thin layer of soil—nothing fancy. They need light and steady moisture to get going.
If you live somewhere warm, you can sow seeds outside after the last frost. The soil should feel cool to the touch, but not frozen.
As soon as seedlings pop up, they need bright light or they’ll get spindly. A sunny window or grow light works well.
Quick Tip: I harden off seedlings for a week by putting them outside for a few hours each day before planting. Makes the transition way less shocking for them.
How tall do asters typically grow, and do they need staking in windy spots?
Most garden asters shoot up anywhere from 1 to 4 feet tall, depending on the variety. Some stay tidy, but others can get wild.
Short types usually stand up on their own. Taller ones? They flop, especially after a good rain or if your yard gets gusty.
I like to add simple stakes or a plant ring early in the season. It’s much easier to give them support before they start leaning all over the place.
Pinching stems in late spring helps keep them shorter and fuller. Honestly, it makes a big difference.
Quick Tip: If summer storms roll through your area, go ahead and stake taller asters—even if they look sturdy at first. Better safe than sorry.
What month do asters usually bloom in the garden, and how long do flowers last?
Asters tend to bloom from late summer into fall—August through October in most places. Cooler zones might see blooms start in September, while warmer spots can get flowers earlier and keep them longer if frost holds off.
Each plant can bloom for weeks, especially if nights stay cool. I always deadhead spent blooms to keep things tidy and encourage more buds to show up.
Quick Tip: If frost threatens early, I toss a light fabric over the plants at night. Sometimes that buys you a few extra days of color.
Do asters spread over time, and how can I keep them from taking over a bed?
Most perennial asters really do spread by sending out underground roots. Give them a few years, and you’ll spot one plant turning into a hefty clump.
I make a habit of dividing my asters every couple of years, usually in spring. This routine keeps the patch from getting out of hand and the plants themselves a lot happier.
When it’s time to divide, I dig up the clump and slice it into smaller chunks, making sure each bit has some roots. I always replant the healthiest-looking pieces and compost anything that seems past its prime.
If I’m serious about keeping asters in check, I stick them near edging or a path—anything that blocks their underground runners does the trick.
Quick Tip: When the middle of an aster clump gets sparse or woody, that’s my cue to divide and give it a fresh start.