
Chrysanthemums show off their best colors in fall, but they won’t do it alone. They crave the right nutrients to really put on a show. For strong stems and loads of flowers, I’ve had the best luck with a balanced fertilizer—think NPK ratios like 5-10-5 or 10-10-10—every couple weeks during the growing season. If you skip feeding, your mums might look a bit sad and sparse, and honestly, that’s just disappointing after all your work.
Timing isn’t just a detail; it’s half the game. I’ve definitely seen blooms thrown off when I fertilized too early or too late. Even the type—liquid, granular, or slow-release—can make a difference depending on your setup.
If this sounds like a lot, don’t worry. I’ll share what your mums actually need, when to feed them, and which products have saved my own garden beds and porch pots. I’ll also flag some common mistakes that can sneak up on you and how to fix them fast.
Key Nutrients and NPK for Thriving Chrysanthemums
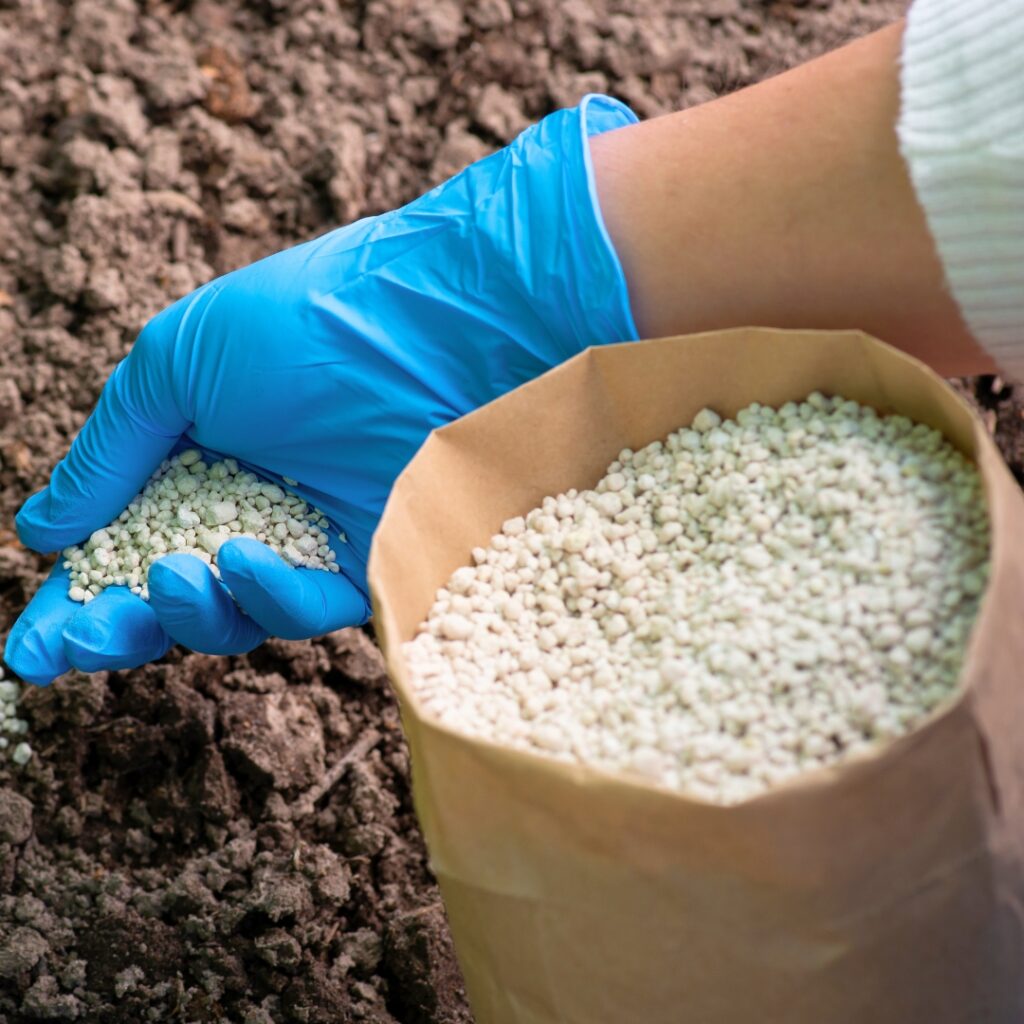
Mums need three main nutrients: nitrogen, phosphorus, and potassium. They also want smaller doses of trace elements. The ideal NPK ratio shifts as your plants grow up.
Nitrogen, Phosphorus, and Potassium Roles: What Each Nutrient Does for Your Mums
Nitrogen is all about lush, green leaves and sturdy stems. When I’ve given enough, my mums are deeper green and fill out nicely. Go heavy on nitrogen late in the season, though, and you’ll get more leaves than flowers. Timing, again, is everything.
Phosphorus is the secret to strong roots and, most importantly, flower power. Buds just won’t come on strong without it. If your mums drag their feet blooming or you’re counting fewer flowers, phosphorus is usually the culprit.
Potassium is a bit of a guardian. It toughens up the whole plant, helps fight off disease, and even improves the color and staying power of the blooms. When I’ve kept potassium up, my mums shrug off cold snaps and pests much better.
Quick Tip: Notice pale or yellowing leaves? That’s probably a nitrogen shortage. If the stems flop, suspect low potassium.
Importance of Trace Elements: The Supporting Cast Your Mums Can’t Ignore
Iron, magnesium, calcium, and manganese don’t get the spotlight, but mums need them. Iron keeps leaves from yellowing and helps them stay vibrant. Magnesium is all about chlorophyll, so it’s crucial for photosynthesis.
Calcium keeps cell walls strong, and manganese helps mums use other nutrients properly. If you’re using a “complete” fertilizer, you’re probably covered, but it’s worth checking the label. I’ve been burned by single-nutrient products missing these extras.
Quick Tip: If you see yellowing between the veins but the veins themselves stay green, your mums are probably begging for more iron or magnesium.
Optimal NPK Ratios for Mums: Matching Fertilizer to Growth Stage
Early on, I stick to a balanced fertilizer—something like 4-4-4 NPK. It’s simple and covers all the bases while your mums are getting established.
As soon as buds start showing, I swap to a formula with more phosphorus—3-5-4 NPK is a good bet. That little boost in the middle number really does bring on more blooms and richer color.
Some folks keep it balanced all season, and that can work. Just avoid high-nitrogen formulas after mid-summer, or you’ll be left waiting for flowers that never come.
Quick Tip: If you’re in a cooler zone (7 and under), switch to a bloom booster by mid-July. That way, your mums can beat the first frost.
Timing and Frequency: When to Fertilize Mums
Getting the schedule right is honestly what makes or breaks your mum display. I break it down into three stages: early growth, bud formation, and the bloom period itself.
Fertilizing in Early Growth (When Your Mums Are Just Getting Started)
When I see new shoots in early spring, I start feeding. That’s when mums are hungriest for nutrients to build up roots and stems.
For mums in the ground, I go with a balanced fertilizer every two weeks—10-10-10 or 5-10-5 works well. Nitrogen helps that leafy growth take off.
Container mums get hungry faster since water washes nutrients out. I feed potted mums every week or so, but I dilute the fertilizer to half strength to avoid overdoing it.
Quick Tip: Mix fertilizer into the soil at planting time in spring for a head start.
If you’re planting cuttings or divisions, give them a couple of weeks to settle before introducing fertilizer. They need that time to root in and recover.
Feeding During Bud Formation (The Make-or-Break Window for Blooms)
As soon as I spot tiny buds—usually late July or early August—I switch gears. This is when feeding really counts for flower production.
I back off the nitrogen and up the phosphorus. Something like 5-10-10 or 10-20-10 gets the job done. Too much nitrogen here just gives you bushy plants and not enough flowers.
I keep feeding every 10-14 days until the buds show their true color. Once I see the first hints of petals, I stop fertilizing altogether.
Quick Tip: Look for those tiny green nubs at the tips—that’s your cue to switch to a bloom booster.
The exact timing depends on your zone. Warmer areas see buds earlier, while cooler regions might lag by a couple weeks.
Best Practices for Bloom Season (Protecting Your Display)
I put the brakes on fertilizer once the flowers start opening. Feeding during bloom actually cuts the lifespan of the flowers.
At this point, mums focus on the blooms, and extra nutrients just go to waste. Overfeeding now can make petals fade faster or drop early.
If you’re keeping mums as perennials, you can give them a light, low-nitrogen feed after the first hard frost. This helps roots store up for winter, but I skip this for annual mums.
Water-soluble fertilizers seem to work best during the main growing season. They get nutrients to the roots fast, which mums appreciate.
Quick Tip: Mark your calendar when you see bud color—no more feeding after that.
Types of Chrysanthemum Fertilizers and Their Benefits
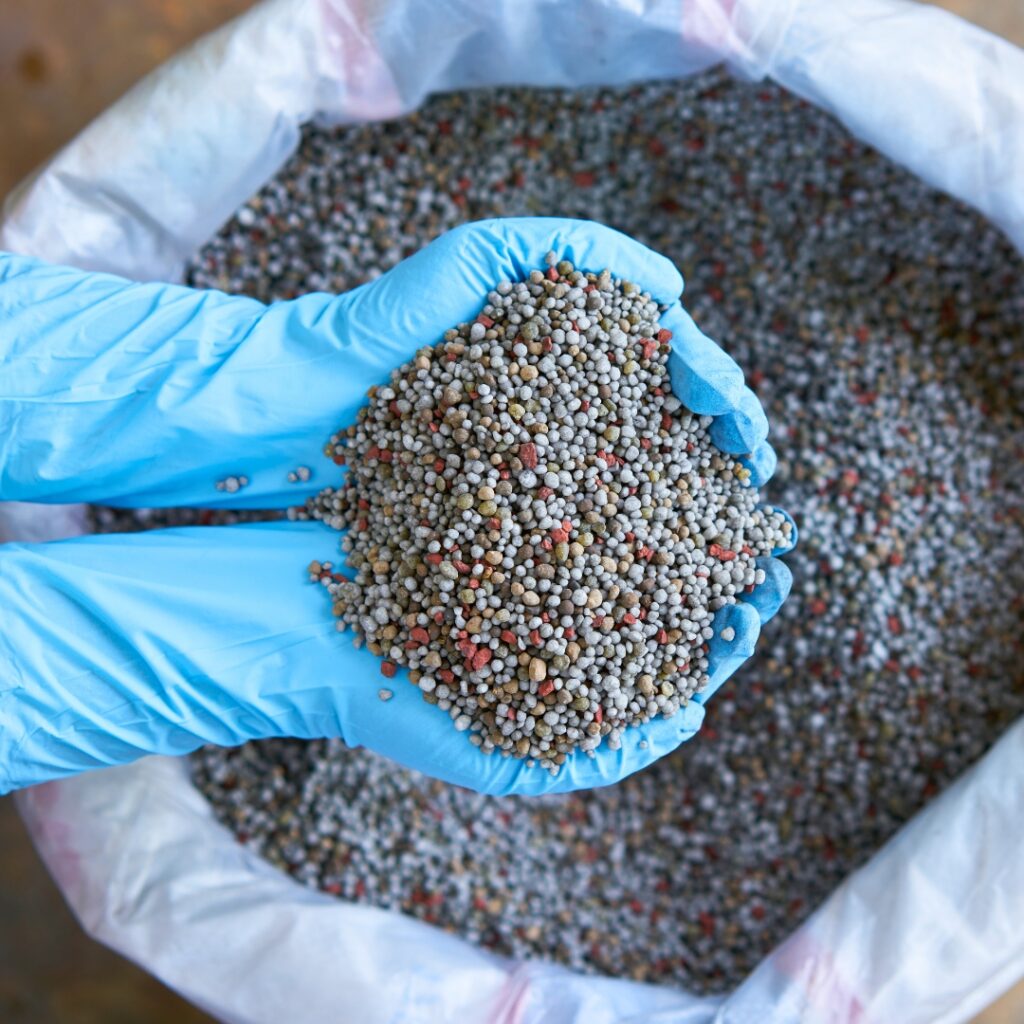
Mums aren’t picky about the delivery method, but each fertilizer type has its quirks. Granular feeds slowly, liquids work fast, and the choice between organic and synthetic changes both plant health and soil quality over time.
Granular Fertilizer Options: Small Pellets That Feed Your Mums Over Time
Granular fertilizer comes as tiny pellets you can toss around the base of your mums. I like these for their simplicity—no measuring, no mixing. Just scatter and water them in.
They break down over weeks, feeding your plants steadily. Most granular blends use balanced ratios like 10-10-10 or 5-10-5, which are solid choices for mums.
Quick Tip: Apply granular fertilizer in early spring with new growth, and again every month or so through the season.
If your mums need a quick pick-me-up, granular might be too slow. But for regular feeding, it’s hard to beat the low effort.
Benefits of Slow-Release Formulas: Set It and Forget It Feeding
Slow-release fertilizers are a lifesaver if you hate constant feeding. These have a special coating that lets nutrients out over months—usually 3-6, depending on weather.
Jobe’s Organics makes a good slow-release option for mums. The steady supply means no risk of burning, and your plants stay fed without much fuss.
In my experience, these work best when temperatures are mild. If it gets really hot (over 85°F), the coating can break down faster than you’d want. In cold zones, they might take their sweet time to release.
Quick Tip: Get slow-release fertilizer on right after your last frost in spring.
The real perk is convenience—you can forget about weekly feeding and still get strong stems and solid blooms.
Liquid and Water-Soluble Choices: Fast-Acting Nutrition for Quick Results
Liquid fertilizers and water-soluble powders dissolve in water and get to work fast. I reach for these when my mums need immediate help, or during the main growth spurt. Roots and leaves can soak up nutrients within hours.
Water-soluble powders are easy to mix and usually cost less per feed. I use them every week or two when things are really growing.
Liquid fertilizers come ready to use or as concentrates. They’re handy, but you’ll pay a bit more. Both let you tweak the strength as needed.
Quick Tip: Go half-strength for weekly feeds to avoid overwhelming your mums with nutrients.
Downside? You have to feed more often. But if your mums are in pots or your soil isn’t the best, this is the fastest way to perk them up.
Comparing Organic vs Synthetic Fertilizers: What Works Best for Your Mums
Organic fertilizers come from real stuff—compost, bone meal, fish emulsion. Synthetics are lab-made. Both can grow great mums, but they work differently.
With organics, you’re feeding the soil as much as the plant. Over time, your soil gets healthier and more alive. Jobe’s Organics and similar products release nutrients slowly as soil microbes do their thing. Mums might respond a bit slower, but your garden gets better every year.
Synthetics deliver nutrients right away, in exact amounts. I use these when I want quick, predictable results or need to fix a deficiency fast.
Quick Tip: If you’re new to feeding mums, organic all-purpose foods are forgiving and lower risk for overdoing it.
| Feature | Organic | Synthetic |
|---|---|---|
| Nutrient release | Slow, depends on soil microbes | Fast, immediately available |
| Soil improvement | Builds soil health over time | No soil structure benefits |
| Cost | Usually more expensive | Generally less expensive |
| Burn risk | Low | Higher if overapplied |
Organic fertilizers need warm soil to really get going, since microbes slow down in the cold. So, if you’re gardening in a chilly spring or far north, synthetics might be more reliable at first.
Top-Rated Products for Mums: Brand and Formula Highlights

Some chrysanthemum fertilizers really stand out—whether you want a specialized liquid feed or a reliable granular product that covers every stage. The right formula can make a noticeable difference in your display.
TPS Nutrients Mum Fertilizer: A Complete Liquid Mum Plant Food Designed for Professional Results
TPS Nutrients packs everything mums crave into one liquid formula. I grab this bottle whenever my chrysanthemums look like they need a pick-me-up.
The NPK ratio fits flowering plants perfectly. Iron and magnesium keep leaves green instead of sickly yellow.
I stick to feeding every two weeks once the season kicks off. If you’re tempted to use more, don’t—liquid fertilizer can burn if you get carried away.
Quick Tip: Mix exactly as the label says. Seriously, don’t eyeball it.
The liquid soaks right into the roots, and sometimes I’ll use it as a foliar spray for a fast fix. Just never spray in the hot sun—crispy leaves are not the goal.
This fertilizer shines in both pots and garden beds. Regular feeding means sturdier stems and way more buds, at least in my experience.
Jack’s Classic 22-5-16 Mum Feed: A Water-Soluble Powder Built for Heavy Bloomers
Jack’s Classic 22-5-16 dissolves fast and feeds even faster. The high nitrogen (22%) pushes lush growth, while potassium (16%) brings out strong blooms.
I usually mix a tablespoon per gallon of water. The chelated micronutrients actually stick around, even if your soil runs alkaline.
Quick Tip: Keep the powder dry, and always stir until it’s fully dissolved—chunks won’t help anyone.
This ratio works best when mums are still bulking up. Once I spot buds, I switch to something heavier on the bloom side.
It’s a staple for commercial growers, and honestly, it never clumps up like some bargain brands. Saves me money since a little goes a long way.
Miracle-Gro Bloom Booster and All Purpose Plant Food: Accessible Options for Casual Gardeners
Miracle-Gro’s All Purpose Plant Food (24-8-16) gets my mums off to a good start in spring. Once buds start forming, I swap in their Bloom Booster (15-30-15).
The Bloom Booster’s extra phosphorus really does make a difference—bigger, brighter flowers every time. Both options dissolve in water and feed through the roots quickly.
Quick Tip: Feed every week or two, but if your mums look tired or wilted, hold off.
These are everywhere—garden centers, hardware stores, you name it. They’re cheap and dead simple to use, which is great if you don’t want to fuss with complicated mixing.
The included scoop keeps things easy. Just be aware, these are synthetic fertilizers. I water regularly to avoid salt crust building up on the soil.
FoxFarm Big Bloom and Other Specialized Options: Organic Alternatives for Natural Growing
FoxFarm Big Bloom is my go-to organic liquid, made from bat guano and earthworm castings. The NPK is low, but it’s loaded with microbes that boost soil health.
I use Big Bloom all season because it’s gentle and won’t burn roots. The smell is earthy, not awful, and the organic matter really wakes up the soil life.
Quick Tip: Shake the bottle every time—stuff settles at the bottom and you want it all in your mix.
Pairing it with Tiger Bloom during flowering helps. On its own, Big Bloom won’t satisfy heavy feeders, but it’s a solid base for healthy roots.
My mums seem tougher against bugs and diseases with organic fertilizers, though I admit organics cost more and take longer to show results.
Fertilizing Tips for Containers and Outdoor Beds

Container mums need feeding more often than those in the ground. Every watering flushes nutrients out the bottom, so you have to stay on top of it.
Outdoor mums in beds like slow-release nutrients from compost and soil amendments. These break down gradually, keeping plants fed over months instead of days.
Feeding Potted Chrysanthemums: Why Container Plants Are Always Hungry
Potted mums are always hungry. Watering washes nutrients away, so you end up fertilizing more than with in-ground plants.
I go with a water-soluble fertilizer every two weeks. Half strength is plenty—full strength risks burning those confined roots.
Wait about two weeks after planting before you start feeding. That gives roots a chance to settle in.
I stop fertilizing six weeks before the first frost so the plant can wind down before winter.
Quick Tip: If the leaves look pale or yellow between the veins, they’re telling you they want more food.
Watch for a salty crust on the soil. If you spot it, flush with plain water to clear out the excess.
Nutrient Leaching and Watering Practices: The Balancing Act Nobody Talks About
Potted mums need steady moisture, but every watering strips away nutrients. I poke my finger an inch into the soil—if it’s dry, I water until it runs out the bottom.
Heavy rain can do the same thing in outdoor beds. After a downpour, I’ll give an extra feeding to make up for what washed away.
Clay pots dry out faster than plastic, so I fertilize those mums more often. Sometimes weekly for terra cotta, every two weeks for plastic.
Smaller pots dry out and lose nutrients faster, so they need more attention. It’s a bit of a juggling act.
Quick Tip: Morning watering lets extra moisture evaporate, which is better for roots and keeps nutrients where they belong.
Amending Soil for Outdoor Mums: Setting Up Garden Beds for Success
I always dig compost into the top 6-8 inches of soil before planting mums outside. It helps drainage and slowly releases nutrients.
I toss in a tablespoon of balanced granular fertilizer per plant, mixing it so roots don’t touch pure fertilizer. That first boost gets them going.
Once a month feeding is enough for garden mums. The soil holds onto nutrients better than pots do, and compost keeps breaking down to feed them naturally.
Each spring, I spread a thin layer of compost around the plants. It works as mulch and slow-release fertilizer in one go.
Quick Tip: If you’ve already loaded up the soil with compost, skip the extra fertilizer. Too much makes mums tall and floppy with fewer blooms.
Check your soil pH every few years. Mums like it slightly acidic to neutral—about 6.0 to 7.0. Adjust with lime or sulfur if you need to.
Troubleshooting Common Feeding Mistakes
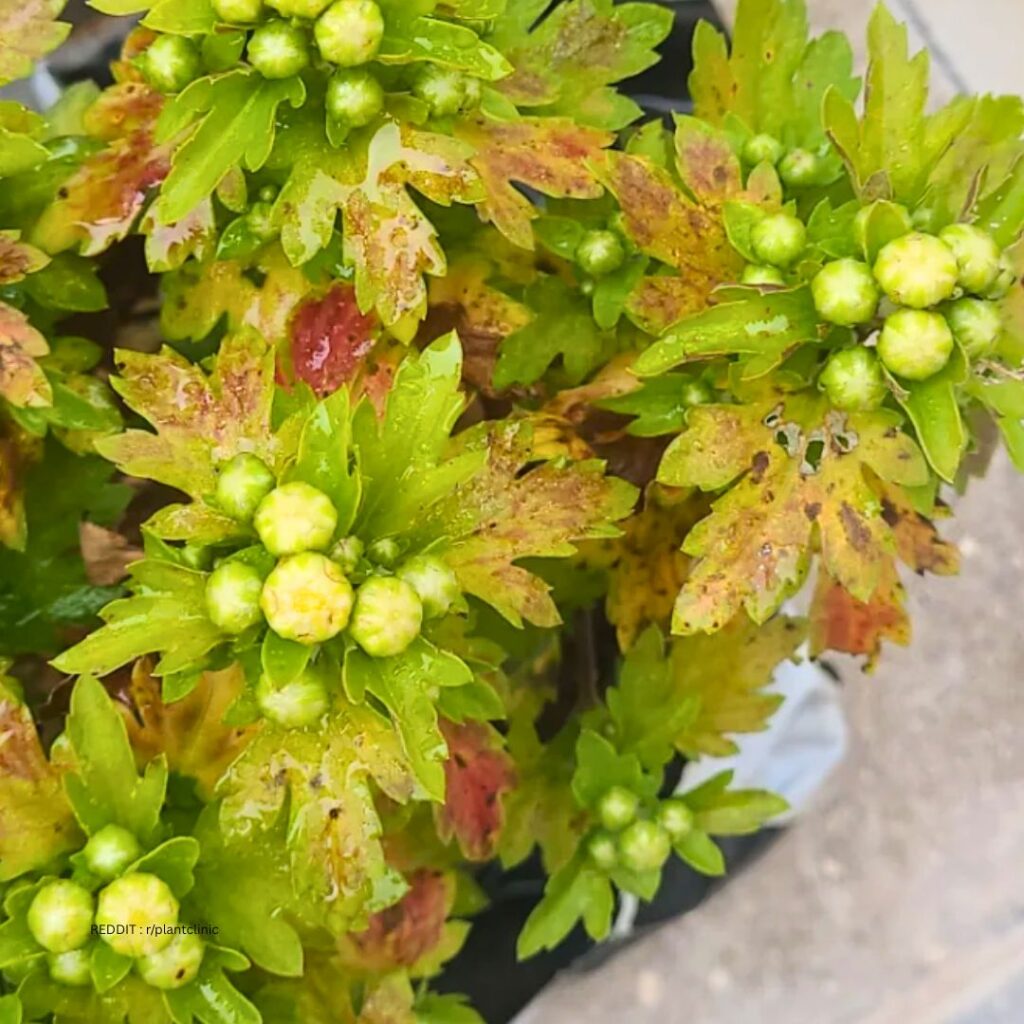
Mums let you know when their feeding routine is off. Burned leaf tips, yellowing, or stunted growth usually mean something’s not right.
Signs of Over-Fertilization (When You’ve Been Too Generous)
Brown, crispy leaf tips are my first clue I’ve overfed. The edges look burnt, almost like someone took a lighter to them.
Salt crust on the soil is a dead giveaway—white and crusty, usually after too much fertilizer.
Sometimes the plant wilts even though the soil is damp. Damaged roots can’t take up water, so the plant droops anyway.
Stunted growth and root burn follow heavy feedings. I’ve learned to resist the urge to “help” with more fertilizer.
Quick Tip: To fix it, flush the soil with water—three times the pot’s volume usually does the trick.
After that, stop feeding for a few weeks. Once the plant bounces back, start again at half strength.
Recognizing Nutrient Deficiencies (What Missing Nutrients Look Like)
Lower leaves turning yellow but staying green along the veins? That’s usually nitrogen deficiency, especially late in the season when growth is fast.
Purple or red tints on stems and leaf undersides mean phosphorus is low. I make sure my fertilizer covers that to avoid weird colors.
Yellow leaves with brown spots along the edges point to potassium problems. The spots creep in from the margins.
Quick Tip: Balanced fertilizers (like 10-10-10) prevent most of these issues for mums.
Small, twisted new leaves usually mean a lack of micronutrients. Iron deficiency shows as yellow new leaves with green veins, while old leaves look fine.
Potted mums run out of nutrients faster, so I check them more often than garden mums.
Adjusting Fertilizer Approach by Plant Stage (Feeding Throughout the Season)
Young mums don’t need much—half-strength balanced fertilizer every couple of weeks does it for cuttings or small plants.
When they start growing fast in spring and early summer, I bump up to full strength every 10-14 days. This helps them bulk up before bloom season.
I cut back feeding by late August when buds form. Too much nitrogen then means more leaves and fewer flowers.
Quick Tip: When you see buds, switch to a low-nitrogen formula like 5-10-10.
Once the flowers open, I stop fertilizing. More food at this stage just shortens bloom time, which nobody wants.
If you’re in a cold climate, stop feeding by early September. This gives mums time to toughen up for winter.
Frequently Asked Questions
Mums need the right nutrients at the right moments. What you use—bloom boosters, balanced blends, or organic feeds—depends on your setup and what you want from your plants.
What type of fertilizer helps mums produce more blooms?
High-phosphorus fertilizers always give me the best flower show. Look for something like 5-10-5 or 10-20-10, where the middle number is the highest.
Phosphorus is the bloom trigger. Without it, you’ll just get a bushy green plant with no payoff.
I start using a bloom formula about six weeks before I want flowers. For fall mums, that’s usually mid to late summer.
Quick Tip: I swap from balanced to bloom fertilizer in July for the most reliable fall color.
How often should I fertilize chrysanthemums growing in pots?
I feed my potted mums every 7 to 10 days during the growing season. Pots lose nutrients fast—there’s no way around it.
Half-strength water-soluble fertilizer works best for these regular feedings. Full strength, too often, is a recipe for root burn.
I stop about a month before the first frost. That gives the plant time to wind down before winter hits.
Quick Tip: I set reminders for weekly feedings so I don’t miss a beat or accidentally double up.
Is a balanced 20-20-20 fertilizer a good choice for mums?
A 20-20-20 formula works well early on, when mums are just waking up and pushing out roots and new leaves. I stick with it from spring until early summer—seems to give them a nice head start.
That even mix of nitrogen, phosphorus, and potassium keeps the plants sturdy and leafy. You’ll notice thicker stems and a fuller look if you stay consistent.
Once buds show up, I swap to a bloom formula. Mums crave more phosphorus at that stage, and the balanced stuff just doesn’t cut it for loads of flowers.
Quick Tip: Reach for 20-20-20 in spring and early summer, but be ready to change things up as soon as you spot flower buds.
Is Miracle-Gro safe to use on chrysanthemums, and how should it be applied?
Miracle-Gro works fine for mums as long as you follow the label. I usually grab the water-soluble kind and mix about a tablespoon per gallon of water—easy enough.
Feed every week or two while the plants are growing fast. If the soil’s bone dry, give it a bit of water first so you don’t scorch the roots.
I pour the mix around the base until I see water draining out. Try not to splash the leaves or blooms; it can leave weird spots that just don’t look great.
Quick Tip: I like using a watering can for small patches—way more control than a hose sprayer, honestly.
Can I make a homemade fertilizer for mums that actually works well?
Compost tea has treated my mums pretty well. I fill a 5-gallon bucket halfway with finished compost, top it with water, and let it sit for three to five days, giving it a stir every day.
After straining out the chunky bits, I dilute the liquid until it looks like weak tea. I pour it around the mums every couple of weeks during the growing season.
Banana peels chopped up and tucked into the soil boost potassium, which helps with stronger stems and more blooms. Coffee grounds can add nitrogen, but go easy—too much can turn your soil sour.
Quick Tip: Keep a compost bin going with kitchen scraps all year so you always have some homemade fertilizer on hand when spring rolls around.
Does the best feeding schedule for chrysanthemums change in warmer states like Georgia or California?
Honestly, the growing season just keeps stretching on in places like Georgia or California. I usually end up fertilizing mums for a few extra weeks out there. Feeding from March through October makes sense—stopping in September always felt a bit early when the weather stays warm.
Instead of sticking to a strict calendar, I pay attention to each variety’s bloom time. Mums can surprise you in warm zones; they’ll sometimes flower ahead of schedule since they care more about day length than temperature.
When those hot summer days hit, especially in inland California, I ease up on nitrogen-heavy fertilizers. Piling on the nitrogen during a heatwave can actually stress the plants and cut back on blooms.
Quick Tip: If you’re in zone 9 or warmer, and your mums are still growing in November, don’t be afraid to give them a light feeding. Sometimes they just keep going and need a little extra boost.