
Haworthias are low-maintenance and slow-growing succulents. Since they are slow-growers, they don’t need frequent repotting. You can wait for at least 2-3 years to repot them.
To repot your haworthia, you have to take the plant out of the present planter, take a slightly bigger pot, prepare a fresh soil mix, add it to the new container and plant the Haworthia in it. In general, haworthia needs to be replanted every 2-3 years to replenish the depleted nutrients.
Repotting replenishes the plant’s growing environment and gives them more space to grow and breathe. It also gives you the chance to propagate by separating offsets.
Repotting the correct way can be easy and tricky at the same time. If you are looking for the right ways to repot Haworthias, this is the right place.
Here, you will get all the information regarding repotting, its importance, the right time to do it, and the correct procedures.
Why is repotting Haworthia necessary?
There are many reasons for repotting Haworthias as it improves the plant’s health.
Fresh soil and nutrients: The soil becomes old, and its nutrients deplete over time.
The soil loses its quality and strength and becomes compact.
But fresh soil will be well-aerated, hold moisture evenly, and have the required nutrients.
More space: Repotting the Haworthia in a new container gives the plant more space to grow and breathe.
Though they are slow-growers, eventually, they will require space to grow their roots comfortably without suffocation.
They will need room to grow offsets.
The more room they get, the more pups they can produce.
Improves water flow: The soil will become compact as time goes by.
Due to this, the water you give them doesn’t absorb well.
Either the water will stay clogged or will immediately flow out.
Repotting with new soil will improve the flow and retain moisture as required.
It gives a chance to propagate: When you take the whole plant out for repotting, you get a chance to propagate.
Haworthias grow pups at their root portion and sometimes out of the soil.
You can separate them after taking the plant out of the container.
Situations where Haworthia needs repotting
When it comes to repotting Haworthia, they will show some signs to make you understand that they need repotting.
Succulent outgrowing from its pot
Over the years, the plant will grow along with the roots.
Due to lack of space, the roots will grow out of the drainage hole and from the soil surface.
As a result, no soil will remain.
Without any soil and roots in such conditions, the plant will face growth problems.
Repot when you find the roots coming out of the drainage holes.
Also read: Do Haworthia Like To Be Root Bound? (+When & How To Repot)
A problem in water absorption or flow
The roots grow in a circular motion, grow out of the pots through drainage holes and from the soil surface, and no soil will be left.
This is called root-bound.
The water you provide the plants will roam around the roots and immediately flow out of the drainage holes.
Without soil, the water can’t reach the plant, and it will suffer underwatering.
When the roots grow out of the potholes, they block the drainage.
Due to this, the water stays in the soil. The roots remain wet for prolonged periods and suffer root rot.
Also read: How Often To Water Haworthia? (Haworthia Water Requirements)
The plant starts to lean over.
Over time, the plant will grow bigger and lean over.
It doesn’t mean you need to repot them to a big pot.
But, you must transfer them to a heavy pot that can hold the succulent.
The problem is with the weight of the plant.
Instead of using plastic pots, try terra cotta or ceramic pots.
The terracotta containers help in holding the succulent as they are heavy.
It will also save from overwatering due to its porous quality.
Offsets
Haworthias will produce offsets once they become mature.
When you find that the pups are peeping out of the container, repot them to a big pot.
It is the perfect time to separate the babies and transplant them to a new location.
This will give them space to grow and produce more pups comfortably without struggle.
Emergency repotting
This is done when the plant suffers root rot.
The leaves will turn yellow or brown and mushy, and the soil will be cold and damp.
The soil and the plant base will also release a foul odor.
You must check the condition of the roots when you find such signs.
You will see that the roots have turned deep brown and feel mushy due to their lengthy stay in the water.
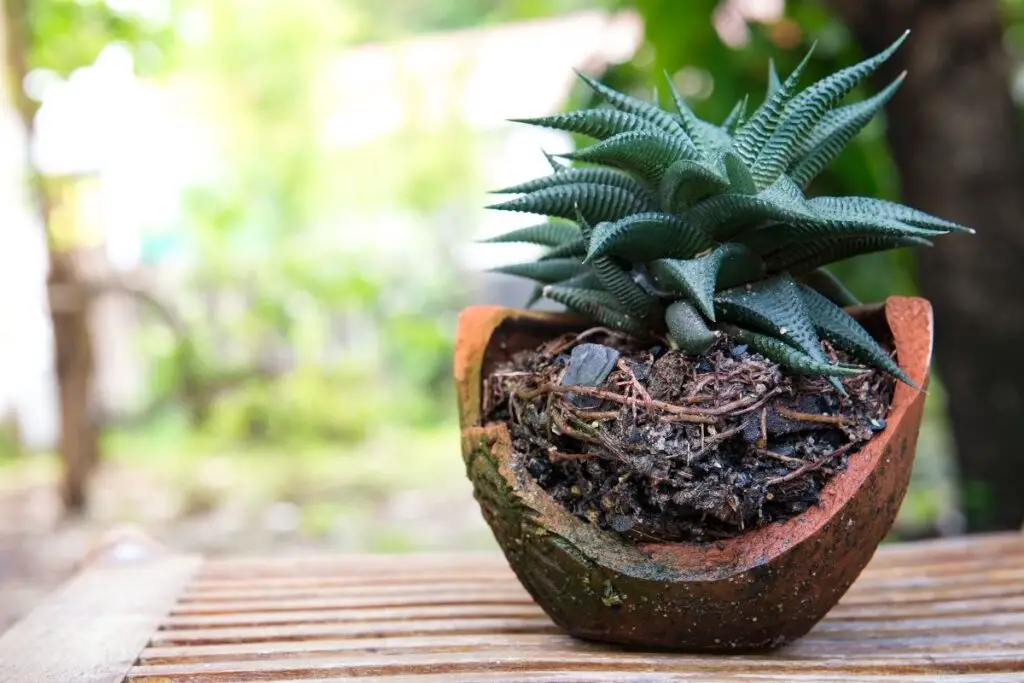
You must take the plant out, remove all the damaged parts (leaves and roots), and repot them with new soil.
If you want to use the old pot, you must clean it with baking soda, scrub it well, wash and dry it out and then use it.
This repotting is urgent, and you must not wait for any right time.
Immediately taking steps is the right way and time to treat this nightmare.
Newly bought plants
They stay in a small plastic pot with generic soil when you buy the plants.
The soil might not suit the plant, or the pot can create problems as Haworthias like to stay slightly dry.
This can affect the plant’s health and stop them from growing well.
Repotting the plant to a terra cotta pot and using well-drained soil will save the plant from any issues.
Commercial cactus potting mix is best and easily available.
It will improve drainage and keep the plant healthy.
Do these 1-2 weeks after bringing the new plant home.
What is the best time to repot Haworthia?
The best time to repot Haworthia is during the months of spring when they are actively growing.
You can also do it in the fall as it is their growing season.
I prefer spring the most.
Repotting during the growing season helps the plant recover quickly and even handle transplant shock.
Repotting during the summer or winter can be quite stressful.
The plant grows very slowly at these times.
Repotting can give them transplant shock, and they will struggle a lot to recover from the shock and come back.
Repotting frequency for Haworthia
Since Haworthias are slow-growing succulents, they take a lot of time to grow their roots and mature.
That is why they don’t need frequent repotting. You can repot them every 2-3 years.
What is the right container and soil for Haworthia?
The right container is the one that is:
Only 1-2 inches bigger than the current pot.
Don’t go for a too big pot that needs lots of soil that takes forever to dry, causing overwatering.
It must have drainage holes for the easy passing out of the excess water.
The soil must be well-drained.
One easily available soil mix for using the right soil is commercial cactus potting soil.
Other recommendations are:
Recipe 1
Recipe 2
Equal parts of:
- 60% Coarse sand
- 40% Potting soil.
Recipe 3
- 50% gravel of appropriate size
- 50% of soil, coarse sand, and organic fertilizer
Recipe 4
- 80% pumice
- 20% coir, 1-3 mm approx.
Recipe 5
- 40% parts potting soil
- 40% parts small gravel
- 20% part perlite or pumice
Also read: What Soil To Use For Haworthia? (+Ideal Soil Mix)
How should I repot Haworthias?
If you are a beginner, then repotting Haworthia might be challenging.
But, once you attempt it and do it multiple times, you will find it very easy.
You will give a detailed guide so that you don’t make any mistakes.
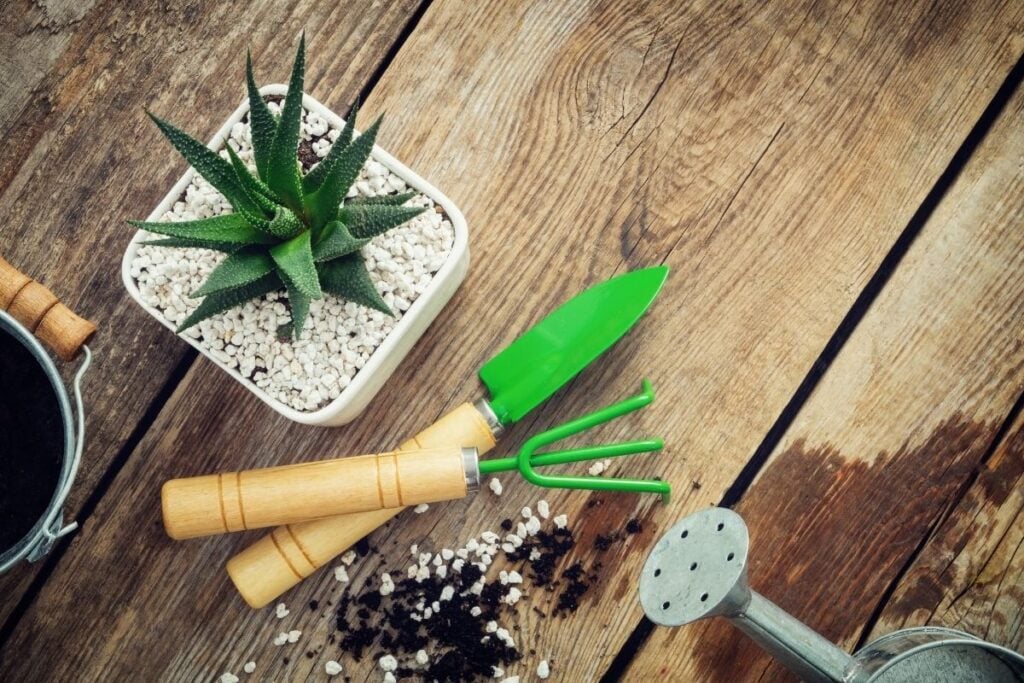
Materials required:
- A container 1-2 inches bigger than the recent pot
- Water
- Ideal soil mix
- Gardening tools like spades or forks to loosen the soil
- Cardboard or paper over which you will do the whole process. You won’t need it if you are doing it outdoors.
- Your Haworthia plant.
- Rubbing alcohol to disinfect the tools.
- Knife, in case you want to propagate.
Preparation for repotting
You need some preparations before you start repotting the Haworthias:
Moisture is important during repotting.
It will help to take the plant out easily.
Moreover, it will keep the plant hydrated.
So, water the plant well 1-2 days before repotting.
Get a new pot for your plant.
Any container would work, but my best suggestion would be clay or terracotta pots.
The above two points are not necessary if the plant suffers root rot.
When they suffer rotting, the soil already stays damp.
So, the plant will easily come off.
If your plant has not outgrown yet, you can use the same pot by cleaning it properly.
Clean the pot very well to free it from fungus, viruses, or bacteria.
- Mix 3 tablespoons of baking soda per liter of water.
- Soak the container in it for some minutes.
- Take it out and wash it with soap and clean water.
Make sure the pot has drainage holes. If not, drill one yourself.
Prepare the soil mix beforehand.
Make sure the soil mix is porous and well-drained.
Drainage is an essential factor for all succulents.
Collect your gardening tools together early so that everything is near you while repotting.
Collect knife, forks, spades, and rubbing alcohol and arrange it in one place.
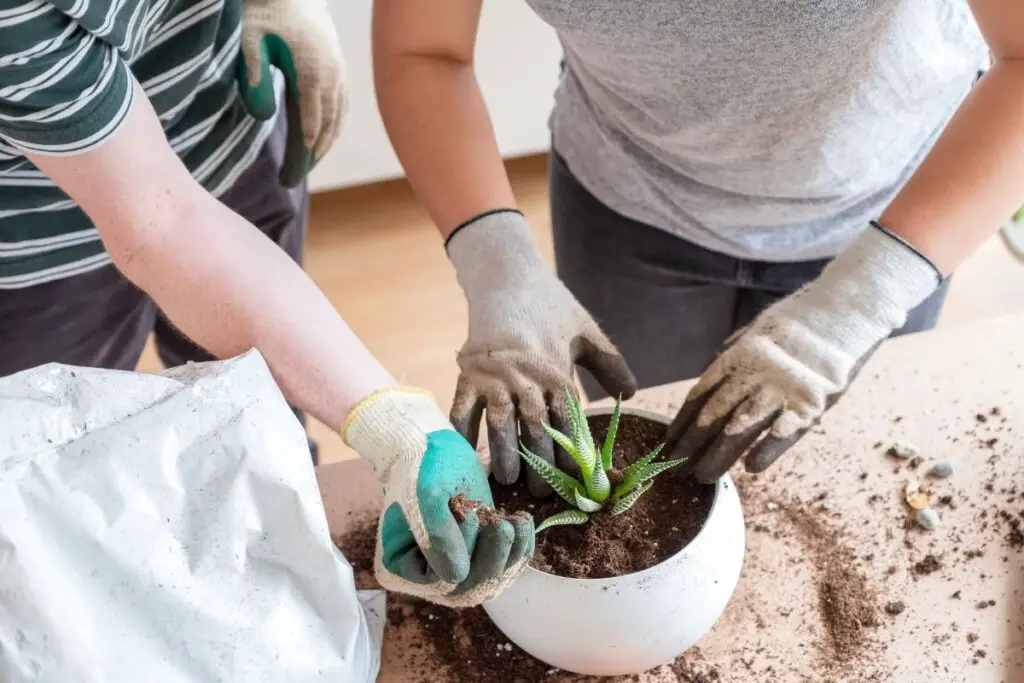
Step-by-step guide for repotting
Go through this guide to understand all the steps of repotting Haworthia.
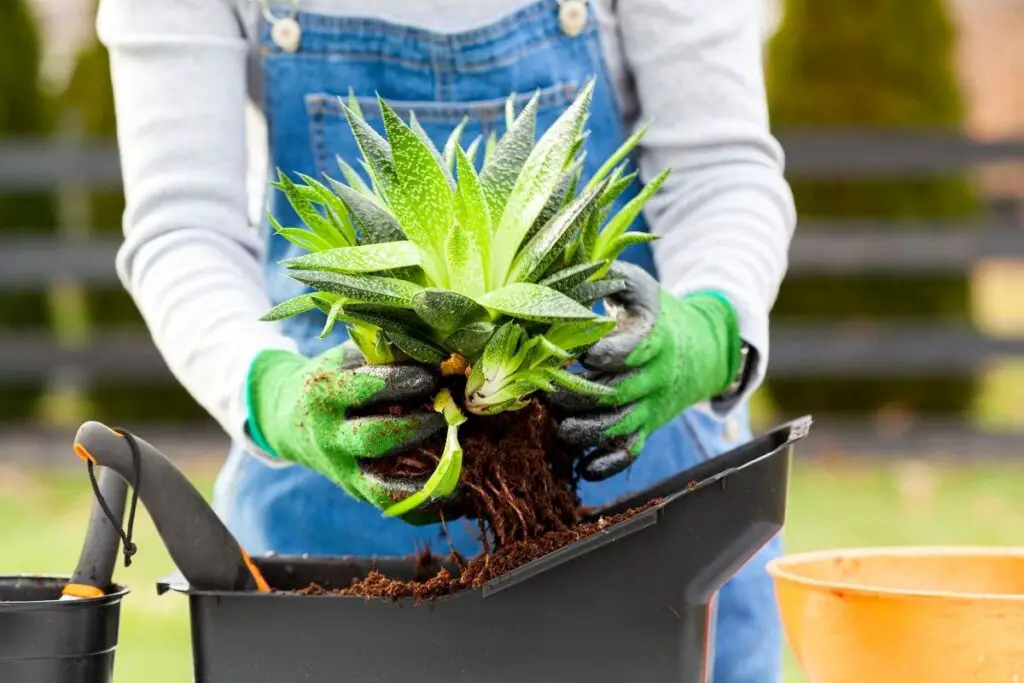
Step 1: The first step is to remove the plant.
Now, this requires a lot of patience.
The success behind gardening is patience.
You need to carefully, gently, and patiently remove the plant from the pot without hurting it.
Since it’s been quite a few years, the plant might be stubborn to come out.
That is why we have already watered it 2 days before so that removal gets easier.
Tap and squeeze the sides of the container to loosen the soil.
If it doesn’t work, use the gardening tools like small spades or trowels to loosen the soil from the edges.
Disinfect the tools before usage.
You might have to break your container if all these techniques fail. It can, however, keep the roots safe.
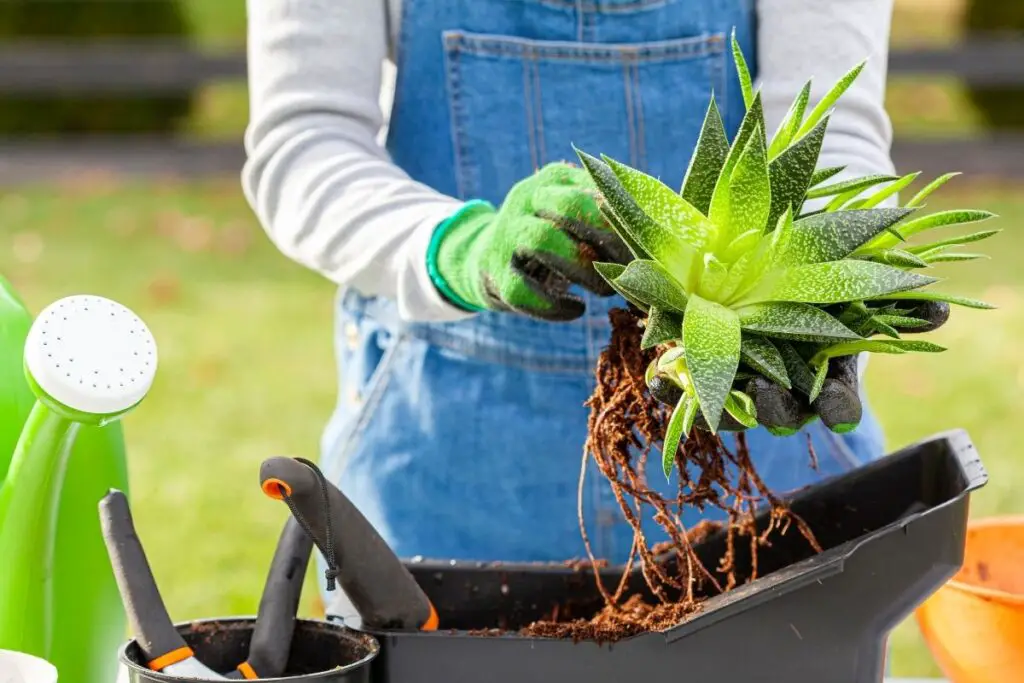
Once the soil is ready to come out of the pot, pull the plant out slowly.
Make sure not to pull with great force.
Step 2: After taking the plant out, clean the roots.
Remove the soil from the roots as much as you can.
You a brush if need be. It will ease out the work.
It will take some time and patience.
If you are not patient enough, you can wash the roots to remove the soil.
This might be quick but let the roots dry out after rinsing.
Keep them in a cool, shady place for 3 to 5 days.
After that, trim off some roots if they are dead, damaged, or too long and thin.
If the plant has suffered root rot, remove all the damaged parts, i.e., the leaves and the roots.
Don’t worry if all the roots need removal.
Haworthias will grow back their roots again.
Step 3: If there are any offsets, detach them from the main plant using the knife.
You can also separate them with a light pull.
But with a knife, the separation would be clear and safe.
If the plant has severe root rot, most leaves will get damaged.
If some leaves are healthy, cut off those healthy leaves and use them for leaf propagation.
If done correctly, there are high chances of success, and you will again get new Haworthias.
One leaf can produce 3 to 5 offspring.
Go through the propagation article to gather more information about it.
Step 4: Now, it’s time for planting.
Take the container of your choice.
Fill 2/3rd of the new pot with your chosen soil mix.
After that, carefully place the plant at the center. Spread the roots properly.
Cover the roots with the remaining soil and gently pat the sides to block air pockets.
The leaves should be above the soil and not under it.
It prevents rotting.
Make sure of it as many people, especially the beginners, make this mistake.
These are stemless plants, and all they have are leaves.
Step 5: Water the Haworthias very little to keep the soil moist.
Water them until it drains out of the drainage holes.
Water them sparingly for some weeks.
Once the plant gets familiar with its new environment, you can start normal watering.
However, you must check the soil moisture to better understand the plant’s watering needs.
Step 6: Now, place the Haworthias at their ideal location.
Remember that since they are recently repotted, they will get a shock due to sudden change in their growing environment.
Haworthias will take some weeks to adjust themselves.
Within these weeks, don’t stress them further.
Put them under bright indirect sunlight, water only when the soil feels dry, make sure they don’t get any temperature fluctuation or high humidity.
For outdoor plants, put them at their previous location if they were doing well there.
Final thoughts
Repotting Haworthias is very easy if you do it 2-3 times. If done correctly, your plant stays healthy for a long time. The plant gets lots of advantages during repotting – new fresh soil, more space, good water flow, and you even get the chance of propagation.
In general, Haworthia wants re-potting every 2-3 years. But this frequency is not possible to maintain if the plant suffers from root rot. That’s an emergency repotting and must be done as soon as possible.
The plant will recover from all sorts of issues, be it the transplant shock or rotting, within a few weeks if you don’t stress them further.
Haworthia repotting – FAQs
What happens if I don’t repot?
If you don’t re-pot, the plant will become root-bound and face various problems like compact soil, underwatering and overwatering, stunted growth, lack of nutrients, etc.
As a result, the plant will die if ignored.
If you don’t do the emergency repotting, the plant will develop fungus and die quickly.
So, eventually, repotting is a must.
Can I fertilize after repotting?
While repotting with new soil, the plant just got fresh nutrients from the soil.
You don’t have to fertilize them immediately.
Moreover, they are not heavy feeders.
So, it is better to wait for at least 5-6 weeks to fertilize them.
Reference: The Haworthia Society, Botanical Studies, University of Wisconsin-Madison, Sciencedirect, Researchgate, Haworthia Study.